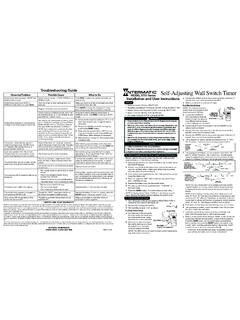
Transcription of Intermatic DT620 Instructions - 1000Bulbs.com
1 Day Of Week (DOW) Display events can be programmed for just one day of the week, all the days of the week, just weekdays or just weekendsEvent Display the timer can be programmed for up to 28 total ON/OFF events per weekMode Display the timer can display several modes during setup and programming and three modes during operation: MANual, AUTO and RANDom. MANual allows for manual operation of the plugged-in devices, AUTO uses the timer s exact settings and RANDom uses the timer s settings varied by random 5-minute increments of 30 Status Indicator this is the ON/OFF indicator.
2 When the green light is on it means that the lamp or appliance should be on. If it is not on, the bulb may be burned out or the device may be turned off at the lamp or : You may set up and program the timer before you plug it in. Be aware that while it is unplugged, the display will turn off to conserve battery power if there is no pushbutton activity for a few minutes. If this happens, simply push any button to turn the display back MAN AUTO RAND CLOCKYEARDATEMONTHSKIPEVENTMO TU WE TH FR SA SUAM PMOFF LOC DUSK DAWNOKMODEPROGON/OFFB attery Holder (back of unit) two LR44 batteries keep time up to three months without powerLow Battery Indicator programmed data is stored in non-volatile memory, so it won t be lost when batteries are removedNOTE.
3 Replace the batteries as soon as possible after the low battery indicator Of Day (TOD) Display the timer will automatically adjust for Daylight Saving Time (DST) and changing dawn and dusk times for your location (Astronomic feature)PushbuttonsTwo Timed, Grounded OutletsSelector KnobReset Get Familiar with the Timer s FeaturesThe timer comes with two LR44 batteries installed. Remove the pull tab to connect the installed display will initialize itself, then flash 12:00 AM in the CLOCK mode (Fig. 1).NOTE: If display doesn t light , the batteries are dead.
4 Replace the batteries before using the digital MAN AUTO RANDCLOCKYEARDATEMONTHSKIPEVENTMOTU WE TH FR SA SUAMPMOFF LOC DUSK DAWNONDAYSAV MAN AUTO RANDCLOCKYEARDATEMONTHSKIPEVENTMOTU WE TH FR SA SUAMPMOFF LOC DUSK DAWNIt s unlikely that your new digital timer has any existing programming, but to make sure, use this procedure before setting the the Reset button. It is the small, round hole adjacent to the keypad. You will need a pen or paper clip to press this and hold the ON/OFF the Reset button for 3 seconds and release.
5 The display will light up and then go the ON/OFF : Pressing the Reset button without holding down the ON/OFF button will clear the time, but will not clear the non-volatile (programming) Clear Any Existing ProgrammingNOTE: The following procedure must be completed entirely, including adjustments, in order for the Astronomic and automatic Daylight Saving Time features to function TimeEnsure that the timer is in the CLOCK mode (Fig. 1). If it is not, press the MODE button a few times (through MANual, AUTO and RANDom) until CLOCK shows in the mode display area, then press the selector knob until the correct hour shows in the first two digits of the Time Of Day (TOD) display, along with the correct AM and PM display.
6 Note that the AM and PM displays will alternate as the time passes through the OK button to set the hour. The last two digits of the TOD display (minute display) will begin to the selector knob until the correct time in minutes the OK button to set the minutes. MONTH, DATE and YEAR will show in the mode display area, with the digits under YEAR flashing (Fig. 3).Setting DateTurn the selector knob until the current year is displayed and press the OK button. The digits under MONTH will begin to the selector knob until the current month is displayed and press the OK button.
7 The digits under DATE will begin to 3 ONDAYSAV MAN AUTO RAND CLOCKYEARDATEMONTHSKIPEVENTMOTU WE TH FR SA SUAM PMOFF LOC DUSK DAWNOKMODEPROGON/OFFFig. 3 ONDAYSAV MAN AUTO RAND CLOCKYEARDATEMONTHSKIPEVENTMOTU WE TH FR SA SUAM PMOFF LOC DUSK DAWNOKMODEPROGON/OFF4 Set the Time, Date and LocationFig. 1 Fig. 2 Digital TimerInput: 102-132 VAC 60 Hz, : 15 Amp output, 1800W resistive and inductive, 500W tungsten, 1/3 HP Installation and User InstructionsMODEL DT620CL SeriesRatings Activate the BatteriesElectrical shock hazard.
8 Risk of injury or death. Always plug three-prong plug into a properly grounded outlet. Never attempt to defeat this safety of fire. Do not use timer to control devices that could have dangerous consequences due to inaccurate timing, such as sun lamps, sauna, heaters, crock pots, etc. WARNINGF ollow local electrical codes during of used batteries promptly per local regulations. NOTICE 23565789 04 2 Turn the selector knob until the current date is displayed and press the OK button. The timer will automatically determine and display the day of the week.
9 NOTE: 00 indicates Daylight Saving TimeDAYSAV and AUTO will show in the mode display area (Fig. 4). The timer will automatically adjust the clock for Daylight Saving Time (DST) when set to AUTO here. If you do not want the timer to do this, turn the selector knob until MANual choosing AUTO or MANual, press the OK button. The timer s starting date for DST will show in the display in the form of MONTH and week (Fig. 5).The start and end dates for DST can change. The next four steps allow you to change them for your location. If the timer s settings for DST are already correct, press the OK button right away, otherwise.
10 First, turn the selector knob to choose the correct month (01 through 12) for your DST starting date and press the OK the selector knob again to change the week (01 = first, 02 = second, 03 = third, 04 = fourth, 0L = Last) for your DST starting date and press the OK , turn the selector knob to choose the correct month for your DST ending date and press the OK the selector knob again to change the week for your DST ending date and press the OK LocationThe timer will now display LOC, the default state and country (Alabama, United States) (Fig. 6).