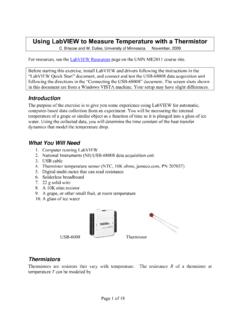
Transcription of LabVIEW LINX and Arduino - halvorsen.blog
1 Hans-Petter LINX and ArduinoLabVIEW + LabVIEW LINX Toolkit + Arduino This Tutorial shows how we can use Arduino in combination with the LabVIEW Programming environment LabVIEW LINX Toolkit is an add-on for LabVIEW which makes it possible to program the Arduino device using LabVIEW In that way we can create Data Logging Applications, etc. without the need of an expensive DAQ device If you don t have LabVIEW Professional Software, you may use the LabVIEW Community Edition (free for non-commercial use). You then get a very low-cost DAQ/Datalogging System!Contents Introduction to LabVIEW LINX DAQ System Input/Output Channels Digital I/O Digital Out/Write Digital In/Read Analog I/O Analog Out/Write -> PWM (Pulse Width Modulation) Analog In/Read Sensors TMP36 Temperature Sensor thermistor Temperature SensorTable of ContentsLabVIEW + LabVIEW LINX ToolkitSensorsArduino UNOPCUSB cable Type A-BLabVIEW+ LabVIEW LINX ToolkitTMP36 Temperature SensorHardware Arduino Breadboard Wires (Jumper Wires) Resistors ( =270 , =10 ) LED, Push Button TMP36 Temperature Sensor thermistor Arduino is a Microcontroller Arduino is an open-source platform with Input/Output Pins (Digital In/Out, Analog In and PWM)
2 Price about $20 Arduino Starter Kit ~$40-80 Arduino UNOwith Cables, Wires, Resistors, Sensors, I/O ChannelsDigital Inputs and Digital OutputsAnalog InputsYou can choose from the code if they are to be inputs or outputsThose marked with ~ can also be used as "Analog Outputs", so-called PWM outputs LabVIEW is Graphical Software LabVIEW has powerful features for simulation, control and DAQ applicationsLabVIEWB asic LabVIEW Example: The LabVIEW LINX Toolkit adds support for Arduino , Raspberry Pi, and BeagleBoneembedded platforms We will use Arduino Uno in this TutorialLabVIEW LINX ToolkitInstalling LabVIEW LINX ToolkitUse VI Package MangerNote: Do not install this package if you are running LabVIEW 2020 Community Edition or later, as the Community Edition already includes the LabVIEW LINX ToolkitLabVIEW LINXLINX Firmware WizardLabVIEW PaletteHans-Petter SystemTable of ContentsAnalog SignalsDigital SignalsSensorsAnalog IODigital IOApplicationSoftwareHardware DriverUSB, SignalsData Acquisition Hardware(Analog/Digital Interface)PCDAQ SystemWe will use an Arduino Uno as the DAQ HardwareDAQ Data AcquisitionAnalog SignalsDigital SignalsAnalog SensorsAnalog IODigital IOI/O ModuleSensors with Digital Interface ( , SPI, I2C)Analog Input (AI)Analog Output (AO)Digital Input (DI)Digital Output (DO)
3 0 5 TrueFalseI/O ModuleHans-Petter LINX Arduino DAQ SystemTable of ContentsHans-Petter ChannelsTable of ContentsArduino I/O ChannelsDigital Inputs and Digital OutputsAnalog InputsYou can choose from the code if they are to be inputs or outputsThose marked with ~ can also be used as "Analog Outputs", so-called PWM outputs Digital Digital Out Digital In Analog Analog Out Analog InInput/Output ChannelsHans-Petter I/OTable of ContentsLabVIEW Palette Digital I/ODigital I/ODigital Inputs and Digital OutputsYou can choose from the code if they are to be inputs or outputsThose marked with ~ can also be used as "Analog Outputs", so-called PWM outputsHans-Petter Out (DO)Table of Contents We will use the Digital Out pins to turn on/off a LEDD igital Out (DO)Breadboard WiringThe Breadboard is used to connect components and electrical circuitsMake sure not to short-circuit the components that you wire on the breadboardLED Wiring =270 LEDLabVIEW ExampleMultiple Digital Out ChannelsHans-Petter In (DI)Table of ContentsLabVIEW -Digital InWe can test the Digital In (Read) by wiring to 5V (True/High) or GND (False/Low)False/LowTrue/HighLabVIEW -Digital InLabVIEW Digital Write -ReadWe can test the Digital In (Read) by wiring a Digital Out (Read) Channel to the Digital In (Read)
4 Channel LabVIEW Digital Write -ReadPush Button/Switch Pushbuttons or switches connect two points in a circuit when you press them. You can use it to turn on a Light when holding down the button, etc.+-Power SupplyLightSwitch (On/Off)Wiring (Pull-up Resistor) using externalPull-up Resistor =10 Another Digital Channel can of course be usedPull-down/Pull-up ResistorWhy do we need a pull-up or pull-down resistor in the circuit? If you disconnect the digital I/O pin from everything, it will behave in an irregular way. This is because the input is "floating" -that is, it will randomly return either HIGH or LOW. That's why you need a pull-up or pull-down resistor in the Resistor When the pushbutton is open (unpressed) there is a connection between 5V and the DI pin.
5 This means the default state is True(High). When the button is closed (pressed), the state goes to False(Low).+5 VGNDDIS witchResistorPull-up Resistor+5 VGNDDIR esistor+5 VGNDDIR esistorTrue/HighFalse/LowSwitchOpenSwitc hClosedWe Push the ButtonPush Button (Pull-up Resistor)Button is Pushed => False/LowButton is NOT Pushed => True/HighAdding a NOT blockButton is Pushed => True/HighButton is NOT Pushed => False/LowPull-down Resistor+5 VGNDDIS witchOpenResistor+5 VGNDDIR esistorTrue/HighFalse/LowSwitchClosedWe Push the ButtonWe could also have wired according to a Pull-down Resistor Wiring (Pull-down Resistor) using externalPull-down Resistor =10 Another Digital Channel can of course be usedPush Button (Pull-down Resistor)
6 Button is Pushed => True/HighButton is NOT Pushed => False/LowHans-Petter I/OTable of ContentsAnalog I/OThose marked with ~ can also be used as "Analog Outputs", so-called PWM outputsLabVIEW Palette Analog I/OHans-Petter Out (AO)Table of Contents Arduino UNO has no real Analog Out We need to use Pulse Width Modulation (PWM)Analog OutNot Working!PWM as Analog Out The Arduino UNO has no real Analog Out pins, but we can use a PWM can be used to control brightness of a LED, control the speed of a Fan, control a DC Motor, is a digital ( , square wave) signal that oscillates according to a given frequencyand duty frequency (expressed in Hz) describes how often the output pulse period is the time each cycle takes and is the inverse of duty cycle (expressed as a percentage) describes the width of the pulse within that frequency can adjust the duty cycle to increase or decrease the average "on" time of the signal.
7 The following diagram shows pulse trains at 0%, 25%, and 100% duty:PWMThe Digital Pins marked with ~ can be used as "Analog Outputs", so-called PWM outputsControl Brightness of a LED We've seen how to turn an LED on and off, but how do we control its brightness levels? An LED's brightness is determined by controlling the amount of current flowing through it, but that requires a lot more hardware components. A simple trick we can do is to flash the LED faster than the eye can see! By controlling the amount of time the LED is on versus off, we can change its perceived brightness. This is known asPulse Width Modulation(PWM).Control Brightness of a we see how we can use PWM to control the brightness of a LED Wiring =270 LEDPWM ExampleWe will see the brightness of the LED will increase.
8 Or you can use a Multimeter and see the (average) voltage will increasePWM ExamplePWM Example1V0-100% 0-5V20% 1 VHans-Petter In (AI)Table of ContentsAnalog InputAnalog InAnalog InHans-Petter LINX Arduino Temperature SensorsTable of ContentsHans-Petter of ContentsWe will use 2 different types of Temperature Sensors: TMP36 Temperature Sensor thermistor Temperature SensorSensorsSensorsSome Examples of premade Sensor VIsYou can use these, or you can also easily make your own VIs for interfacing Sensors from scratchHans-Petter Temperature SensorTable of Contents Arduino Breadboard TMP36 Temperature Sensor Wires (Jumper Wires)HardwareTMP36 Temperature A Temperature sensor like TM36 use a solid-state technique to determine the temperature.
9 They use the fact as temperature increases, the voltage across a diode increases at a known rate. It costs only about $1 TMP36 TMP is a small, low-cost temperature sensor and cost about $1 (you can buy it everywhere )WiringLabVIEWLabVIEW LINX has a built-in SubVIfor TMP3x SensorsLabVIEW LabVIEW LINX has a built-in SubVIfor TMP3x Sensors ( ) Let's see how we can do it from Scratch We use the Datasheet and the ordinary Analog Do it from ScratchDatasheetOutput Voltage vs. Temperature Linear ScalingConvert form Voltage (V) to degrees CelsiusFrom the Datasheet we have:( !, !)=( ,25 )( ", ")=(1 ,50 )There is a linear relationship between Voltage and degrees Celsius: = + We can find a and b using the following known formula: !
10 = " ! " !( !)This gives: 25=50 251 ( )Then we get the following formula: =100 50 LabVIEW Example =100 50 Hans-Petter Temperature SensorTable of ContentsThermistorOur thermistor is a so-called NTC (Negative Temperature Coefficient). In a NTC thermistor , resistance decreases as the temperature is a non-linear relationship between resistance and excitement. To find the temperature we can use the following equation (Steinhart-Hart equation):1 = + ln( )+ ln( )7where , , are constants given below = , = = 08A thermistor is an electronic component that changes resistance to temperature -so-called Resistance Temperature Detectors (RTD). It is often used as a temperature sensor.[Wikipedia] Arduino Breadboard thermistor 10K (Temperature Sensor) Wires (Jumper Wires) Resistor 10 k HardwareWiring =10 ThermistorVoltage Divider[ ]The wiring is called a Voltage divider :GND+5V =10 Analog In (AI)10 ThermistorGeneral Voltage : !