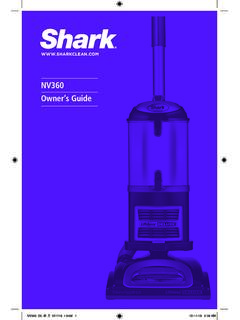
Transcription of Navigator™ Swivel Plus Upright Vacuum
1 Navigator Swivel Plus Upright VacuumNV40 SeriesOWNER S THESE INSTRUCTIONSREAD ALL INSTRUCTIONS BEFORE USEIMPORTANT SAFETY INSTRUCTIONSHOUSEHOLD USE ONLYTo reduce the risk of electric shock, this Vacuum cleaner has a polarized plug (one blade is wider than the other). As a safety feature, this plug will fit into a polarized outlet only one way. If the plug does not fit fully into the outlet, reverse the plug. If it still does not fit, contact a qualified electrician. DO NOT force into outlet or try to modify to fit. WARNING TO REDUCE THE RISK OF FIRE, ELECTRIC SHOCK OR INJURY: GENERAL WARNINGS Your Vacuum cleaner may consist of a motorized nozzle, wand, hose, and/or Vacuum pod. This device contains electrical connections, electrical wiring, and moving parts that potentially present risk to the user. Use only identical replacement parts. Carefully observe and follow the instructions provided below to avoid improper use of the appliance.
2 DO NOT use the Vacuum for any purpose other than those described in this manual. Before use, carefully inspect all parts for any damage. DO NOT use if any parts are damaged. The use of an extension cord is NOT recommended. This Vacuum cleaner contains no serviceable WARNINGS DO NOT allow the appliance to be used by children. Close supervision is necessary when used near children. This is not a toy. Always turn off the Vacuum cleaner before connecting or disconnecting any motorized nozzles or other accessories. DO NOT handle plug or Vacuum cleaner with wet hands. DO NOT use without filters in place. Only use Shark branded filters and accessories. Failure to do so will also void the warranty. DO NOT damage the power cord: a) DO NOT pull or carry Vacuum cleaner by the cord or use the cord as a handle. b) DO NOT unplug by pulling on cord. Grasp the plug, not the cord. c) DO NOT run the Vacuum cleaner over the power cord, close a door on the cord, pull the cord around sharp corners, or leave the cord near heated surfaces.
3 DO NOT put any objects into nozzle or accessory openings. DO NOT use with any opening blocked; keep free of dust, lint, hair, and anything that may reduce airflow. DO NOT use if nozzle or accessory airflow is restricted. If the air paths or the motorized floor nozzle become blocked, turn the Vacuum cleaner off and unplug from electrical outlet. Remove all obstructions before you plug in and turn on the unit again. Keep nozzle and all Vacuum openings away from hair, face, fingers, uncovered feet, or loose clothing. DO NOT use if Vacuum cleaner is not working as it should, or has been dropped, damaged, left outdoors, or dropped into water. Use extra care when cleaning on stairs. DO NOT leave the Vacuum cleaner unattended while plugged in. When powered on, keep the Vacuum cleaner moving over the carpet surface at all times to avoid damaging the carpet fibers. DO NOT place Vacuum cleaner on unstable surfaces such as chairs or tables.
4 Your Shark Vacuum may not be designed to stand up on its own. When taking a break from cleaning, you may need to lean it against furniture or a wall, or lay it flat on the floor. Using the Vacuum for an application where the unit lacks stability may result in personal injury. DO NOT use to pick up: a) Liquids b) Large objects c) Hard or sharp objects (glass, nails, screws, or coins) d) Large quantities of dust (drywall dust, fireplace ash, or embers). DO NOT use as an attachment to power tools for dust collection. e) Smoking or burning objects (hot coals, cigarette butts, or matches) f) Flammable or combustible materials (lighter fluid, gasoline, or kerosene) g) Toxic materials (chlorine bleach, ammonia, or drain cleaner) DO NOT use in the following areas: a) Poorly lit areas b) Wet or damp surfaces c) Outdoor areas d) Spaces that are enclosed and may contain explosive or toxic fumes or vapors (lighter fluid, gasoline, kerosene, paint, paint thinners, mothproofing substances, or flammable dust) Turn off all controls before plugging in or unplugging the Vacuum .
5 Unplug from electrical outlet when not in use and before any maintenance or cleaning. Hand wash with water only. Washing with cleaning chemicals could damage the unit. During cleaning or routine maintenance, DO NOT cut anything other than hair, fibers, or string wrapped around the brushroll. Allow all filters to air-dry completely before replacing in the Vacuum to prevent liquid from being drawn into electric parts. Make sure the dust cup and all filters are in place after routine maintenance. If provided, secure the power cord around the two cord hooks during Lower the Vacuum body onto the power Connect the nozzle hose from the Vacuum body to the power Slide the handle assembly into the Vacuum Secure the handle assembly in place with included nut and Insert the extension wand into the top of the nozzle hose. Store the dusting brush on the tool caddy on the back of the Vacuum . 6. Attach the flexible hose: a) Snap hose into Swivel connector b) Route hose through anti-tip hook to prevent Vacuum from tipping c) Run hose over upper holder d) Insert hose securely into extension wand IMPORTANT: The flexible hose must be securely attached to the extension wand to enable suction to reach the floor proper operation, ensure all parts are firmly clicked into YOUR VACUUMWHAT DOES THE BRUSHROLL INDICATOR LIGHT MEAN?
6 Solid Green: The brushroll is on and working as it should. Solid Red: There is a jam in the brushroll area. Turn your Vacuum off and remove the Light: The Vacuum is off. To turn it on, set the power selector switch to either Carpet Cleaning (II) or Bare Floor (I) INDICATOR LIGHTINDICATOR LIGHTPlug power cord into outlet. Place foot on floor nozzle and tilt handle back. = Carpet Cleaning = Bare Floor = OFF Select surface setting: O Power Off I Bare Floor For bare floors and small area rugs. II Carpet For suction with the suction release valve on the end of the flexible hose. Slide the valve open to reduce suction to increase maneuverability on carpets. Close the valve for maximum suction when vacuuming bare THE FLEXIBLE HOSEFor maximum cleaning reach, remove extension from Vacuum body. For shorter reach, remove flexible hose from top of extension desired accessory to the wand or flexible hose.
7 Lift the dust cup off the Vacuum body by pulling up on the release latches on the sides of the dust cup dust cup over a trash bin and press the bottom Dust Cup Release THE DUST CUPIMPORTANT: Unplug the power cord before performing any PRE-MOTOR FILTERS EVERY 3 MONTHS With the dust cup removed, take out the foam and felt filters, and rinse with water. Allow filters to air-dry completely before reinstalling. Tap loose dirt off filters between washes as HEPA FILTER EVERY YEAR To access the HEPA filter, reach under the grill, pull the latch forward, and pull the grill away from the Vacuum . Remove and rinse the HEPA filter with water only. Allow filter to air-dry completely before clean and replace your filters to keep your Vacuum s suction power : DO NOT use soap when cleaning the FilterPre-Motor Felt Filter (Felt Side Up)Pre-Motor Foam FilterFilter FrameFilter Frame (Underside)CLEANING THE FILTERSRESET MOTOR THERMOSTATIf the thermostat overheats, turn off and unplug the Vacuum .
8 Empty the dust cup and clean filters if needed. Check hoses and all other openings, and clear any blockages. Wait 45 minutes for Vacuum to cool, then plug in and turn on : Remove dust cup, wand, and floor nozzle and check all dust cup intake : Remove the handle assembly and check for dust cup assembly and empty dust cup. Disconnect the flexible hose. Check air duct behind dust cup for clogs. Clear any obstructions before replacing dust cup Vacuum on the floor to expose opening behind the brushroll for clogs and clear away any obstructions. To clean the brushroll, use scissors to carefully cut away threads, hair, or other debris that might be trapped in the Vacuum flat on the floor. Remove nozzle hose and clear away any clogs. CHECKING FOR BLOCKAGESDUST CUP AIR DUCTFLEXIBLE HOSEFLOOR NOZZLE HOSE CONNECTORINTAKE OPENING BEHIND THE BRUSHROLLR emove flexible hose from both the Vacuum body and extension wand. Inspect the length of the hose for is not picking up dirt.
9 No suction or light suction. Check filters to see if they need cleaning. Follow instructions for rinsing and drying the filters before reinstalling. See Cleaning the Filters for more information. Dust cup may be full; empty dust cup. Check hoses, hose connections, nozzle, and accessories for blockages; clear blockages if required. Close the suction release on the flexible hose to increase suction power. If dust cup is empty, and attachment inlets are clear, check for other blockages. See Checking for Blockages for more lifts area rugs. Suction is powerful. Take care when vacuuming area rugs or rugs with delicately sewn edges. Open the suction release on the flexible hose to decrease suction is jammed or has shut off. Immediately turn off and unplug Vacuum , disconnect the nozzle, and remove blockage before reconnecting and turning Vacuum back on. See Checking for Blockages for more turns off on its own or indicator light flashes Vacuum is equipped with a motor-protective thermostat.
10 If your Vacuum overheats, the thermostat will automatically turn the suction motor off. Perform the following steps to restart the thermostat:1. Turn Vacuum off and unplug Empty dust cup and clean Check for blockages in hoses, accessories, and inlet Allow unit to cool for a minimum of 45 Plug in Vacuum and turn it : If Vacuum still does not start, contact Customer Service at: Five (5) Year Limited Warranty applies to purchases made from authorized retailers of SharkNinja Operating LLC. Warranty coverage applies to the original owner and to the original product only and is not warrants that the unit shall be free from defects in material and workmanship for a period of five (5) years from the date of purchase when it is used under normal household conditions and maintained according to the requirements outlined in the Owner s Guide, subject to the following conditions and exclusions:What is covered by this warranty?1. The original unit and/or non-wearable components deemed defective, in SharkNinja s sole discretion, will be repaired or replaced up to five (5) years from the original purchase In the event a replacement unit is issued, the warranty coverage ends six (6) months following the receipt date of the replacement unit or the remainder of the existing warranty, whichever is later.