Transcription of NETGEAR Wireless N150 Access Point WN604 User Manual
1 350 East Plumeria DriveSan Jose, CA 95134 USAN ovember, 2015202-10623-06 Wireless n150 Access Point WN604 user Manual2 Wireless n150 Access Point WN604 SupportThank you for purchasing this NETGEAR product. You can visit to register your product, get help, Access the latest downloads and user manuals, and join our community. We recommend that you use only official NETGEAR support the current EU Declaration of Conformity, visit regulatory compliance information, visit the Notification of Compliance statement, visit the regulatory compliance document before connecting the power NETGEAR , Inc., NETGEAR and the NETGEAR Logo are trademarks of NETGEAR , Inc. Any non- NETGEAR trademarks are used for reference purposes HistoryPublication Part NumberPublish DateComments202-10623-06 November 2015 Revised the Support section on this 2015 Updated the information on this page and provided a Notification of Compliance 2014 Revised the 1 Getting StartedAbout the Access Point .
2 6 Compatible NETGEAR Switches .. 6 System Requirements .. 7 What s In the Box .. 7 Hardware Description .. 7 Front Panel .. 8 Rear Panel .. 9 Side Panel .. 10 Product Label .. 10 Chapter 2 Installation and Basic ConfigurationLog In to the Access Point .. 12 Install the Access Point .. 13 Configure the System Settings for Your Location.. 13 Set the Time .. 15 Set Basic IP Options.. 15 Configure Wireless Access .. 17 Deploy the Access Point .. 17 Verify Wireless Connectivity .. 18 Wireless Equipment Placement and Range Guidelines .. 18 Wireless Settings .. 19 Wireless Settings Screen Fields .. 20 Configure Basic QoS Settings .. 21 Set Up and Test Basic Wireless Connectivity .. 22 Chapter 3 Configure SecuritySecurity Profiles .. 25 Edit Security Profile Screen Fields .. 25 Wireless Security Options .. 27 Manually Configure Security.. 28 Configure WPA2, or WPA2 + WPA, or WPA .. 28 Configure WEP .. 29Wi-Fi Protected Setup (WPS).. 30 Use WPS to Add a Client to the Wireless Network.
3 31 Restrict Wireless Access by MAC Address .. 334 Wireless n150 Access Point WN604 Chapter 4 ManagementUpgrade the Wireless Access Point Firmware .. 35 Configuration File Management .. 36 Change the Administrator Password .. 38 Enable the SysLog Server .. 39 Activity Log .. 40 View Summary Information .. 40 System Screen Fields.. 41 Network Traffic Statistics .. 42 Statistic Screen Fields .. 42 Available Wireless Station Statistics .. 43 Chapter 5 Advanced ConfigurationSchedule the Wireless Radio .. 45 Advanced Wireless Settings.. 45 Advanced Wireless Settings Screen Fields .. 46 Advanced QoS Settings .. 47 Enable Wireless Bridging .. 49 Configure a Point -to- Point Bridge.. 51 Configure a Point -to-Multi- Point Wireless Bridge .. 52 Chapter 6 TroubleshootingTroubleshooting with the LEDs .. 55 All LEDs Are Off .. 55 WiFi LED Is Off.. 55 LAN LED Is Off .. 56 Cannot Access the Internet or the LAN Wirelessly .. 56 Cannot Connect to the Access Point to Configure It.
4 56 Time-Out Error .. 57 Appendix A Supplemental InformationFactory Default Settings .. 59 Technical Specifications .. 61511. Getting StartedThis chapter covers the following topics: About the Access Point Compatible NETGEAR Switches System Requirements What s In the Box Hardware Description Note: For more information about the topics covered in this Manual , visit the support website at Started6 Wireless n150 Access Point WN604 About the Access PointThe Wireless n150 Access Point WN604 is the basic building block of a Wireless LAN infrastructure. It provides connectivity between Ethernet wired networks and radio-equipped Wireless notebook systems, desktop systems, print servers, and other Access Point provides Wireless connectivity to multiple Wireless network devices within a fixed range or area of coverage interacting with a Wireless network interface card (NIC) through an antenna. Typically, an individual in-building Access Point provides a maximum connectivity area with about a 500-foot radius.
5 Consequently, the Access Point can support a small group of users in a range of several hundred feet. Most Access points can handle between 10 and 30 users simultaneously per Access Point acts as a bridge between the wired LAN and Wireless clients. Connecting multiple Access points through a wired Ethernet backbone can extend the Wireless network coverage. As a mobile computing device moves out of the range of one Access Point , it moves into the range of another. As a result, Wireless clients can freely roam from one Access Point to another and still maintain seamless connection to the NETGEAR SwitchesFor a list of compatible products from other manufacturers, see the Wireless Ethernet Compatibility Alliance website (WECA; see ). The following NETGEAR switches work with the WN604 Wireless Access Point : FS108P - ProSafe 8 Port 10/100 Switch with 4 Port PoE FS116P ProSafe 16 Port 10/100 Desktop Switch with 8 Port PoE FS726TP - ProSafe 24 Port 10/100 Smart Switch with 2 Gigabit Ports and 12 Port PoE FS728TP - ProSafe 24+4 10/100 Smart Switch with full PoE FS752 TPS - ProSafe 48 Port 10/100 Stackable Smart Switch with 4 Gigabit Ports and 24 Port PoE FSM7328PS - ProSafe 24-port 10/100 L3 Managed Stackable Switch with 24 PoE Ports FSM7352PS-ProSafe 48 Port 10/100 L3 Managed Stackable Switch with 4 Gigabit Ports and PoE GS724TP-ProSafe GS724TP 24-Port Gigabit Smart Switch and PoE GS748TP-ProSafe GS748TP 48-Port Gigabit Smart Switch and PoEGetting Started7 Wireless n150 Access Point WN604 System RequirementsBefore installing the Access Point , make sure your system meets these requirements.
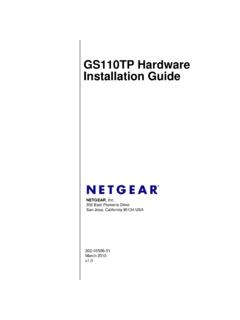
6 A 10/100 Mbps LAN device such as a hub or switch The Category 5 UTP straight through Ethernet cable with RJ-45 connector included in the package, or one like it A 100 240 V, 50 60 Hz AC power source A web browser for configuration such as Microsoft Internet Explorer or later, or Mozilla or later At least one computer with the TCP/IP protocol installed devicesWhat s In the BoxThe package contains the following: Wireless n150 Access Point WN604 Ethernet cable Power adapter Vertical stand feet (2) Installation Guide Resource CDContact your reseller or customer support in your area if there are any missing or damaged parts. Keep the original packing materials, and use the packing materials to repack the Access Point if you need to return it for repair. To qualify for product updates and product warranty registrations, we encourage you to register on the NETGEAR website at: DescriptionThis section describes the front, rear, and side hardware functions of the Access Started8 Wireless n150 Access Point WN604 Front PanelThe Access Point front hardware functions are described 1.
7 WN604 front panelThe following table explains the LED indicators on the front 1. Front panel LEDs LEDD escriptionPower Solid green. Power is on and the Access Point is ready. Blinking green. A firmware update is in process. Solid amber. The Access Point is performing a power-on self-test. Off. No Protected Setup (WPS) Blinking green. WPS activities are in process. Off. No WPS activity, or there is a WPS Solid blue. The Wireless radio is up and running without Wireless data transmission. Blinking blue. Wireless data is being sent or received. Off. The Wireless interface is turned ports 1 4 Solid green. 100 Mbps link detected, no data transmission on the port. Blinking green. 100 Mbps link detected, data transmission on the port. Solid amber. 10 Mbps link detected, no data transmission on the port. Blinking amber. 10 Mbps link detected, data transmission on the port.
8 Off. No link is detectedPowerWi-FiWPSLAN ports 1 4 Getting Started9 Wireless n150 Access Point WN604 Rear PanelFigure 2. WN604 rear panelDuring set up, use an Ethernet RJ-45 port to connect a computer. After initial set up, use an Ethernet port to connect to an Ethernet LAN through a device such as a hub, switch, router, or PoE Reset button has two functions: Reboot. When pressed and released quickly, the Access Point restarts. Reset to Factory Defaults. This button can also be used to clear all data and restore all settings to the factory default values. See Factory Default Settings on page ports 1 4 ResetAntennaOn/OffGetting Started10 Wireless n150 Access Point WN604 Side PanelFigure 3. WN604 side panelThe side panel has a Wireless On/Off button and an WPS button. Wireless On/Off button. You can use this button to turn the Wireless radio off and on. You can also schedule the Wireless radio. See Schedule the Wireless Radio on page 45.
9 WPS button. You can use WPS to add clients to the WN604 Wireless network without typing the WPA or WPA2 password. See Wireless Security Options on page LabelThe label on the bottom of the Access Point includes the MAC address, serial number, security PIN, and the default IP address for logging in to the Access Point . Figure 4. The label is located on the bottom of the Access pointWireless On/OffWPS1122. Installation and Basic ConfigurationThis chapter contains the following sections: Log In to the Access Point Install the Access Point Set the Time Set Basic IP Options Configure Wireless Access Deploy the Access Point Wireless Settings Wireless Settings Configure Basic QoS Settings Set Up and Test Basic Wireless Connectivity Installation and Basic Configuration12 Wireless n150 Access Point WN604 Log In to the Access PointThe Access Point is set, by default, with the IP address of with DHCP disabled.
10 To log in to the Access Point :1. Prepare a computer with an Ethernet adapter. this computer is part of your network, record its TCP/IP configuration settings. b. Configure the computer with a static IP address of and for the subnet Connect an Ethernet cable from the Access Point to the computer. 3. Power up the Access the power adapter and plug it into an electrical Make sure that the Power On/Off button on the rear panel is in the On position (pressed in).4. Verify the following: The Power LED is on. The LAN LED is on for the LAN port that is connected to your powered-on computer. The WiFi LED is Launch a web browser and enter in the address field. You are prompted to log in:6. Type admin in the user name field and password in the Password field, both in lower-case letters, and click and Basic Configuration13 Wireless n150 Access Point WN604 Your web browser finds the Access Point and displays the General Settings the Access PointBefore installing the Access Point , make sure that your Ethernet network is up and working.