Transcription of Nighthawk X10 AD7200 Smart WiFi Router - Netgear
1 Nighthawk X10 AD7200 SmartWiFi RouterUser ManualModel R9000 June 2017202-11653-04350 E. Plumeria DriveSan Jose, CA 95134 USAS upportThank you for purchasing this Netgear can visit to register yourproduct, get help, access the latest downloads and user manuals, and join our community. We recommend thatyou use only official Netgear support the current EU Declaration of Conformity, visit regulatory compliance information, visit the regulatory compliance document before connecting the power Netgear , Inc., Netgear and the Netgear Logo are trademarks of Netgear , Inc. Any non_NETGEAR trademarks are used for reference purposes X10 AD7200 Smart wifi RouterContentsChapter 1 Hardware SetupUnpack Your Your Your the LEDs On or Off or Disable LED the LEDs On or Off Using the LED On/Off or Enable LED Blinking or Turn Off 2 Connect to the Network and Access the RouterConnect to the Connection Using of a Web Browser to Access the Internet In to the the Router With the Netgear Up the the Router With the Netgear genie 3 Specify Your Internet SettingsUse the Internet Setup Set Up the Internet an Internet Connection Without a an Internet Connection That Uses a IPv6 Internet for Entering IPv6 Auto Config for an IPv6 Internet Auto Detect for an
2 IPv6 Internet Up an IPv6 6to4 Tunnel Internet Up an IPv6 6rd Internet Up an IPv6 Pass Through Internet Up an IPv6 Fixed Internet Up an IPv6 DHCP Internet Up an IPv6 PPPoE Internet the MTU 4 Control Access to the InternetSet Up Parental or Block Access to Your Keywords to Block Internet Services From the Keywords From the Blocked Blocking on a Trusted Network Access Control When to Block Internet Sites and Up Security Event Email 5 Network SettingsView or Change WAN Up a Default DMZ the Router s Device the LAN TCP/IP the IP Addresses That the Router the DHCP Server Feature in the Reserved LAN IP an IP a Reserved IP a Reserved IP Address the WPS Wizard for wifi Basic wifi the wifi Mbps the wifi Password or Security Up a Guest wifi the wifi the wifi On/Off or Disable the wifi Up a wifi WPS the Router as a wifi Access Up the Router in Bridge Up a Bridge for a Port Group or VLAN Tag Up a Bridge for a Port Up a Bridge for a VLAN Tag Up an IPTV Port to Lease an Intranet Static Up a Static a Static a Static Port Up Ethernet Port Ethernet Port Aggregation the Router Configuration for Ethernet Port X10 AD7200 Smart wifi RouterChapter 6 Optimize PerformanceUse Dynamic QoS to Optimize Internet Traffic Dynamic or Disable the Automatic QoS Database Update the Dynamic QoS in Dynamic QoS Network Connections With Universal Plug and Multimedia Quality of
3 7 Manage Your NetworkUpdate the Router for New Firmware and Update the Upload Firmware to the the admin Password and Enable Password Up Password the admin Router Internet Port the Internet Connection and Manage Logs of Router Devices Currently on the Internet Traffictraffic the Router Configuration Up the Current Configuration Configuration Up Remote Remote Access Your Router Using the genie 8 Share USB Storage Devices Attached to the RouterUSB Device a USB Storage Device to the a Storage Device Connected to the Router From a Windows a USB Device to a Windows Network a Storage Device That Is Connected to the Router From a Up Windows Computers With ReadySHARE Up Mac Computers With Time Up a USB Hard Drive on a to Back Up a Large Amount of Time Machine to Back Up Onto a USB Hard Up a Whole Drive or Files to Amazon FTP Within the or Change Network Folders on a Storage a Network Folder on a USB Storage a Network Folder on a USB Storage X10 AD7200 Smart wifi RouterSet Up Netgear Files Using Netgear the Netgear Downloader Up Email Notifications for Netgear Netgear Downloader Remove a USB Storage 9 Use Dynamic DNS to Access USB Storage Devices Through the InternetSet Up and Manage Dynamic Up FTP Access Through the Personal FTP Up Your Personal FTP Up a New Dynamic DNS a DNS Account That You Already the Dynamic DNS USB Storage Devices Through the
4 Access a USB Device Using a ReadyCLOUD Your Router With 10 Use the Router as a Media ServerSet Up Plex Media Up Plex Media Server With a USB Hard Up Plex With a Network ReadyDLNA Media Server Music From a Storage Device With iTunes Up the Router s iTunes Server With Up the Router s iTunes Server With the Remote Media From a USB Device on Up the Router to Work With Videos on Music or View Photos on the NTP 11 Share a USB PrinterInstall the Printer Driver and Cable the the ReadySHARE Printer the ReadySHARE Printer Using the Netgear USB Control or Change the Status of a the Scan Feature of a Multifunction USB Netgear USB Control Center Off Automatic Startup for Netgear USB Control the Language for the Netgear USB Control the USB Control Center 12 Use VPN to Access Your NetworkSet Up a VPN X10 AD7200 Smart wifi RouterSpecify VPN Service in the OpenVPN OpenVPN Software on Your Windows OpenVPN Software on Your Mac OpenVPN Software on an iOS OpenVPN Software on an Android a VPN Tunnel on Your Windows VPN to Access the Router s USB Device and VPN to Access Your Internet Service at Up VPN Client Internet Access in the VPN Client Internet Access in the a VPN Tunnel to Access Your Internet Service at 13 Customize Internet Traffic Rules for PortsPort Forwarding to a Local Up Port Forwarding to a Local a Custom Port Forwarding a Port Forwarding a Port Forwarding Example.
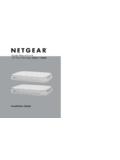
5 Make a Local Web Server the Router Implements the Port Forwarding a Port Triggering Port Example: Port Triggering for Internet Relay Chat port 14 TroubleshootingQuick to Restart Your Ethernet Cable With the LED Behavior When the Router Is Powered LED Is Off or Never Turn or Ethernet Port LEDs Are LED Is Cannot Log In to the Cannot Access the Internet Are Not wifi Your Network Using the Ping the LAN Path to Your the Path From Your Computer to a Remote 404 Error Message When Trying to Log In to Plex X10 AD7200 Smart wifi RouterChapter 15 Supplemental InformationFactory X10 AD7200 Smart wifi Router1 Hardware SetupThis chapter contains the following sections: Unpack Your Router on page 10 Front View on page 11 Rear Panel on page 13 Cable Your Router on page 15 Position Your Router on page 14 Turn the LEDs On or Off or Disable LED Blinking on page 15 For more information about the topics covered in this manual, visit the support website at Your RouterYour package contains the Nighthawk X10 AD7200 Smart wifi Router , the power adapter, and a yellowEthernet 1.
6 Package contentsHardware Setup10 Nighthawk X10 AD7200 Smart wifi RouterFront ViewThe status LEDs are located on the top of the Router . The USB ports are located on the side of the four active antennas include LEDs. If the LEDs on the active antennas are lit, the wifi radios 2. Front viewTable 1. LED descriptionsDescriptionLED Solid white. The Router is ready. Blinking white. The Router is not ready, firmware is upgrading, or the Reset button waspressed. Off. Power is not supplied to the Solid white. An Ethernet connection is established. Blinking white. The port is sending or receiving traffic. Off. No Ethernet cable is connected between the Router and the Setup11 Nighthawk X10 AD7200 Smart wifi RouterTable 1. LED descriptions (Continued)DescriptionLED Solid white.
7 The GHz wifi radio is operating. Blinking. The Router is sending or receiving wifi traffic. Off. The GHz wifi radio is GHz wifi Solid white. The 5 GHz wifi radio is operating. Blinking. The Router is sending or receiving wifi traffic. Off. The 5 GHz wifi radio is GHz wifi Solid white. The 60 GHz wifi radio is operating. Blinking. The Router is sending or receiving wifi traffic. Off. The 60 GHz wifi radio is GHz wifi Solid white. The GHz guest wifi radio or the 5 guest GHz wifi radio is operating. Off. The guest wifi radio is wifi Solid white. A USB device is connected and is ready. Blinking. A USB device is plugged in and is trying to connect. Off. No USB device is connected, or someone clicked the Safely Remove Hardware buttonand it is now safe to remove the attached USB port 1 and USB 2 Solid white.
8 A powered-on device is connected to the 10G LAN SFP+ port. Blinking. The port is sending or receiving traffic. Off. No device is connected to the 10G LAN SFP+ LED color indicates the speed: white for Gigabit Ethernet connections and amber for 100 Mbps or 10 Mbps Ethernet connections. Solid. A powered-on device is connected to the Ethernet port. Blinking. The port is sending or receiving traffic. Off. No device is connected to this Ethernet ports 1 4 Hardware Setup12 Nighthawk X10 AD7200 Smart wifi RouterTable 1. LED descriptions (Continued)DescriptionLEDP ressing this button for two seconds turns the GHz, 5 GHz, and 60 GHz wifi radios on this LED is lit, the wifi radios are on. If this LED is off, the wifi radios are turned off and youcannot use wifi to connect to the On/Off button with LEDThis button lets you use WPS to join the wifi network without typing the wifi LED blinks white during this process and then lights solid button with LEDIf the LED On/Off switch is moved to the Off position, all the LEDs except the PowerLED are turned PanelThe rear panel connections and buttons are shown in the following 3.
9 Rear panelViewed from left to right, the back panel contains the following components: LED On/Off switch. If this switch is in the Off position, all the Router s LEDs, including the LEDs on thefour active antennas, but not the Power LED, are turned off. Reset button. Pressing the Reset button resets the Router . If the Reset button is pressed for at leastseven seconds and the Power LED blinks white, the Router returns to its factory settings. For informationabout the factory settings, see Factory Settings on page 161. Ethernet ports. Six Gigabit Ethernet RJ-45 LAN ports to connect the Router to LAN devices. Ethernetport aggregation is enabled by default. Use Ethernet aggregate ports 1 and 2 to cable a device thatsupports Ethernet port aggregation to the Router .
10 Ethernet ports 3, 4, 5, and 6 are nonaggregate Ethernetports. Internet port. One Gigabit Ethernet RJ-45 WAN port to connect the Router to a cable modem. 10G LAN SFP+ port. One 10G LAN SFP+ port to connect an SFP+ Setup13 Nighthawk X10 AD7200 Smart wifi Router Power On/Off button. Press the Power On/Off button to provide power to the Router . DC power connector. Connect the power adapter that came in the product package to the DC Your RouterThe Router lets you access your network anywhere within the operating range of your wifi network. However,the operating distance or range of your wifi connection can vary significantly depending on the physicalplacement of your take full advantage of the 11ad adva