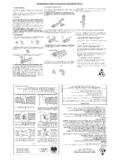
Transcription of OWNER’S MANUAL
1 94-00-0600 600 lb. max tongue weight 6,000 lb. max loaded trailer weight94-00-0800 800 lb. max tongue weight 8,000 lb. max loaded trailer weight94-00-1000 1,000 lb. max tongue weight 10,000 lb. max loaded trailer weight94-00-1061 1,000 lb. max tongue weight 10,000 lb. max loaded trailer weight with pre-installed hitch ballYour model # can be found on the stickers on either spring arm. Make a note of it here for future S MANUALA Product of Progress Mfg. on your purchase of a new e2 round bar hitch. Read this owner s MANUAL thoroughly to become familiar with proper set-up and maintenance procedures.
2 This will ensure that your e2 hitch will give you maximum performance and years of service. KEEP THIS MANUAL in a safe place as a reference for regular adjustment and DEALERS: PLEASE PASS THIS MANUAL ON TO THE END USER AFTER HITCH BAR Faster, Easier. Hitch ball not included except model #Part NumberPart Clip2293-04-92851/2 Nylock Nut4392-03-9205L-Pin2493-02-5150L-Bracke t2593-02-92701/2 x 4 Bolt - Grade 54693-02-5350 Studded Outside Link Plate2793-02-5200 Inside Link Plate2892-04-92281/2 Nut4992-04-92901/2 Lock Washer41092-00-6000 Snap-up Lever11192-03-97005/8 Angle Set Bolt112*94-02-06996,000 lb.
3 Spring Arm (single)2*94-02-08998,000 lb. Spring Arm (single)94-02-109910,000 lb. Spring Arm (sngl.)Item #Part NumberPart Sticker21492-04-96403/4 Nylock Nut21592-04-96453/4 Conical Toothed Washer416BD094-AHWarning Sticker11792-04-9625 Hitch Pin11892-02-41007 Rise x 1 Drop Adj. Shank11992-04-9630 Hitch Pin Clip12092-04-9650 Spacer Rivet12192-04-9655 Spacer Washers72292-04-96353/4-10 x 5 Grade 5 Bolt223**94-02-1055e2 Round Bar Hitch Head124 --Hitch BallNSBD094e2 Round Bar Instruction Manual1* Hitch contains two (2) matched spring arms.
4 See stickers for model # and capacity.** Hitch contains one (1) head rated as indicated on box. Hitch ball NOT included except model Not of Contents PageParts Breakdown..2-3 Important Safety Information.. 5 Important Hitch Information ..7 Step 1: Getting Things Ready ..8 Step 2: Install the Hitch Ball .. 9 Step 3: Attach Hitch Head to Shank .. 10 Step 4: Sway Bracket Assembly Set Up .. 12 Step 5: Install Spring Arms.
5 14 Step 6: Weight Distribution Setup.. 14 Step 7: Weight Distribution Adjustments .. 17 Step 8: Trailer Angle Adjustments .. 20 Step 9: Final Tightening.. 20 Step 10: Regular Maintenance.. 21 Customer Support.. 22 Appendix A: Troubleshooting Guide .. 23 Appendix B: Weight Distribution Adjustments .. 24 Warranty .. 25 Frequently Asked Questions (FAQ) .. 26 TOOLS NEEDED FOR INSTALLATIONThe following tools will help you to install your hitch. 1-1/8 Socket or Box End Wrench (Shank Bolts)1-1/16 Socket or Box End Wrench (Shank Nut)Torque Wrench capable of 250 ft-lbs.
6 Of torque. (Shank bolts)3/4 Socket or Box End Wrench (Link Plates and L-brackets)15/16 Socket or Box End Wrench (Angle Set Bolt)Measuring TapePencilRecommended tools for installing the Hitch Ball:1-7/8 SocketTorque Wrench capable of reaching torque specifications recommended by hitch ball manufacturer. 5A Product of Progress Mfg. Safety Information Failure to follow all safety warnings may result in severe injury or , understand, and follow all safety warnings, setup, use, and main tenance instructions of your trailer, tow vehicle, and hitching equipment before installing your hitch or towing your cut, weld, grind, bend, or modify hitch components in any is the driver s responsibility to adjust equipment and driving habits to Warning Stickers Arm Sticker(not actual size)
7 Head StickerFaster, or Exceeds V5 and SAE e2 hitch is a product of Progress Mfg. Lbs. maximum tongue weight6,000 Lbs. maximum trailer weightFor a copy of the instructions e2 hitch is a product of Progress Mfg. V5 and SAE setup can cause severe injury or death. Read and follow owner s MANUAL at all times. Check for proper setup before BAR 94-00-0600 Faster, or Exceeds V5 and SAE e2 hitch is a product of Progress Mfg. Changes in tow vehicle & trailer loading can change weight distribution requirements and vehicle handling.
8 For best performance check your hitch setup often. Verify that proper weight distribution is achieved. Refer to owner s towing conditions. The driver is responsible for their own safety and the safety of exceed the specified weight ratings for the trailer, tow vehicle, hitch, hitch ball, or any other towing hitch setup guarantees that trailer sway will be altogether load trailer correctly. Follow trailer and tow vehicle manufacturer s recommendations for placement and quantity of tow with a minimum tongue weight of 10% of the gross trailer use a hitch ball with a rating that equals or exceeds the trailer Gross Vehicle Weight Rating (GVWR).
9 Always use a hitch ball size that correctly matches your trailer coupler size and make sure it is coupled securely be fore towing. Good weight distribution setup does not ensure safe towing. The opera tor is responsible for making necessary adjustments to the hitch to opti mize weight distribution and sway control. Each trip is different, and the weight distribution setup and towing performance should be evaluated by the operator and adjusted when tow with your hitch adjusted all hardware before each trip. Do not tow your trailer until all bolts and nuts have been checked for wear and fatigue, are properly tightened, and all pins and clips are securely in not tow your trailer on rough roads.
10 Do not tow your trailer through profound ditches, dips, or swales. Excessive strain on the spring arms and hitch head may cause hitch fatigue or your dealer installed your hitch, make sure to verify that it is still adjust ed correctly after loading your trailer and tow vehicle for your all worn, faded, or unreadable warning stickers on the hitch im not transfer hitch to a different tow vehicle or trailer without re adjust ing the Product of Progress Mfg. not loosen or remove any part of the hitch except the L pins and L pin clips while the hitch is under secure tow vehicle and trailer with parking brake and wheel chocks before setting up or adjusting weight distribution before towing or backing the trailer where there is a significant transition in grade which puts excessive strain on the hitch, a flat street to a steep uphill Hitch InformationWeight Distribution.