Transcription of Picture Menu Web Part - Amrein Engineering
1 Picture menu Web part Amrein Engineering AG Version March 2012 Description The Picture menu Web part displays the List items contained in the specified Sharepoint Picture Library as a vertical or horizontal Picture menu . The Web part can be used with Windows Sharepoint Services V3, and Sharepoint 2010 and comes with a starter collection of more than 100 "Metro" style icons. The following parameters can be configured: Sharepoint List or Library containing the menu items Horizontal or vertical layout CSS Styles Prerequisites Before you attempt to install the solutions you need to make sure that you have the following installed on your server(s): Microsoft Office SharePoint Server 2007, WSS or Sharepoint 2010 Installation Manual Installation 1. download and unpack the file. The ZIP archive contains the and the files.
2 2. drop the either into the SPS web application bin directory or into the GAC of your Sharepoint server (c:\windows\assembly). 3. add the following line to the "<SafeControls>" section of your file. Please make sure that the line is added as one single line (no line breaks): <SafeControl Assembly="AEMenuWebpart, Version= , Culture=neutral, PublicKeyToken=c1de7e0cbb1f51bc" Namespace="AEMenuWebpart" TypeName="*" Safe="True" /> 4. from the top site go to "Site Actions/Site Settings/Modify All Site Settings/Galleries/Web Parts" 5. use the "Upload" menu option to upload the file. Automatic Installation 1. Unpack the and (or ) files from the Zip Archive and place the 2 files onto your Sharepoint Server. 2. Add the Solution by either running (for Sharepoint 2007) or for Sharepoint 2010) by manually entering: stsadm -o addsolution -filename 3.
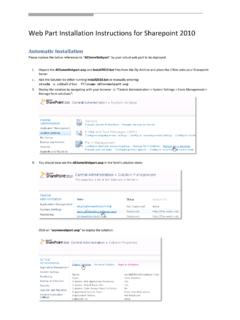
3 Deploy the solution by navigating with your browser to Central Administration > System Settings > Farm Management > Manage farm solutions : 4. You should now see the in the farm s solution store: Click on to deploy the solution: 5. Proceed to activate the feature by navigating to the Site Actions/Site Settings page in your top-level site: Choose Site collection features to navigate to the Site collection Features page: Activate the AE Picture menu Web part feature Adding the Web part to a Page Navigate to a page where you would like to place the web part and choose "Site Actions/Edit Page" 1. Add the web part to the appropriate zone. The web part is listed in the " Amrein Engineering " gallery section : Web part Configuration Configure the following Web part properties in the Web part Editor "Miscellaneous" pane section as needed: o Site Name: Enter the name of the site that contains the menu Picture Library: - leave this field empty if the Library is in the current site (eg.)
4 The Web part is placed in the same site) - enter a "/" character if the Library is contained in the top site - enter a path if the Library in in a subsite of the current site (eg. in the form of "current site/subsite") o List Name: Enter the desired Sharepoint List or Picture Library name. Example: Menus Please note that if you specify a List, the menu pictures are defined as List item attachments. If you want to display only the icons contained in a specific Library folder, append the folder name (separated by a "/") to the Library name: Examples: menu pictures /Teamsite menu pictures /Teamsite/Business o View Name: optionally enter the desired List View of the list specified above. A List View allows you to specify specific data filtering and sorting. Please note that you need to select the "Title" and "URL" columns when defining the view.
5 Leave this field empty if you want to use the List default view. o menu Picture Field Name: enter the List/Library field name that contains the Picture URL. Enter FileRef if you are using a Picture Library. Leave this field empty if you want the web part to use the Picture file attached to the List item. You can either create your own icon collection or use the existing "Metro" icon collection contained in the Zip file download which contais the "Icons 48x48" folder (see Preview). To create your own "Metro" style icons, we recommend to use the free Metro Studio 1 software from Syncfusion which can be downloaded from the Syncfusion web site o menu Title Field Name: enter the List/Library field name that contains the menu item title (Default:Title) o menu Description Field Name: enter the optional List/Library field name that contains the menu item description o menu URL Field Name: enter the List/Library field name that contains the menu item URL o menu Layout: choose one of the following 3 menu layouts: - vertical: display the icons and the menu title laid-out vertically - vertical Icons only: display just the icons laid-out vertically - horizontal Icons only: display just the icons laid-out horizontally o Open Link in new window.
6 Opens the menu link either in a new browser window or in the same browser window o Picture Width: enter the desired Picture width in pixels o menu CSS Style: enter the desired web part container CSS style Example: width:300px;background-color:orange o Icon CSS Style: enter the desired menu icon CSS style Example: padding-left:6px o Title CSS Style: enter the desired menu title CSS style Example: font:14pt Segoe UI;color:white o Item CSS Style: enter the desired menu item CSS style Example: padding-left:6px;color:black;border-bott om:1px solid red o Web part Header: enter the optional header text. You can embed HTML tags to format the header. Example: <p style="FONT:16pt verdana;color:white">Team menu </p> o Web part Footer: enter the optional footer text. You can embed HTML tags to format the header. Example: <div style="color:white;margin:10px;border-top:solid 1px white">Need to add a new entry ?
7 Please call 034 678-88</div> o License Key: enter your Product License Key (as supplied after purchase of the " Picture menu Web part " license key). Leave this field empty if you are using the free 30 day evaluation version or if you choose one of the License Activation described below. License Activation You have the following 3 options to enter your License Key: 1. Enter the License Key into the corresponding License Key field in the web part configuration pane (See description above). 2. WSP Solution Deployment: Add the file (as supplied by Amrein Engineering after having purchased a license) to the Solution at the following location: c:\Program Files\Common Files\Microsoft Shared\Web Server Extensions\14\template\features\AEMenuWe bpart 3. Manual Deployment: Add the License Key to your (typically found at c:\inetpub\wwwroot\wss\virtualdirectorie s\80) <appSettings> section as follows: <appSettings>.
8 <add key="AELR" value="AELR-x-xxxxx-xxxxx-xx-xx" /> </appSettings> Replace the x characters with your actual key values. Please note that this method requires you to manually add the key to each Sharepoint application.