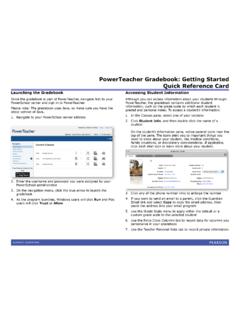
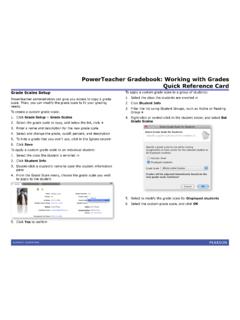
Transcription of PowerTeacher Quick Reference Card
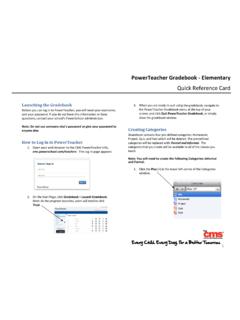
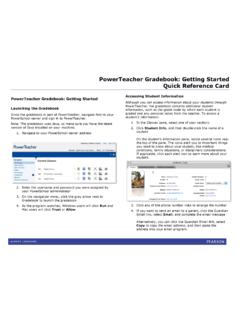
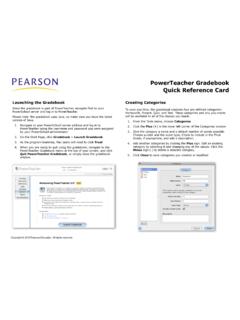
1 Elementary Gradebook Quick Reference card Copyright 2008 Pearson Education, Inc. or its affiliates. All rights reserved. Gradebook Quick Reference Quick Entry Tips Select Quick Entry Tips on the PowerTeacher gradebook Help menu to view shortcuts. Creating Categories 1. On the gradebook menu bar, choose Tools > Categories. 2. Click the Plus (+) button in the lower left corner of the window. Enter information. 3. Click Close. Add Assignments 1. Select a class, then click the Assignments or Scoresheet tab. 2. Click the Plus (+) button. Enter information. 3. Click Save. Change Publishing Assignments 1. Select a class, then click the Assignments or Scoresheet tab.
2 2. Select the assignment you want to publish, then click the Publish tab. 3. From the Publish Assignment pop-up menu, choose when to publish. 4. If you selected On Specific Date, enter the date the assignment should appear in the Date On field. 5. If you selected Days Before Due, enter the number of days the assignment should appear prior to the date that it is due in the Days Before Due field. 6. Click Save. Set Final Grade Preferences 1. On the gradebook menu bar, choose Gradebook > Preferences. 2. Select the appropriate When calculating a grade the value should be option. 3. Choose the number of digits to appear after the decimal point from the Store calculated grades with up to pop-up menu.
3 4. Click OK. Define Final Grade Calculation 1. Select a class, then click the Grades Setup tab. 2. Click the name of the reporting term for which you want to set up final grade calculation. 3. Select the appropriate for Calculate Final Grade Using option. 4. Click Save. Filter a Scoresheet 1. Select a class, then click the Scoresheet tab. 2. Choose one or more of the following filters: Filter By Reporting Term Filter By Category Filter By Students Open the Score Inspector 1. Select a class from the Classes pane, then click the Scoresheet tab. 2. From any assignment field (or Final Grade field) within the Scoresheet, press COMMAND+click (Mac) or right-click (Windows) and select Score Inspector.
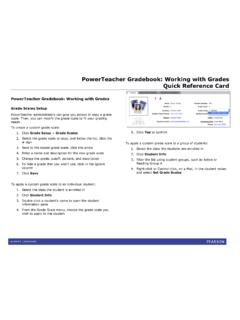
4 Enter a Score 1. Select a class, then click the Scoresheet tab. Or, open the Score Inspector. 2. Click the assignment column of the student for whom you want to enter a score. 3. Enter the score using one of the following: On the Scoresheet window, press ENTER or RETURN. Click Save. On the Score Inspector window, use the Previous and Next arrows to repeat for each student, then click Close. Mark Assignments 1. Select a class, then click the Scoresheet tab. Or, open the Score Inspector. 2. Click in the assignment column of the student for whom you want to enter an assignment status: On the Scoresheet window, press COMMAND+click (Mac) or right-click (Windows) and select Collected, Late, Exempt, or Missing.
5 Click Save. On the Score Inspector window, select Collected, Late, Exempt, or Missing checkbox. Click Close to save. Add a Score Comment 1. Open the Score Inspector and select the assignment of the student you want to update. 2. Manually enter score comments in the Comment field and/or click Comment Bank to select one or more predefined comments. 3. Use the Previous and Next arrows to repeat for each student, if applicable. 4. Click Close to save. Add a Final Grade Comment 1. Make sure you are in the PGSH class in order for this to print on the report card . 2. Make sure you are in the correct term. You must use Q1, Q2, Q3, or Q4 - don't use S1 or S2.
6 3. Open the Score Inspector and select the final grade of the student you want to update. 4. Manually enter final grade comments in the Comment field and/or click Comment Bank to select one or more predefined comments. Use the Previous and Next arrows to repeat for each student, if applicable. 5. Click Close to save. Manually Override Final Grades 1. Select a class from the Classes pane, then click the Scoresheet tab. 2. Choose a term from the Filter By Reporting Term pop-up menu. 3. Open the Score Inspector and select the final grade of the student you want to update.
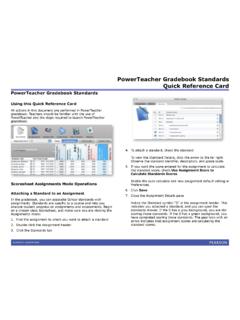
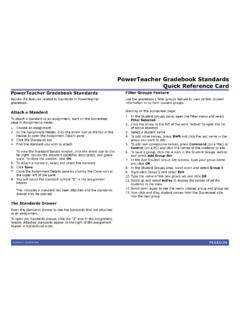
7 The final grade field appears highlighted. 4. Select the Manual Override checkbox. Enter the new grade in the appropriate field, and enter any comments in the Comment field, if applicable. Use the Previous and Next arrows to repeat for each student, if applicable. 5. Click Close to save. Reports The following reports are available on the gradebook Reports tab: Attendance Grid Category Total, Final Grade a Comment Verification, Individual Student Report, Missing Assignment, Scoresheet, Student Multi-Section, and Student Roster. Standards Fill Final Grades Use the Fill Scores command on the standard column on the Scoresheet Final Grades window to quickly and easily enter the same standard or final grade for all students or for only those with unrecorded scores.
8 How to Quick Fill 1. Select a class from the Classes pane. 2. Click the Scoresheet tab. The Scoresheet window appears. 3. Click Final Grades mode. 4. Right-click on Final Grade column header and slide to Quick Fill then on the additional bar that appears, choose the score to fill all. 5. Manually change those that need a different score. How to Fill Final Scores 1. Select a class from the Classes pane. 2. Click the Scoresheet tab. The Scoresheet window appears. 3. Click Final Grades mode. 4. Right-click on the Final Grade column header and select Fill Scores.
9 The Fill Final Scores dialog appears. 5. Indicate whether you want to only fill empty scores or replace all scores by selecting one of the following options: * Students with No Grade * Replace Manually Overridden Grades * Replace All 6. Enter a grade value. 7. Click OK.