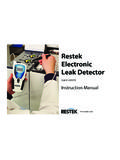
Transcription of Restek’s ProFLOW 6000 Electronic Flowmeter
1 S ProFLOW 6000 Electronic FlowmeterUser ManualVersion cat.# 22656No part of this manual may be reproduced in any form or by any means without the prior agreement or permission by Restek ProFLOW 6000 volumetric of Contents Page Introduction ..3 Specifications ..3 Installing the batteries ..4 Battery power consumption ..4 Battery lifetime ..4 Battery charge indicator ..4 Operating instructions ..5 Interpreting results ..6 Flow range display ..6 Data collection on the PC ..7 ProFLOW 6000 menu structure ..9 Unit power up/power down ..9 USB activation ..10 Adjust LCD image backlight ..10 Show battery charge indicator ..11 Firmware version information ..11 Adjust auto shutoff duration ..12 Display calibration date ..12 Display unit serial number ..13 Troubleshooting ..13 Product back label legend ..14 Volumetric vs. mass flow measurements ..15 Bubble flowmeters ..15 Product case specifications.
2 16 Calibration and service ..16 Declaration of Conformity .. 3 IntroductionRestek s ProFLOW 6000 Flowmeter is specifically designed for use with gas chromatography (GC) systems. The probe is applied directly to the gas flow stream and the measured flow rate is presented on the LCD screen. Units of flow are measured in unit provides continuous real-time measurements of gas streams ranging from mL/min to 500 mL/min. Because the technology uses volumetric flow measurement, the unit is compatible with all laboratory : Do NOT exceed maximum operating flow rates. Recalibration may be required if the unit has been subjected to extreme flow use appropriate laboratory safety practices when operating this device. Wear laboratory safety goggles when operating this unit. NOTE: There are no serviceable parts in this unit. Opening the device other than to change the batteries or tampering with the internal parts will void the factory : To ensure accurate measurements and effective clearance of the flow gas from the unit, DO NOT obstruct the vent holes on the back of the : Modifying the length of tubing can cause a shift in calibration.
3 SpecificationsTable I: Type of measurement Volumetric flow Accuracy of measurements 2% of flow reading or mL/min, whichever is greater Power requirements 2 AA alkaline batteries V DC each/3 V DC 200 ma Operating flow range to 500 mL/min Operating temperature range 32 -120 F (0 - 48 C) Available communication USB data port Warranty One year (excludes recalibration) Calibration NIST traceable Yearly recalibration is recommended Certifications CE, Ex (see section ) Compliance WEEE, RoHS 2, China RoHS 2 (see section ) Figure 1: Product Installing the batteriesThis unit uses two AA alkaline batteries. To install batteries, extend the wire stand. Open the cover. Insert the batteries with the polarity ( and ) correctly aligned. Close the cover. (Figures 2 and 3.)Precautions for battery replacement: Load the new batteries with their polarity ( and ) aligned correctly. Do not use rechargeable Battery power Battery lifetimeThe battery lifetime is dependent on the number of options the user has unit is shipped with the most energy-demanding options disabled (Table II).
4 The power saving functions can be changed. See Section : USB Activation See Section : Adjust LCD Image Backlight See Section : Adjust Auto Shutoff Battery charge indicatorThe unit includes a battery charge indicator. Replace batteries as needed. See Section : Show Battery Charge Indicator Auto shutoff duration 6 minutes LCD backlight 0 (off) USB port disabledNOTE: Store your ProFLOW 6000 in its protective storage case following use. Do not store this manual or any other items on top of the ProFLOW 6000 or the unit may turn on when the storage case lid is closed. Table II: Default settings for the ProFLOW 6000 Figure 2: Extend the wire stand before opening battery 3 Insert the batteries as marked.+ + + + - 4 5 Operating instructionsCAUTION: Do not exceed maximum operating flow rates. Recalibration may be required if the unit has been sub-jected to extreme flow the white probe end tip to the output of the gas flow line to be measured. Be sure the probe tip connection is completely sealed around the flow source outlet and is free of leaks (Figure 4).
5 (White tubing ID "; OD ")Press and hold the (Power) button until the unit responds with a regular clicking sound. The ProFLOW will immediately begin to provide flow measurements (Figure 5). Wait for the measured values to stabilize. It takes a few seconds for the unit to reach a steady state with the gas flow power down the unit, press and hold the (Power) button until the unit stops unit is equipped with a timed auto shutoff option. (Default: 6 minutes.) See Section : Adjust Auto Shutoff DurationFigure 4: Probe connected to a GC gas 5: LED displays the measured flow 6 Interpreting resultsThe unit has an operating range of mL/min to 500 mL/min (Figure 7). If the flow is less than mL/min., the display will read under range. If the flow exceeds 515 mL/min, the display will read over range. Excessively high flow rates may dam-age this unit. NOTE: units of mL/min are equivalent to Flow range displayThe unit automatically adjusts the resolution of the display depending on the flow range being measured.
6 Table III shows the resolution of the flow 6: Example flow 7: Description of flow ranges. Flow range Display resolution (mL/min) 100 500 1 Table III: Display resolution vs. flow RangeDisplay reads under range Display readsflow valuesDisplay reads over range mL/min515 7 Data collection on the PCWARNING: ONLY connect USB cable to USB port while unit is ProFLOW 6000 provides you with a data stream of real-time flow values via the USB port (Figure 1, p. 3). In order to use this feature, you must first install the appropriate FTDI Virtual Com Port (VCP) Driver available at: VCP driver will cause the ProFLOW to appear as a standard RS-232 port. This will work on any operating system for which there is an FTDI VCP driver. After installing the driver, connecting the device, and determining which port it creates, you can access the data stream through any programmatic means, or by using any serial terminal Windows systems:To determine which port the ProFLOW is using, go to the Control Panel and open System.
7 Go to the Hardware tab and click the Device Manager button. Expand the Ports (COM & LPT) entry. Make sure the VCP driver is installed, and then connect a powered ProFLOW 6000 to the USB port. You will see the new COM port appear. Open your serial terminal. See Section : USB ActivationFigure 8: Screen capture of data 8 you do not already have serial terminal software, free, open-source options are available online ( , RealTerm, etc.). You can download RealTerm* software from: installation, click the Port tab and set the following: Baud: 115200 Port: The appropriate VCP for your ProFLOW Parity: None Data Bits: 8 bits Stop Bits: 1 bit HardwareFlow Control: NoneGo to the USB menu entry in the ProFLOW and turn the transmission on. Finally, click Open on the Port tab in RealTerm and you will see the serial data stream begin in the terminal window (Figure 8).If you would like to log the flow data, this can be done by clicking on the Capture tab. Set File to the name and location of the log file that you would like to save and click either the Start: Overwrite or Start: Append buttons appropriately (Figure 9).
8 *This software is not supplied or supported by Restek. User assumes all responsibility for the downloading and use of the 9: Screen capture of data 9 ProFLOW 6000 menu Unit power up/power down Press the (Power) button:The LCD screen will display Followed by the device intro screen: calibrated date: To power off, press and hold the (Power) messages encountered at power up If the unit is hooked up to a flow stream with a flow rate less than mL/min, the unit will report an under range status for the flow. This message will appear until the flow rate exceeds by measuredflow data:01/10/2012- 10 USB activation To enable the USB, press the (Menu) the (arrow) keys to select the USB menu:Press the (menu) button again to enter the value select screen. Use the (arrow) keys to toggle between USB on and off. To return to the main menu screen, press the (menu) exit and return to measuring flow, press the (menu) button again.
9 See Section : Data Collection on the Adjust LCD image backlight Press the (Menu) the (arrow) keys to select the Backlight menu:Press the (Menu) button again to enter the value select screen. Use the (arrow) keys to select the backlight value. Backlight Values: 0 (off) and 5 (maximum). To return to the main menu screen, press the (Menu) exit and return to measuring flow, press the (Menu) button again. 11 Show battery charge indicator Press the (Menu) the (arrow) keys to select the Batteries menu:Press the (Menu) button again. The battery life is displayed. To return to the main menu screen, press the (Menu) exit and return to measuring flow, press the (Menu) button again. Firmware version information Press the (Menu) the (arrow) keys to select the Firmware menu:Press the (Menu) button again. The most recent version of firmware is displayed.
10 To return to the main menu screen, press the (Menu) exit and return to measuring flow, press the (Menu) button again. - 12 Adjust auto shutoff duration To conserve battery life, the unit automatically turns off after 6 minutes. To customize the auto shutoff setting, press the (Menu) the (arrow) keys to select the Power Time menu:Press the (Menu) button again to enter the value select screen. Use the (arrow) keys to select the auto shutoff setting. Values: 1 59 minutes or constant on (max.) To return to the main menu screen, press the (Menu) exit and return to measuring flow, press the (Menu) button again. Calibration Date To display the calibration date, press the (Menu) button. Use the (arrow) keys to select the Cal Date menu:Press the (Menu) button again to display the calibration return to the main menu screen, press the (Menu) exit and return to measuring flow, press the (Menu) button datecalibrated:12/12 13 Troubleshooting Problem Possible Cause(s) Suggested Solution(s) Multiple readings Unit is out of calibration Return the unit to Restek for recalibration* are not giving Value is being compared to a bubble Flowmeter See Section for a discussion of the reproducible results weaknesses of bubble flowmeters Unit does not power up Dead batteries Replace with 2 new AA alkaline batteries Flow value display is The ProFLOW 6000 is very sensitive Allow more time for flow to stabilize erratic/jumpy to small changes in flow*Contact Restek or your Restek representative for return instructions for servicing a damaged unit.