Transcription of Returning Clear Connect System Devices to Factory Default ...
1 Returning Clear Connect System Devices to Factory Default Settings Revision B. Overview When Devices are shipped from the Factory they are unaddressed and ready to be assigned to a System . When a device is assigned to a System it is given a unique System address. To assign an addressed device to a different System or to remove an addressed device from the System , the device must be reset to its Factory Default Settings. To reset a device to Factory Default Settings, follow the procedures described below. Reset procedures are intentionally difficult to prevent Devices from being accidentally returned to Factory Default Settings.
2 It may take several attempts to successfully reset Devices until the reset procedure becomes familiar. Refer to the Best Practices section at the end of the document. Returning a device to its Factory Default Settings will remove the device from the System , and return it to stand-alone local operation. To make the device part of a System again, address the device using the System 's PC Programming Software or via simple walk-around programming as described in the System 's Setup Guide or device's installation instructions.
3 Systems that have been programmed using a PC-based Programming Utility will require the use of the PC. Programming Utility to re-address the device back to the System (manual, walk-around style programming is not allowed on a PC programmed System ). 1|Page Procedures for Returning Devices to Factory Default Settings Contents Maestro Dimmers and Switches .. 3. Dynamic and Wireless seeTouch 3. GRAFIK T Dimmers and Switches .. 4. GRAFIK T Hybrid Keypads .. 4. Visor Control Receiver (VCRX) .. 5. Pico Wireless Controller 1st Generation (RRD-P3 BRL, QSR4P).
4 5. Pico Wireless Controller 2nd Generation (PJ-) .. 6. Pico Wireless Controller 3rd Generation (PJ2-) .. 6. Radio Powr SavrTM Occupancy/Vacancy Ceiling Sensor 1st Generation (LRF2-xCRB-) .. 7. Radio Powr SavrTM Occupancy/Vacancy Ceiling Sensor 2nd Generation (LRF2-xCR2B-) .. 7. Radio Powr SavrTM Occupancy/Vacancy Wall-Mounted Sensor .. 8. Plug-in Modules (3PD and 15 APS) .. 8. Radio Powr SavrTM Temperature Sensor .. 9. Single Zone HVAC 10. Lutron TouchPRO WirelessTM Thermostat .. 10. Grafik Eye QS Wireless (running firmware).
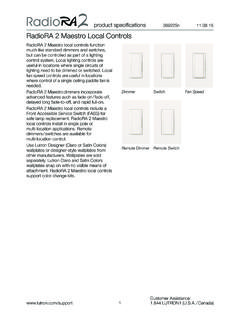
5 11. Grafik Eye QS Wireless (running or newer firmware) .. 11. Wallbox Power Module .. 12. 0-10V RF Module .. 12. 16A SoftSwitch RF Module .. 13. Single CCO RF Module .. 13. Auxiliary/Hybrid Repeater .. 14. Lutron Connect 15. Best Practices .. 16. 2|Page Maestro Dimmers and Switches Step 1: Quickly triple tap and hold down the paddle switch of the dimmer/switch. DO NOT. release after the third tap. Step 2: Continue to hold the paddle switch for a few seconds. The dimmer LEDs will begin to scroll up and down quickly.
6 The switch LED will begin to flash rapidly. Step 3: Release the paddle switch and quickly perform another triple tap of the paddle switch. The load will flash. The dimmer LEDs will scroll up and down slowly or the switch LED will flash slowly three times and then shortly after will return to normal local LED status. (*Note* The time between release and the second triple tap must be less than half a second, thus must be performed very quickly). The dimmer/switch has now been returned to Factory Default Settings.
7 Dynamic and Wireless seeTouch Keypads Step 1: Quickly triple tap and hold any button (except raise/lower) on the keypad. DO NOT. release after third tap. Step 2: Keep the button pressed after the third tap for a few seconds until all the status LEDs start to flash slowly (approximately once per second). Step 3: Release the button and triple tap the button again until all the status LEDs on the keypad flash quickly. (*Note* The time between release and the second triple tap must be less than half a second, thus must be performed very quickly).
8 The keypad has now been returned to Factory Default Settings. 3|Page GRAFIK T Dimmers and Switches Step 1: Quickly triple tap and hold the off button (bottom button) on the device. DO NOT release after third tap. Step 2: Keep the off button pressed after the third tap for a few seconds until all the status LEDs start to flash slowly (approximately once per second). Step 3: Release the button and triple tap the off button again until all the status LEDs on the device flash quickly. (*Note* The time between release and the second triple tap must be less than half a second, thus must be performed very quickly).
9 The device has now been returned to Factory Default Settings. GRAFIK T Hybrid Keypads Step 1: Quickly triple tap and hold any button on the keypad. DO NOT release after third tap. Step 2: Keep the button pressed after the third tap for a few seconds until all the status LEDs start to flash slowly (approximately once per second). Step 3: Release the button and triple tap the button again until all the status LEDs on the keypad flash quickly. (*Note* The time between release and the second triple tap must be less than half a second, thus must be performed very quickly).
10 The keypad has now been returned to Factory Default Settings. 4|Page Visor Control Receiver (VCRX). Step 1: Quickly triple tap and hold any button (except Learn) on the VCRX. DO NOT release after third tap. Step 2: Keep the button pressed after the third tap for a few seconds until all the status LEDs start to flash slowly (approximately once per second). Step 3: Release the button and triple tap the button again until all the status LEDs on the VCRX. flash quickly. (*Note* The time between release and the second triple tap must be less than half a second, thus must be performed very quickly).