Transcription of STANDARD OPERATING PROCEDURE TEMPLATE
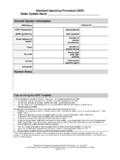
1 Report #10-097, 10-27-10 Page 1 of 6 STANDARD OPERATING PROCEDURE TEMPLATE #1 CONTACT INFORMATION: PROCEDURE Title Instron PROCEDURE Author Aaron Michel and Jeffrey B. Tok Date of Creation/Revision 6-1-2011 Name of Responsible Person Jeffrey B. Tok Location of PROCEDURE Nano Bldg, Rm 008 Approval Signature (If required. See section #10 of this TEMPLATE ) #2 THIS STANDARD OPERATING PROCEDURE (SOP) IS FOR A: Specific laboratory PROCEDURE or experiment Instron Generic laboratory PROCEDURE that covers several chemicals Examples: distillation, chromatography, etc. Generic use of specific chemical or class of chemicals with similar hazards Examples: organic azides, mineral acids, etc. #3 PROCESS OR EXPERIMENT DESCRIPTION Provide a brief description of your process or experiment, including its purpose.
2 Do not provide a detailed sequential description as this will be covered by section #6 of this TEMPLATE . Indicate the frequency and duration below. [PRECEDING GUIDANCE TEXT MAY BE DELETED.] Frequency: one time daily weekly monthly other:_____ Duration per Expt: _____30-60___ minutes; or _____hours Report #10-097, 10-27-10 Page 2 of 6 #4 SAFETY LITERATURE REVIEW & HAZARD SUMMARY Stanford s Chemical Safety Tool Kit. It can be accessed via: Stanford s EH&S Chemical Hygiene Plan. It can be accessed via: #5 STORAGE REQUIREMENTS n/a #6 STEP-BY-STEP OPERATING PROCEDURE Step-by-Step Description of Your Process or Experiment Potential Risks if Step is Not Done or Done Incorrectly (if any) Step 1: Don personal protective equipment. appropriate street clothing (long pants, close-toed shoes) gloves; indicate type:_____ safety goggles safety glasses face shield lab coats other:_____ Step 2: Check the location/accessibility/certification of the safety equipment that serves your lab including fume hoods, safety showers, spill kits, fire extinguisher, etc.
3 Step 3: Fill in Logout Setting up the Equipment: Turn on the load frame via a switch on the right hand side. The transducer panel on the left hand side should have an indicator that counts down from 3 to 1. Open the compressed air valve by twisting the knob on the tabletop. Report #10-097, 10-27-10 Page 3 of 6 Bluehill Software Creating a new method: If you are creating a new method for testing ( replicating an ASTM STANDARD that has not been used on this instrument), click Method. Create a new method with the desired sample size settings, crosshead speed, data collection settings, Starting a test: More than likely, you can use a method that already exists. In this instance, click Test and select the method to be used. Create a new file directory for the data to be saved to. Running the test: Place the tensile test specimen between the grips, ensuring that the sample is vertical.
4 Move the top crosshead to align the grips with the sample by using the jog up or down buttons on the Instron control panel. Press the floor pedal marked Close to close the bottom clamps at the desired spot on the sample. Press the same pedal to close the top grips. You may not get the proper alignment at first. Press the Release pedal and repeat the process until the sample is properly aligned. Press the Reset GL button on the control panel to set the return level for the crosshead. Press the start button in the software. The test should begin with an autobalance if it is included in the method. (If not, click the load cell button in the top menu and autobalance manually before beginning Report #10-097, 10-27-10 Page 4 of 6 the test.) Let the test complete. You may need to press the stop button in the software if automatic stops in the test method are not properly set.
5 Remove the sample by using the floor pedals. Press Return on the control panel to return the crosshead to the pre-set level. Repeat the test with all samples. Always note which sample you are testing and the corresponding test sample number within the software. Finishing: By clicking Finish on the software all data is saved to the set folder. Close the software and turn off the load frame. Step 4: Dispose of hazardous solvents, solutions, mixtures, and reaction residues as hazardous waste. Step 5: Cleanup work area and lab equipment. Step 6: Remove PPE and wash hands. Step 7: Sign off logbook #7 EMERGENCY procedures A. Health-Threatening Emergencies (ex: fire, explosion, health-threatening hazardous material spill or release, compressed gas leak, or valve failure) 1. Call 9-911 (or 286 in the School of Medicine).
6 2. Alert people in the vicinity and activate the local alarm systems. 3. Evacuate the area and go to your Emergency Assembly Point (EAP): 106 Center of Engineering Plaza 4. Remain nearby to advise emergency responders. 5. Once personal safety is established, call EH&S at 725-9999 (or 286 in the School of Medicine). 6. Provide local notifications: Jeffrey Tok, 650-575-9884 If personnel exposed or injured: 1. Remove the injured/exposed individual from the area, unless it is unsafe to do so because of the medical condition of the victim or the potential hazard to rescuers. 2. Call 9-911 (or 286 in the School of Medicine) if immediate medical attention is required. 3. Call 725-9999 (or 286 in the School of Medicine) to report the exposure to EH&S. 4. Administer first aid as appropriate. 5. Flush contamination from eyes/skin using the nearest emergency eyewash/shower for a minimum of 15 minutes.
7 Remove any contaminated clothing. 6. Bring to the hospital copies of MSDSs for all chemicals the victim was exposed to. B. Non-Health Threatening Emergencies For non-health threatening injuries and exposures Call the Occupational Health Center at 725-5308 for more information and to schedule an Report #10-097, 10-27-10 Page 5 of 6 appointment. For hazardous material spills or releases which have impacted the environment (via the storm drain, soil, or air outside the building) or for a spill or release that cannot be cleaned up by local personnel: 1. Notify Stanford University responders by calling 725-9999 (or 286 in the School of Medicine). These services are available 24 hours a day, 7 days a week. 2. Provide local notifications: Jeffrey Tok, 650-575-9884 Identify the area management staff that must be contacted and include their work and home numbers.
8 This must include the principal investigator and may include the lab safety coordinator, facilities manager, and/or business manager. [PRECEDING GUIDANCE TEXT MAY BE DELETED] C. Small Spills/Local Cleanup: In the event of a minor spill or release that can be cleaned up by local personnel using readily available equipment (absorbent, available from EH&S in Small Spill Kit): 1. Notify personnel in the area and restrict access. Eliminate all sources of ignition. 2. Review the MSDS for the spilled material, or use your knowledge of the hazards of the material to determine the appropriate level of protection. 3. Wearing appropriate personal protective equipment, clean up spill. Collect spill cleanup materials in a tightly closed container. Manage spill cleanup debris as hazardous waste. 4. If greater than 30 ml, or if it will take longer than 15 minutes for you to clean up, immediately call EH&S at 725-9999 (or in the School of Medicine, x286) to report the spill, and notify your supervisor.
9 5. Submit online waste pickup request to EH&S. D. Building Maintenance Emergencies ( , power outages, plumbing leaks): Call Facilities Operations at 723-2281. #8 WASTE DISPOSAL n/a #9 TRAINING REQUIREMENTS General Training (check all that apply): General Training (check all that apply): General Safety & Emergency Preparedness (EHS-4200) Chemical Safety for Laboratories (EHS-1900) Compressed Gas Safety: EHS-1900, EHS-2200 Location Where Records Maintained: Rm 008, Nano Bldg Laboratory-specific training (check all that apply): Review of MSDS for other chemicals involved in process/experiment Review of this SOP Report #10-097, 10-27-10 Page 6 of 6 Other:__Review of Facility Safety Protocol and Checklist Location Where Records Maintained: Rm 008, Nano Bldg #10 PRIOR APPROVALS n/a