Transcription of Standard Proctor Compaction Test - UT Arlington – …
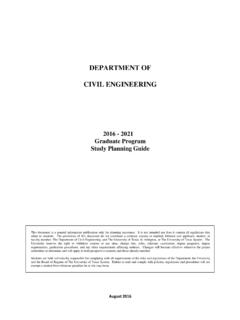
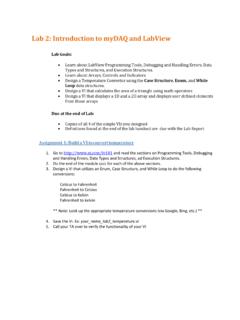
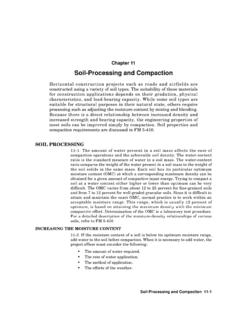
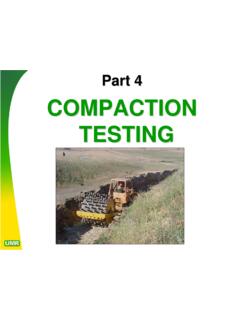
1 university of texas at Arlington Geotechnical Engineering Laboratory Test Procedure Standard and Modified Proctor Compaction Test Lecture Note 6 (Thursday 02-26-04). Definitions, Objectives and Applications (class notes). This page intentionally left blank Principles of Compaction Figure 1. Effects of Compaction on soil structure (Lambe, 1962). t G Gs w d = = s w =. 1+ w 1+ e wG s . 1+ . Sr . Figure 2. Standard Proctor Compaction test (Lambe, 1961). Standard Compaction Test Equipment 1. Proctor mould with a detachable collar assembly and base plate. 2. Manual rammer weighing kg and equipped to provide a height of drop to a free fall of 30 cm. 3. Sample Extruder. 4. A sensitive balance. 5.
2 Straight edge. 6. Squeeze bottle 7. Mixing tools such as mixing pan, spoon, trowel, spatula etc. 8. Moisture cans. 9. Drying Oven Test procedure 1. Obtain approximately 10 lb ( kg) of air-dried soil in the mixing pan, break all the lumps so that it passes No. 4 sieve. 2. Add approximate amount of water to increase the moisture content by about 5%. 3. Determine the weight of empty Proctor mould without the base plate and the collar. W1, (lb). (Row #1. of the table). 4. Fix the collar and base plate. (Ask your instructor regarding how to fill the mould and take the steps 5 and 6). 5. Place the first portion of the soil in the Proctor mould as explained in the class and compact the layer applying 25 blows.
3 6. Scratch the layer with a spatula forming a grid to ensure uniformity in distribution of Compaction energy to the subsequent layer. Place the second layer, apply 25 blows, place the last portion and apply 25 blows. 7. The final layer should ensure that the compacted soil is just above the rim of the Compaction mould when the collar is still attached. 8. Detach the collar carefully without disturbing the compacted soil inside the mould and using a straight edge trim the excess soil leveling to the mould. 9. Determine the weight of the mould with the moist soil W2, (lb). Extrude the sample and break it to collect the sample for water content determination preferably from the middle of the specimen.
4 10. Weigh an empty moisture can, W3, (g) and weigh again with the moist soil obtained from the extruded sample in step9, W4, (g). Keep this can in the oven for water content determination. 11. Break the rest of the compacted soil with hand (visually ensure that it passes US Sieve ). Add more water to increase the moisture content by 2%. 12. Repeat steps 4 to 11. During this process the weight W2 increases for some time with the increase in moisture and drops suddenly. Take two moisture increments after the weights starts reducing. Obtain at least 4 points to plot the dry unit weight, moisture content variation. 13. After 24 hrs recover the sample in the oven and determine the weight W5, (g).
5 14. Fill out the following table completely; Calculate rows 9 and 10, these two will give one point of the plot. Notice that; The modified Compaction procedure is similar to the above with a change in the compactive effort. The rammer used in the modified Compaction is a 10 lb with a height of drop of 18". Calculations and reporting the results Test # 1 2 3 4 5. 1. Weight of the mold with out the base and collar, W1, (lb). 2. Weight of the mold + moist soil, W2 (lb). 3. Weight of the moist soil, W2-W1, (lb). 4. Moist unit weight, = [(W2- W1)/(1/30)], (lb/ft3). 5. Moisture can number 6. Weight of moisture can, W3, (g). 7. Mass of can + moist soil, W4, (g). 8. Mass of can + dry soil, W5, (g).
6 9. Moisture content: w(%)= [(W4-W5)/(W5-W3)] x 100. 10. Dry unit weight of Compaction : d (lb/ft3) = t /[1+(w/100)].