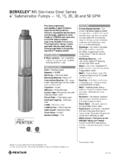
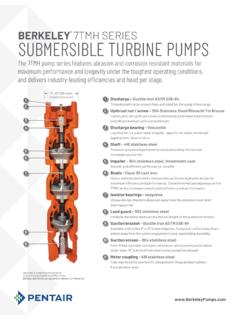
Transcription of Submersible Turbine - Berkeley Pumps
1 READ AND FOLLOW SAFETY INSTRUCTIONS!This is the safety alert symbol. When you see this symbol on your pump or in this manual, be alert to the potential for personal about hazards that will cause serious personal injury, death or major property damage if about hazards that can cause serious personal injury, death or major property damage if about hazards that will or can cause minor personal injury or property damage if label NOTICE indicates special instructions which are important but not related to hazards. Carefully read and follow all safety instructions in this manual and on safety labels in good condition.
2 Replace missing or damaged safety of Contents:Safety ..1 General ..1 Specifications ..2 Pre-Installation Procedures and Checks ..2-3 Installation ..3-4 Submergence ..4 Three-Phase Current Unbalance ..5 Service ..6 Electrical Tests ..6 Pump Disassembly ..7 Maintenance Inspection ..7 Preventive Maintenance ..8 Pump Disassembly/Assembly ..9-13 Repair Parts ..14 Troubleshooting ..15 Warranty ..16 GENERAL CONSIDERATIONSB efore installing your Submersible Turbine pump, review the following sure the well is clear of sand and abrasive material before installing pump.
3 Abrasive materials in the water cause component wear and reduce pump capacity and discharge pressure. Never use the pump to develop or clean the well. Permanent pump damage can result within the first few hours of the well casing is suspected of being crooked, check it with a gauge of identical length and diameter as the pump and motor with two lengths of pipe attached. Serious dam-age can result if the pump becomes lodged in a crooked sure the well can supply a high-capacity Turbine pump. The well should be deep enough to cover the pump unit with water, even at extreme pumping rates.
4 Typically, the pump should be submerged 10 to 20 feet below the lowest water level and at least 5 feet above the bottom of the entrained in the water reduces performance and will dam age the pump is designed to provide maximum efficiency under specific capacity and head conditions. Do not oper-ate it beyond specified controls and pump must match. Do not inter-change controls with other models. Serious damage can result to the unit if pump and controls do not control systems and pump units are repairable in the field. To avoid serious damage to the unit, use only parts obtained from authorized number of starts per day will influence motor and control component life (starters, relays, capacitors, etc).
5 Select pump size, tank size and control components for low est practical number of starts per day. Excessive cycling accelerates bearing, spline, and pump wear and con trol contact s/Operator s Manual Submersible Turbine 2013 Pentair Ltd. All Rights Reserved. BE215 (06/28/12)293 WRIGHT STREET, DELAVAN, WI 53115 : 888-782-7483 PREINSTALLATION PROCEDURES AND ChECKSE lectrical Splices and ConnectionsSplices must be waterproof. Make a strong mechanical bond between the motor leads and the cable to avoid high resistance at the connection.
6 A poor mechanical con nection, or a poorly wrapped splice, can cause motor problems and motor connecting the motor to the cable, perform a ground check to assure that the motor has not been damaged. Attach one end of an ohmmeter lead to any of the three motor leads and the other ohmmeter lead to the pump intake bracket. A new motor must have a resistance of 2 megohms or greater. If not, contact your dealer. Repeat for all three the cable and make the mechanical connections (Figure 1A) and splices as follows:1.
7 Cut motor leads and corresponding cable ends at 3-inch spacings to stagger connections for a smooth Cut connecting cable to match the motor leads. NOTICE: Match color coded wires, red to red, black to black, and white to When using a butt connector, expose bare wire for about 1/2 . When using stranded wire, expose about 1 of wire. NOTICE: Butt connectors may be used with solid wires through 8 AWG, or stranded wires through 10 Clean exposed ends of wire thoroughly with emery cloth or sandpaper to assure good electrical BUTT CONNECTORS (Figure 1A): Insert wires into con nector until insulation butts up against connector.
8 Crimp connector to wires with a pair of crimping pliers. Pull on cable to make sure the connection is solid and I: Frequency of StartsTable II: Weight of Pipe (Column)Table III: Weight of Cable per 1000 Ft. (lbs.)Table IV: Cable Wire Resistance Casing GPM Size 20 40 60 80 100 120 140 160 180 200 220 240 6 ID 8 ID } FPS 10 ID.
9 If flow rate past motor is expected to be less than rate shown in table, install a shroud around motor to force cooling flow past shell. To minimize erosion to shell if flow rate is expected to be more than 10 FPS (especially if sand is present), reduce flow through pump to reduce flow past shell. Table V: Cooling Flow Rates Past Submersible Motors In Feet Per Second (FPS) 6 Nominal Motor ( OD)Formula to find flow rate: FPS = GPM x .409 D12 D22 D1 = Casing inside diameter D2 = Motor outside diameter AWG Wire Size Resist (Ohms/Ft) 14.
10 0050 12 .0032 10 .0020 8 .0013 6 .0008 4 .0005 2 .0003 AWG 3-Phase 1-phase Size Nom. Dia. Weight Nom. Dia. Weight 12-3 .500 140 .487 130 10-3 .545 186.