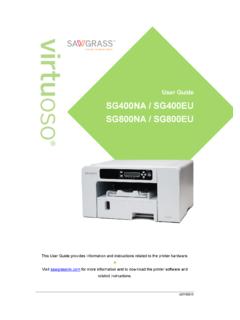
Transcription of Table of Contents | i
1 Table of Contents | i Table of Contents | ii Table of Contents Introduction Read This First .. 1 Manuals for this printer .. 1 Manuals 1 Important Notice .. 2 User's 2 Information about this Manual .. 4 Symbols .. 4 Note .. 5 Model-Specific Information .. 5 Available Units and Options for Each Model .. 6 About The Sawgrass SG500 and SG1000 .. 7 Guide to Components .. 7 Front View .. 7 Rear View .. 8 Left Side View .. 8 Options and Accessories .. 9 Option Tray SG500NA / SG500EU .. 9 Option Tray for SG1000NA / SG1000EU .. 10 Bypass Tray for SG500NA / SG500EU .. 10 Bypass Tray for SG1000NA / SG1000EU .. 11 Control Panel.
2 12 Turning On/Off the Power .. 13 Turning on the power .. 13 Table of Contents | Turning off the power .. 14 Setup and Installation .. 15 Setup Procedure .. 15 Checking the Installation Area .. 20 Installation Area .. 20 Checking the power source .. 23 Checking the Supplied Items and Unpacking the printer .. 24 Attaching and Detaching Options .. 26 Attaching and Detaching the Option 26 Attaching and Detaching the Bypass Tray .. 25 Loading Sublimation Transfer Paper .. 27 Loadable Paper Sizes .. 27 Handling and Storage Precautions .. 28 Loading Paper .. 29 Loading Paper into Tray 1-3 .. 29 Extending the Paper Tray to Load Paper.
3 31 Installing the Ink Cartridges .. 34 Plugging in the Power Cord and Turning the Power On .. 36 Connecting the printer .. 38 Confirming the Connection Method .. 38 USB Connection .. 38 Ethernet Connection .. 39 How to change the LAN type .. 41 How to connect using SSID Auto Search .. 42 How to connect using push button method .. 43 How to connect using PIN code method .. 45 Using the Control Panel to Make printer Settings .. 47 Overview of Settings .. 47 Table of Contents | Using the [Print Features] Menu .. 49 Using the [List/Test Print] Menu .. 49 Using the [System] Menu .. 50 Nozzle Check .. 51 Head-cleaning .. 52 No-fuss head cleaning.
4 53 Head-flushing .. 54 Head Position .. 55 Adjust Paper 57 Registration .. 59 Using the [System Settings] Menu .. 61 Using the [Tray Paper Settings] Menu .. 62 Printing a Configuration Page .. 62 Interpreting the Configuration Page .. 63 Changing the Sleep Mode Timer .. 63 Setting the Date and Time .. 64 Date setting .. 64 Time setting .. 65 Time zone setting .. 66 De-condensation .. 67 Using the [Interface] Menu .. 68 Changing the [Interface] Menu .. 69 Precautions When Using a Networked printer .. 71 Using the [Language] Menu .. 72 Software .. 68 System Requirements .. 68 Design Software Requirements .. 69 Download, Install and Configure Software.
5 69 Table of Contents | Monitoring and Configuring the printer .. 70 Using Web Image Monitor .. 70 Displaying Top Page .. 71 Menu .. 72 Logging in Using Web Image Monitor .. 72 Changing the printer Settings .. 73 Maintenance .. 76 Ink Cartridges .. 76 Checking the Remaining Ink .. 76 Replacing an Ink Cartridge .. 77 Handling Ink Cartridges .. 78 Waste Collection Unit .. 80 Checking the Waste Ink Level .. 80 Replacing a Waste Collection Unit .. 81 Cleaning .. 91 Cleaning the Power Cable Plug .. 91 Moving .. 92 Moving a Short Distance .. 92 Moving a Long Distance .. 93 Disposing .. 94 When Not Using for a Long Period of Time.
6 94 Troubleshooting .. 95 Canceling Printing .. 95 Canceling Printing Using the [Job Reset] Key .. 95 Canceling Printing from the Windows Taskbar .. 97 Canceling a Print Job from the Macintosh Print Job Queue Window .. 97 Printing Does Not Start .. 97 Paper Is Not Fed or Delivered Normally .. 98 Table of Contents | Paper Jam .. 99 Using the [Form Feed] selection Key to Remove Jammed Paper .. 100 Removing Paper Jammed in Tray 1 .. 101 Paper Jam in Tray 2/3 .. 102 Removing Paper Jammed in the Bypass Tray .. 103 Removing Paper Jammed under the Top Cover .. 104 Opening the Rear Cover to Remove Jammed Paper .. 106 Removing Paper Jammed in Tray 2/3.
7 107 Opening the Rear Unit Cover to Remove Jammed Paper (SG500NA/SG500EU) .. 108 Poor Print Quality .. 109 Prints are Unsatisfactory .. 109 Colors are not correct .. 110 Image Position is not Correct or Only a Partial Image is Printed .. 111 Error & Status Messages on the Display .. 112 Error Messages .. 112 Errors Displayed by the Web Image Monitor .. 116 No Paper/Tray Not Detected (Tray 1) .. 117 No Paper/Tray Not Detected (Tray 2/3) .. 117 No Paper/Tray Not Detected (Bypass Tray) .. 117 Paper Size Mismatch/Paper Type Mismatch (Tray 1) .. 118 Paper Size Mismatch/Paper Type Mismatch (Tray 2/3) .. 118 Paper Size Mismatch/Paper Type Mismatch (Bypass Tray).
8 118 Paper Size Mismatch/Paper Type Mismatch (Auto Tray Select) .. 118 Cover 119 Cover Open / Ink Cartridge(s) Not 119 Cartridge Almost Empty .. 121 Cartridge Empty .. 121 Used Cartridge .. 122 Waste Collection Unit Not Detected .. 122 Waste Collection Unit Almost Full .. 123 Table of Contents | Waste Collection Unit 123 Used Waste Collection Unit .. 123 Out of Printable Temperature Range .. 123 printer Error .. 124 Network Interface Error .. 124 Maintenance Failed .. 124 Cannot Recover Error Page .. 124 Where to Inquire .. 125 Recommended Consumables .. 125 Options .. 125 Introduction Read This First | 1 Introduction Read This First Manuals for this printer Read this manual carefully before using this printer .
9 Refer to the sections that are relevant to what you want to do with the printer . Safety Information This booklet contains important information about using the printer safely and correctly. Be sure to read this before using the printer . Quick Installation Guide This guide briefly explains how to unpack and install the printer . User Guide (PDF) This guide explains in detail how to install and use the printer . The guide also provides instruction on how check and change settings on the printer itself, and how to make and check printer settings using a Web browser. It contains basic troubleshooting procedures, such as those related to printing and paper jams, and important information about consumables such as paper and ink.
10 We recommend this guide be installed on the computer so it can be easily referred to. Manuals List Manual Name Printed Manuals Provided PDF Manuals Provided Quick Installation Guide Yes No User Guide No Yes Safety Information Yes No Introduction Read This First | 2 Important Notice In no event will Sawgrass be liable for direct, indirect, special, incidental, or consequential damages as a result of handling or operating the printer . For good output quality, Sawgrass recommends that only genuine Sawgrass ink from Sawgrass be used. Sawgrass shall not be responsible for any damage or expense that might result from the use of parts other than genuine parts from Sawgrass with the printer .