Transcription of Table of Contents - Innova
1 Table of Contents i SAFETY PRECAUTIONS SAFETY FIRST! .. 1 SCAN TOOL CONTROLS CONTROLS AND INDICATORS .. 2 DISPLAY FUNCTIONS .. 4 BATTERY REPLACEMENT .. 5 USING THE SCAN TOOL CODE RETRIEVAL PROCEDURE .. 7 THE SYSTEM MENU .. 12 VIEWING OEM ENHANCED DTCs (except Ford/Mazda) .. 12 VIEWING OEM ENHANCED DTCs (Ford/Mazda only) .. 13 VIEWING ABS DTCs .. 15 VIEWING SRS DTCs .. 16 VIEWING TPMS DTCs .. 17 NETWORK TEST .. 19 ERASING DIAGNOSTIC TROUBLE CODES (DTCs) .. 21 ABOUT REPAIRSOLUTIONS 2 .. 22 CONNECTING TO BLUETOOTH / WIFI .. 23 LIVE DATA MODE VIEWING LIVE DATA.
2 25 CUSTOMIZING LIVE DATA (PIDs) .. 26 RECORDING (CAPTURING) LIVE DATA .. 27 LIVE DATA PLAYBACK .. 30 ADDITIONAL TESTS THE MAIN 32 SYSTEM/ACTUATOR TESTS .. 33 PERFORMING SERVICE RESETS .. 79 PERFORMING A SERVICE CHECK .. 87 HYBRID BATTERY CHECK, BATTERY ALTERNATOR TEST 87 SYSTEM TEST MENU .. 88 BATTERY/ALTERNATOR MONITOR .. 91 VIEWING DRIVE CYCLE PROCEDURES .. 94 USING THE DLC LOCATOR .. 95 VIEWING VEHICLE INFORMATION .. 95 VIEWING THE FIRMWARE VERSION .. 97 THE TOOL LIBRARY .. 97 TOOL SETTINGS .. 101 USING SCAN TOOL MEMORY VIEWING DATA IN MEMORY .. 103 WARRANTY AND SERVICING LIMITED ONE YEAR 105 SERVICE PROCEDURES .. 105 Safety Precautions SAFETY FIRST! 1 SAFETY FIRST!
3 This manual describes common test procedures used by experienced service technicians. Many test procedures require precautions to avoid accidents that can result in personal injury, and/or damage to your vehicle or test equipment. Always read your vehicle's service manual and follow its safety precautions before and during any test or service procedure. ALWAYS observe the following general safety precautions: When an engine is running, it produces carbon monoxide, a toxic and poisonous gas. To prevent serious injury or death from carbon monoxide poisoning, operate the vehicle ONLY in a well-ventilated area. To protect your eyes from propelled objects as well as hot or caustic liquids, always wear approved safety eye protection.
4 When an engine is running, many parts (such as the coolant fan, pulleys, fan belt etc.) turn at high speed. To avoid serious injury, always be aware of moving parts. Keep a safe distance from these parts as well as other potentially moving objects. Engine parts become very hot when the engine is running. To prevent severe burns, avoid contact with hot engine parts. Before starting an engine for testing or troubleshooting, make sure the parking brake is engaged. Put the transmission in park (for automatic transmission) or neutral (for manual transmission). Block the drive wheels with suitable blocks. Connecting or disconnecting test equipment when the ignition is ON can damage test equipment and the vehicle's electronic components.
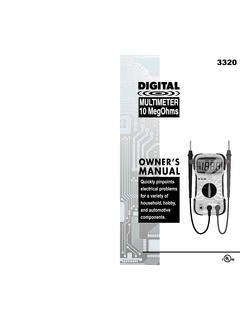
5 Turn the ignition OFF before connecting the Scan Tool to or disconnecting the Scan Tool from the vehicle s Data Link Connector (DLC). To prevent damage to the on-board computer when taking vehicle electrical measurements, always use a digital multimeter with at least 10 megOhms of impedance. Fuel and battery vapors are highly flammable. To prevent an explosion, keep all sparks, heated items and open flames away from the battery and fuel / fuel vapors. DO NOT SMOKE NEAR THE VEHICLE DURING TESTING. Don't wear loose clothing or jewelry when working on an engine. Loose clothing can become caught in the fan, pulleys, belts, etc. Jewelry is highly conductive, and can cause a severe burn if it makes contact between a power source and ground.
6 NLDRP Scan Tool Controls CONTROLS AND INDICATORS 2 CONTROLS AND INDICATORS Figure 1. Controls and Indicators See Figure 1 for the locations of items 1 through 22, below. 1. ERASE button - Erases Diagnostic Trouble Codes (DTCs), and Freeze Frame data from the vehicle s computer, and resets Monitor status. 2. SYSTEM MENU button When pressed, displays the System Menu. 3. DTC/FF button - Displays the DTC View screen and/or scrolls the LCD display to view DTCs and Freeze Frame data. 4. POWER/LINK button - When not connected to a vehicle, turns the Scan Tool On and Off (press and hold for 3 seconds).
7 When connected to a vehicle, links the Scan Tool to the vehicle s PCM. 5. M button When pressed, displays the Main Menu. 6. LD button When pressed while linked to a vehicle, places the Scan Tool in Live Data mode. 7. UP button When in MENU mode, scrolls UP through the menu options. When LINKED to a vehicle, scrolls UP through the current display screen to display additional data. 8. ENTER button - When in MENU mode, confirms the selected option or value. 9. DOWN button - When in MENU mode, scrolls DOWN through the menu options. When LINKED to a vehicle, scrolls DOWN through the current display screen to display additional data. 22211613246571314111589172018191210 Scan Tool Controls CONTROLS AND INDICATORS 3 10.
8 Left Soft Key - selects the associated option shown on the display (Yes/No, Previous/Next, etc). 11. Right Soft Key - selects the associated option shown on the display (Yes/No, Previous/Next, etc). 12. GREEN LED - Indicates that all engine systems are running normally (all Monitors on the vehicle are active and performing their diagnostic testing, and no DTCs are present). 13. YELLOW LED - Indicates there is a possible problem. A Pending DTC is present and/or some of the vehicle s emission monitors have not run their diagnostic testing. 14. RED LED - Indicates there is a problem in one or more of the vehicle s systems. The red LED is also used to show that DTC(s) are present. DTCs are shown on the Scan Tool s display. In this case, the Malfunction Indicator ( Check Engine ) lamp on the vehicle s instrument panel will light steady on.
9 15. Display - Color LCD display shows menus and submenus, test results, Scan Tool functions and Monitor status information. See DISPLAY FUNCTIONS, following, for more details. 16. CABLE - Connects the Scan Tool to the vehicle s Data Link Connector (DLC). Items 17 through 22 are available with purchase of the optional OBD1 Adaptor Kit and OBD1 firmware upgrade. 17. CHRYSLER Connector Cable Adaptor - Installs on cable (item 14) when connecting to a Chrysler OBD1 Data Link Connector. 18. FORD Connector Cable Adaptor - Installs on cable (item 14) when connecting to a Ford OBD1 Data Link Connector. 19. GM Connector Cable Adaptor - Installs on cable (item 14) when connecting to a GM OBD1 Data Link Connector. 20. HONDA Connector Cable Adaptor - Installs on cable (item 14) when connecting to a Honda OBD1 Data Link Connector.
10 21. OBD II Cable - Connects the scan tool to the vehicle's Data Link Connector (DLC) when retrieving codes from OBD II systems. 22. TOYOTA Connector Cable Adaptor - Installs on cable (item 14) when connecting to a Toyota OBD1 Data Link Connector. Scan Tool Controls DISPLAY FUNCTIONS 4 DISPLAY FUNCTIONS Figure 2. Display Functions See Figure 2 for the locations of items 1 through 15, below. 1. I/M MONITOR STATUS field - Identifies the I/M Monitor status area. 2. Monitor icons - Indicate which Monitors are supported by the vehicle under test, and whether or not the associated Monitor has run its diagnostic testing (Monitor status).