Transcription of Take a Guess - sciencespot.net
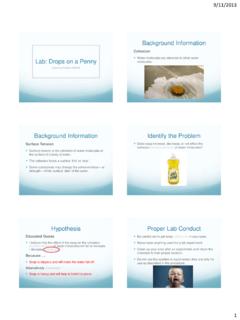
1 Name _____Take a Guess : How many drops of water can fit on one side of a penny ? _____ Part A: Perform a CONTROL test for comparison with later results. Step 1: Rinse a penny in tap water and dry 2: Place the penny on paper 3: Use an eye dropper to place drops of WATER on the penny (one at a time) until ANY amount of water runs over the edge of the 4: Record the number of drops for that trial in the Steps 1 - 4 three more times before calculating your B: Perform tests with the TESTING LIQUID. Step 1: Start with a clean penny . Rinse the penny in tap water and dry completely. Be sure to remove as much residue as possible - without using soap!Step 2: Hold the penny with the tweezers provided, then dip it into the TESTING LIQUID.
2 Allow extra liquid to drip off the penny into the container before proceeding to the next 3: Place penny on dry spot on a paper towel. Place drops of WATER on the penny (one at a time) until ANY amount of water runs over the edge of the 4: Record your observations and the number of drops for that trial in the table. Repeat Steps 1 - 4 three more times before calculating the average. Part C: Answer each question related to the experiment. 1. Explain your results from both parts of the experiment in terms of cohesion and surface tension. 2. How do your results compare to the other groups in your class? Provide at least 2 possible reasons for any similarities and differences you Trimpe 1999 1 Trial 2 Trial 3 Trial 4 AverageTrial 1 Trial 2 Trial 3 Trial 4 AverageDrops on a penny Teacher Notes Materials.
3 Each group (2-3 students) will need one penny , an eyedropper, pair of tweezers, sample of testing liquid (soap). You will also need to provide a clean water source for rinsing pennies (sink or bucket of water) and plenty of paper towels. NOTES: I place the testing liquids (soap) into plastic film canisters with tight fitting lids. I keep all the materials for a group in old Cool Whip containers. Each group must clean up their lab area and materials before returning the container to me at the end of class. This makes it easy to repeat the lab in other class periods as well as reduces my prep time the following school year! If you want to add a bit of variety, provide different brands (or types) of soap for each group.
4 At the end of their experiment, students can compare which brand worked the "best". I have done this in the past and label the film canisters with letters to indicate the different brands (Dawn = D, Ivory = I, etc.). When the samples run low, I know which brand to use for ..(1) Cohesion and Surface Tension (optional if your students already know these concepts)I start the lesson by discussing the definitions of cohesion and surface tension - see pages 4-5 of this download for a student worksheet and master key. I copy the definitions page on the back of the lab page so students have their own copy to complete. For the paperclip activity, I fill several small clear plastic glasses with water (leaving a little bit of room at the top) and place them at various lab tables throughout the room to make sure everyone can see one or more of the glasses.
5 I ask the students to Guess the number of paperclips they think will fit into the glass before the water runs over the edge. I add a little more water to the glasses and ask them if they d like to change their guesses, which many change to a smaller number. I add enough water to make the glasses as full as possible with the water bulging over the top. I give the students a chance to change their guesses one last time! By this time most students have a Guess that is less than 10 or so paperclips - unless you have a few who have seen this demo before! I have one student at each station start adding paperclips (small ones) one at a time to the glass until the water starts to run over the rim of the glass.
6 They must do it carefully and make sure that only the paperclip enters the water and not the tip of a finger. Students will also need to make sure they don t bump the lab tables! Some years we are able to get 100 or more small paperclips into the glass before it runs over! When the demo is over, I relate it to the definitions discussed at the start of the lesson. NOTE: You can also give the students a chance to try this demo again after they have completed the penny lab. Add one or two drops of soap to the cup of water and see how this affects the number of paperclips it will hold.(2) drops on a penny labIntroduction - I pass out the lab materials and safety goggles. We discuss the directions and safety rules that relate to this experiment (see list below).
7 Students must first perform a control test with the plain penny before coating the penny in the testing liquid (soap). A word of advice .. make sure the students understand that they are to put drops of water on the pennies that have been dipped in soap. They should not put drops of soap on the pennies! Each year I have a few groups who do not read the directions carefully and start putting soap on the pennies a drop at a time. Safety Rules: Always wear safety goggles when experimenting with chemicals (soap). Never taste chemicals (or other substances) used for a lab experiment. Keep lids on all containers when not in use. Clean up spills immediately. If any substance gets into your eyes or in a cut on your skin, notify your teacher and follow his/her directions.
8 Wash your hands before and after an experiment. Clean up your lab area and materials after an experiment and return materials to their proper location.(You might also want to emphasize that eyedroppers are not to be used as mini water guns!)T. Trimpe 1999 - As students are performing the experiments, I move around the room to supervise their efforts and remind students to follow directions or safety rules whenever needed. I also ask students to share their observations and answer questions they may have (or help them figure out the answers on their own.) I also ask students to relate their observations to the paperclip/glass of water demo. They should be able to observe a bubble of water on the plain penny that is similar to the one formed on the glass of - After all the groups have completed the experiment, I have one person from each group write their results on the chalkboard.
9 Each group must provide the results for individual trials as well as the average. The groups spend time comparing their data to the ones displayed on the board and complete the questions in Part C on the lab worksheet. Part C Answer Key -1. Explain your results from both parts of the experiment in terms of cohesion and surface tension. Answers will vary; however, students should attempt to use the terms and/or definitions in their answers. For example, students should observe that the bubble of water formed during the control portion of the test was larger and they were able to add a lot of drops of water. The bubble formed during Part B was not as large (or they were not able to get one to form at all) and they were not able to add many drops before the water ran over the edge.
10 These observations/results would indicate that the surface tension in Part A was stronger than in Part B. The students should conclude that the soap reduces the cohesive force of water, which in turn reduces its surface tension. The reduced surface tension resulted in a fewer number of drops of water for Part How do your results compare to the other groups in your class? Provide at least 2 possible reasons for any similarities and differences you will vary depending on the data for individual groups. Most groups should have results that show a larger number of drops on average for Part A than Part B. To help my students identify experimental errors and discrepancies in data, I facilitate a class discussion by asking the question, Shouldn t we have the same results since we all followed the same directions?