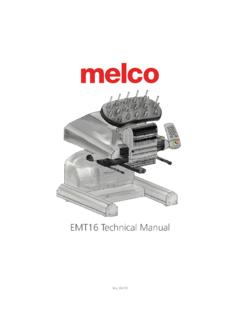
Transcription of Technical Manual - Melco Tech
1 Technical ManualRev 1010172 of 266 ContentsCopyright Notice 9 About This Manual 10 Scope of Manual 11 Standard Conventions and Definition of Terms 12 Regulatory Notices 13 Best Maintenance Repair Practices 14 Maintenance Philosophy: 14 Grounding and Static Electricity 17 Machine Orientation 19 Safety Issues 20 Warranty Considerations 21 Explanation of Machine Symbols 22 Keypad Operations 23 Keypad Buttons 26 Trace Button 26 Arrow Up Key (Y-Axis Back) 26 Color Change/Needle Case 26 Arrow Left Key (X-Axis Left) 26 Arrow Right Key (X-Axis Left) 27 Center Key 27 Adjustment Key 27 Arrow Down Key (Y-Axis Forward) 27 Hoop Key 28 Step Back Key 28 Step Forward Key 28 Laser Key 28 Start Button 28 Stop Button 29 Emergency Stop Button 29 LED Indicator 30 Specifications 31 Technical Specifications 33 Torque Specifications 343 of 266 Software Maintenance Menus 36 Special Tools and Fixtures 37 General Maintenance 38 Cleaning 38 Lubrication Schedule and Specifications 40 Maintenance Schedule 40 Daily Maintenance 42 Weekly Maintenance 43 Monthly Maintenance 45 Quarterly Maintenance 51 Thread Cutter Blade Replacement 61 Centering The
2 Needle Plate 62 Head Up Position Adjustment 63 Mechanical Head-Up Position 63 Adjusting Head-Up (Z-Home) Position: 64 Hook Timing Inspection/Adjustment 65 Rotational Hook Timing Inspection Procedure 65 Needle To Hook Gap Inspection Procedure 67 Adjustment Procedure 67 Thread Clamp Replacement 71 Thread Clamp PCB Replacement 72 Thread Clamp Harness Replacement 72 Laser Light - Adjustment 74 Needle Depth 76 Setting the Needle Depth by Eye 76 Presser Foot Height 77X/Y Home Adjustment 78 Home Adjustment Procedures: 78X-Cable Tension 81 Determining if an X-Cable is Set to Required Specifications 81 Adjusting an X-Cable that is Tensioned Outside the Required Specifications 82Y-Axis Timing Belt Tensioning 84Y-Axis Belt Tension Inspection 84Y-Axis Belt Tension Adjustment 85 When Belt Tensions are Correct 85Y-Motor Timing Belt Tensioning 86 Inspection and Adjustment 864 of 266Z-TIMING: Bottom Center & Head-Up 87 Bottom Center (Z Timing) 87Z-Drive Belt Tensioning 92 Inspection and Adjustment 92Z-Home Adjustment 94 Procedure to Identify the Closest Needle 95 Needle Case Calibration 98 Fine calibration procedure: 98 Rough Calibration Process.
3 99 Rotary Hook Support Adjustment 101 Inspection Procedure 101 Adjustment Procedure 103 Color Change, Take-Up, Feeder Housing Assembly 105 Replacement Procedure for Entire Color Change/Take-Up/Feeder Assembly: 105 Color Change Linear Actuator Replacement 107 Replacement Procedures: 107 Thread Feeder Gear Replacement 110 Replacement Procedures: 110 Thread Feeder Optical Sensor PCB Replacement 112 Replacement Procedure: 112 Thread Feeder Radial Bearing Replacement 113 Replacement Procedures: 113 Thread Feeder Stepper Motor Assembly 114 Replacement Procedure: 114 Laser Pointer Assembly 116 Replacing the laser assembly: 116 LED Cluster PCB Replacement 118 Presser Foot Assembly Replacement 119 Reciprocator 122 Replacement Procedure 122 Take-Up Lever Cam Replacement 124 Replacement Procedure 124Z-Drive Repair and Adjustment 127Z-Drive Belt Replacement and Tensioning 127Z-Home Sensor PCB Replacement 1295 of 266Z-Belt Idler Assembly Replacement 131Z-Motor Assembly 132 Clearing Thread from Thread Feeder Roller 135 Color Change Spindle Mounting Bracket Replacement 137 Grabber Blade Replacement 139 Needle Case Removal 142 Needlecase Installation 144 Grabber Stepper Motor Replacement 146 Take Up Lever Replacement 147 Thread Feeder (replacement and adjustment)
4 149 Thread Sensor Assembly Replacement 152 Bobbin Shaft Overhaul 154 Rotary Hook Replacement 156 Main PCB 158 Power Input Assembly Replacement 160 Power Input Assembly Removal: 160 Power Input Assembly Component Replacement: 161 Power Input Assembly Installation: 166 User Interface Assembly Replacement 167 Harnesses 170 Color Change Motor Harness 171 Ethernet Harness 174 Grabber/Threadfeed Motor Harness 176 Grabber/Threadfeed/CC Home Harness 179 Laser Harness 182 LED Cluster Harness 184 Replacement Procedures: 184 Thread Break Harness 188Z Home Harness 1916 of 266 User Interface Harness 193X/Y Home Harness 195 Bearing Block Assemblies 197X-Beam Assembly 199X-Carriage Assembly 201X-Drive Cable Removal 203X-Drive Cable Installation 205X-Drive Motor Replacement 209X-Home Optical Switch Assembly Replacement 212X/Y Home PCB Replacement 214Y-Drive Belt Replacement 216Y-Motor Assembly 218 Troubleshooting 220 Grabber Function Test 221 Final Functional Tests 223 Optical Sensors Test 225 Power Supply Test 226 Servo Motor Resistance Test 228 Stepper Motor Resistance Test 229 Servo Motor Resistance Test 230 Test Designs 231 Thread Tension Test 232 Belt Tension Test 232 Long Stitch Test 233 Looping Test 233 Orientation Test 234 Registration Test 234 Small
5 Alphabet Test 234 Thread Break Sensor Test 235 Thread Break Test 235 Trimmer Test 2367 of 266 Electrical Failures 237 Color Change Failures 237 LED Cluster Assembly Failures 238 Mechanical Failures 239 False Thread Breaks 239 Loose/Looping Stitches 239 Needle Breaks 239 Skipped Stitches 240 Thread Breaks 241 Miss-Starts 245 Cap Frame Issues 245 Miscellaneous Problems 246X-Axis Failures 247Y-Axis Failures 248Z-Axis Failures 249 Software Error Messages 250 DSP Command Errors 251 Can t Initialize Stepper Motors 251No Trace Data 251XY Home Not Set 251 Goto Func Error 252 Hoop Center Error 252 Stepper Motor Time Out and Index Errors 252E-Stop Engaged 253 Servo Motor Errors (Move Time Out, Tracking, and Over Current Errors)
6 2558 of 266 Critical Measurements 257 Introduction 257 Needle Drive Stud to Reciprocator Fit 258 Hook Timing 258 Upper Arm to Lower Bed Alignment 258 Needle to Hook Gap 259 Hook to Rotary Support Gap 259 Take-Up Lever Stroke 259 Take-Up Lever Fit to Shaft 260 Take-Up Lever Endplay 260 Cam Follower Preload 260 Pull Force on Take-Up Lever 261 Color Change Lead Screw 261 Color Change Housing Location 262 Bobbin Tension 262 Presser Foot Adjustment at Bottom Dead Center 263 Thread Feed Forward 200 264 Needles 264 Thread Clean Thread Path 265Z-Belt Tension 265X-Cable Tension 266Y-Axis Timing Belt Tension 266 Proper Lubrication of Moving Parts 2669 of 266 Copyright Notice Copyright Melco , 2017 ALL RIGHTS RESERVED.
7 No part of this publication may be reproduced, stored in a retrieval system, or transmitted in any form or by any means (electronic, mechanical, photocopying, recording or otherwise) without prior written approval from the author. The author reserves the right to revise this publication and to make changes in it at any time without obligation of the author to notify any person or organiza-tion of such revisions or precautions have been taken to avoid errors or misrepresentations of facts, equipment, or products. However, the manufacturer does not assume any liability to any party for loss or damage caused by errors or machine technology is protected by - but not limited to - the following patents: Pat. US 6,445,970 B1 Pat. US 6,736,077 B2 Pat.
8 US 6,732,668 B2 Pat. US 6,823,807 Pat. US 6,871,905 Pat. US 6,983,182 B2 Pat. US 7,513,202 Pat. US 7,308,333 B2 Pat. US D474,785 S Pat. CH 693569 A5 Pat. US 8,851,001 B2 Other patents pending 10 of 266 About This ManualThis Manual contains instructions on repairs and adjustments to the embroidery machine, in addition to other Technical you do not fully understand any information in this Manual , you are advised to contact your local au-thorized Technical support provider for of 266 Scope of ManualThis Technical Manual is a guide to performing repairs and adjustments that go beyond routine operator these procedures are best understood and performed by professional service technicians in conjunction with specific factory Technical training, much of the information in this Manual is a useful reference for others who might possess appropriate Technical aptitude and skills.
9 Note: This Manual is written for individuals with adequate knowledge, Melco certified training or equivalent and experience in the use of tools required. No attempt is made to explain how to use tools required to make repairs to the machine other than graphical depictions within the procedures Technical Manual specifies that certain functions are to be performed only by authorized service tech-nicians. This is because specialized training and/or special tools or fixtures are required in order to per-form the function correctly. Performing repairs to the machine may result in damaged components, poor machine performance, and potential injury to the technician or operator. If you do not fully understand any information in this Manual , contact Technical support for assistance before performing the procedure.
10 The Technical support staff are professional service technicians trained on this equipment. They have acquired Technical expertise through experience and Technical training. Additionally, certified equipment technicians routinely receive up to date servicing information to further enhance their product Technical Manual is presented in six sections:1. Introduction to the Manual and various service requirements2. General information and specifications containing all of the engineering settings and specifications you need to know when adjusting the machine3. Lubrication schedules and procedures4. Service and repair - detailed instructions to service and repair the machine5. Options - maintenance and repair of optional equipment6. Troubleshooting - a troubleshooting guide for problems commonly encountered with the of 266 Standard Conventions and Definition of TermsThroughout this Manual abbreviations and specific terms may be used.