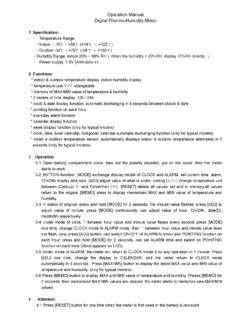
Transcription of TMD90A Dual Input Digital Thermometer - Amprobe
1 TMD90A . Visit for dual Input Digital Catalog Thermometer Application notes Product specifications User manuals User Manual Mode d'emploi Bedienungshandbuch Manuale d'Uso Manual de uso Please Recycle TMD90A . dual Input Digital Thermometer User Manual Mode d'emploi Bedienungshandbuch Manuale d'Uso Manuel de uso PN 2099366. March 2007. 2007 Amprobe Test Tools. All rights reserved. Printed in China 1 3/23/2007 3:22:47 PM. 2 3/23/2007 3:22:49 PM. TMD90A . dual Input Digital Thermometer User Manual English 3 3/23/2007 3:22:49 PM. 4 3/23/2007 3:22:49 PM.
2 TMD90A dual Input Thermometer Contents Safety Information 2. Symbols Used in this Manual 2. Introduction 3. Display and Controls 4. Functions 5. Auto Power Off (Sleep Mode) 5. Change Thermocouple Type 5. Using the Pushbuttons 6. RS-232 Output 7. Troubleshooting 8. Replacing the Battery 9. 9 V ac Adapter 9. Repair 10. Limited Warranty and Limitation of Liability 11. Thermocouple Definitions 11. Specifications 12. Additional Specifications 12. 1. 5 3/23/2007 3:22:49 PM. Safety Information Place ONLY thermocouples in the thermocouple Input . Make sure your meter is configured for the thermocouple type to be used.
3 Be sure the thermocouple you use can withstand the temperature extreme it will be exposed to. Properly maintain the meter and calibrate it regularly Use the Thermometer only as specified in this manual, or the protection provided by the Thermometer might be impaired. Replace the battery as soon as BAT appears to avoid false readings that can lead to electric shock and injury. XWWarning Supplied thermocouple is not intended for contact with liquids or live electrical circuits. Symbols Used in this Manual X Dangerous Voltage W Refer to the manual T Double insulated J Earth Ground P Complies with EU.
4 Directives 2. 6 3/23/2007 3:22:49 PM. Introduction The Model TMD90A dual Input Thermometer accepts Type K, J, T, R, S, and E thermocouples. With a triple display screen to view measurement results and relative time clock. Optional RS-232 software and cable allows collection of real time data to a PC for further analysis or reports. TMD90A displays all LCD (liquid crystal display) segments for approximately 3 seconds when it is first turned on and then provides information on any connected thermocouples. Numerous viewing combinations are available.
5 The LCD is divided into three distinct sections; one large (Primary) top screen and two smaller bottom screens (Secondary and Relative Clock). The three display areas are continually updated with the temperature measurements and relative time information. There are several options regarding how and what information is presented on the LCD. Temperature readings are easily toggled between Fahrenheit and Celsius. A backlight illuminates the LCD for viewing in low light areas. The A button will freeze the upper display data while allowing the lower displays to continue updating Information.
6 A low battery indicator is also displayed as appropriate. The meter defaults to the last mode selected when turned off. Note: If no thermocouples are connected, four dashes(----) appear in the temperature display. Box Contents TMD90A Thermometer 1. Type K thermocouple probe 2. Users Manual 1. Hard plastic carry case 1. 9 V battery 1. 3. 7 3/23/2007 3:22:49 PM. Display and Controls 10 (T1) 10 (T2). 2 3. 4. 1. 5. 7 6. 8. 11. 9. 6. 12. 13. A REC Relative clock is active for recording min and max temperature occurences or for time stamp purposes.
7 B MAX/MIN Maximum or minimum temperature measurements are being monitored. C HOLD/REL Freezes primary display or establishes a relative zero for the primary display information. D BAT Low battery indicator. E C F Displays temperature in either degrees Celsius or degrees Fahrenheit. F T1-T2 Toggles screen information from T1 (Primary)/ T 2. (Secondary) to T2 (Primary) / T1 (Secondary) ,then to T 1-T 2. (Differential) on Primary and alternating T1/T2 temperatures on Secondary display. G Primary data display. Displays T1, T2, or T1-T2( temperature differential -TD ) or a relative zero of T1, T2, or TD.
8 H KJTRSE Selects proper Input reference for thermocouple in use. T1 and T2 must be the same thermocouple type. I Secondary data display. Displays T2,T1 or T1 and T2. temperatures. J Thermocouple Input . Positive and negative polarized plugs for the thermocouple probes used ( Blade type ); T1 on the left,T2 on the right. K Relative clock display. Displays time in hours, minutes, and seconds (HHMMSS) when REC is pressed and the relative time that MIN or MAX data was recorded. L RS-232 output port. Optional software and cable PN. TM-SWA. M AC to DC converter Input .
9 4. 8 3/23/2007 3:22:49 PM. WCaution Read all Safety Information before using this Thermometer . Functions Auto Power Off (Sleep Mode). The TMD90A shuts off automatically approximately 20 minutes after being turned on. For recording or operating over longer periods of time you can disable the sleep mode by pressing D and A. simultaneously while powering on. When "n" then appears in the center of the screen you can release the On button. Auto power off is disabled when you turn off the meter. Change Thermocouple Type Press E and D simultaneously for 2 or more seconds until K.
10 Appears. Press the C button the type of probe cycles through K. (the default), J, T, R, S, and E types. The current mode is displayed on the left side of the LCD. press E, an "S" will appear in the center of the screen. 5. 9 3/23/2007 3:22:49 PM. Using the Pushbuttons The display defaults to the mode last used. For your convenience the meter defaults to the settings used during the last operation. REC. HOLD C F. REL. T 1 T2. 6. 10 3/23/2007 3:22:49 PM. Use the pushbuttons to control operation of the TMD90A . The table assumes the TMD90A has been powered on with two thermocouples installed and is set to display (default) T1 on the primary display, type K thermocouple, and Record off.