Transcription of Trouble Shooting Maintenance Guide - Associated Equip
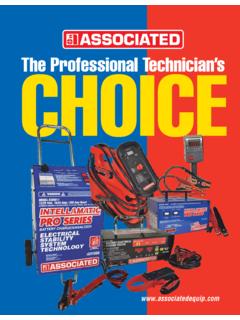
1 Associated EQUIPMENT CORPORATION TROUBLESHOOTING AND Maintenance Guide Celebrating over 60 years of Quality American Manufacturing TROUBLESHOOTING & Maintenance Guide Trouble Shooting & Maintenance Last modified 12/17/2009 Page 2 TABLE OF CONTENTS SECTION PAGE CONCEPT OF A BATTERY CHARGER 3 Maintenance AND CLEANING INSTRUCTIONS 4 EQUIPMENT NEEDED 5 TROUBLESHOOTING INSTRUCTIONS 6 DIAGNOSING FAILURES 8 COMPONENT FUNCTIONS 12 Manuals, Wire Diagrams, and additional information may be found on our website: Additional technical help is available by emailing: TROUBLESHOOTING & Maintenance Guide Trouble Shooting & Maintenance Last modified 12/17/2009 Page 3 CONCEPT OF A BATTERY CHARGER In its most basic function, a battery charger uses a typical household voltage of 120 volts AC and steps it down to a lower AC voltage before converting that AC into DC to charge a battery.
2 This is done by feeding the higher input voltage into the primary side of the transformer and the lower output voltage is produced on the secondary side of the transformer. The primary of the transformer consists of at least two inputs (or taps) and may contain several more. Each input tap is designed to produce a calculated voltage on the output windings called a secondary. Various switches are employed to change these taps in order to get the desired output levels and timers are often used to govern the length of time on charge.
3 The lower secondary voltage of the transformer is then connected to the rectifier (or diodes) which clip the top half of the AC (alternating current) sine wave resulting in DC (direct current) voltage. This is the voltage used to actually charge the battery. Additional safety mechanisms of input and output circuit breakers are used to protect the charger and diminish fire hazards. Meters are used to for monitoring and providing state of charge information to the operator. A more elaborate design may include additional elements such as a microprocessor controlled circuit board for controlling the charge cycle so that it conforms to a particular charging profile.
4 Because certain batteries can be damaged if the method of charging is not carefully observed, selection of the proper charger for the application is vital. Understanding the principles of how a battery charger works is an essential part of knowing how to repair one should it need service. If you are unsure of the individual components in the charger and their purpose, Please see the COMPONENT FUNCTIONS section of this document for parts identification and their respective functions before attempting to service your battery charger.
5 This Guide addresses the manual type chargers using a manual timer or on/off switch. While this document does not specifically address the repair of microprocessor controlled chargers, many of the troubleshooting steps are fundamental in determining the source of problems in these types of chargers as well. TROUBLESHOOTING & Maintenance Guide Trouble Shooting & Maintenance Last modified 12/17/2009 Page 4 Maintenance & CLEANING INSTRUCTIONS 1. Worn clamps and jaws should be replaced. Worn parts can lead to poor connections and present a safety hazard.
6 See parts list for part number of jaw and clamp kits. Any Maintenance or repair of this unit that involves disassembly of the cabinet should be done only by a qualified service person. 2. Incorrect reassembly may result in a risk of electric shock when the unit is subsequently used. To clean, wipe with a soft damp cloth. Avoid the use of chemical and abrasive cleaners. Wipe up spills immediately. 3. Furniture polish may be used to maintain a bright sheen on the cabinet and cables, but avoid spraying directly onto the metal and apply to a cloth and rub it in.
7 4. When not in use, this unit should be stored upright, in a dry location. 5. If there are signs of cabinet damage, have the unit checked by a qualified service person before using. TROUBLESHOOTING & Maintenance Guide Trouble Shooting & Maintenance Last modified 12/17/2009 Page 5 EQUIPMENT NEEDED You will need to have the following to disassemble and adequately test the output of the charger. Digital multi-meter capable of measuring AC/DC voltage with a diode checking function. Handheld Load Tester (recommended model 6029 or equivalent) Good Battery important to have a known good battery & not a suspect one.
8 Nut Driver set (SAE) Socket set (SAE) Flat Blade Screwdriver Phillips Blade Screwdriver Additional helpful items to have: Alligator clips for Digital Multi-meter (for hands-off measurements) Clamp on amp meter Jumper leads that have alligator clips on each end (for hard to reach places) Flashlight or Trouble light TROUBLESHOOTING & Maintenance Guide Trouble Shooting & Maintenance Last modified 12/17/2009 Page 6 TROUBLESHOOTING INSTRUCTIONS WARNING: Troubleshooting involves working with live voltages!
9 Only Qualified personnel or an experienced electrician should attempt to repair this unit. If you are not comfortable with this process, do not attempt it. Troubleshooting is a process that starts at the source of input and ends at the output. The direction in finding the problem is performed much like following a flow chart, making measurements along the way to find the source of the problem. Understanding how each component in the battery charger operates is crucial to solving a problem with the charger and will also help in solving the problem much quicker.
10 If you are not familiar with the parts in this charger, please see the COMPONENT FUNCTIONS section of this document for parts identification and their respective functions before attempting to service your battery charger. The testing methods in this Guide are written in such a way that it minimizes the disassembly of the charger. Please take the time to familiarize yourself with the wire diagram before getting started. There are some very basic tests to initially perform to determine if service is required on the charger before having to remove any panels.