Transcription of TROUBLESHOOTING COMMON Make sure that the …
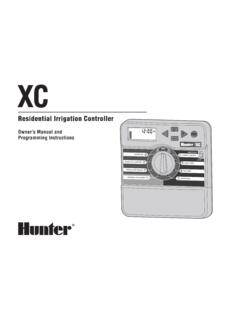
1 COMMON Controller Error MessagesHunter controllers incorporate automatic self-diagnostics that display the following error messages when electrical faults occur: Err - indicates problems with SmartPort wiring # Err - indicates the station number for the shorted station(s) P Err - indicates a high current draw on the P/MV circuitCommon Controller Problems Blank Display Scrambled or Locked Display Display Shows No AC No Station Output Controller Does Not Recognize Module(s) Sensor Does Not Shut Controller OffVisual InspectionBefore taking steps to diagnose and troubleshoot problems, it is recommended to make a quick visual inspection of the controller. Things to check include: All station modules are installed and locked in their proper locations Power module is properly installed Front panel ribbon connector installed Check front panel ribbon cable damage Sensor bypass switch in active position Check for damaged components Tighten all terminal screwsTROUBLESHOOTING COMMON CONTROLLER PROBLEMSR esetting Hunter ControllersPressing the reset button will reset the micro-processor and initiate module recognition (for modular controllers).
2 Sometimes a full reset may be required to clear the memory return the controller to factory settings, (requires reprogramming of the controller).Hunter Quick Check The Hunter Quick Check feature can be used to identify electrical problems such as shorted wires, or defective solenoids. Quick Check is an easy way to diagnose electrical problems Controller Problems Display Shows Err A display showing Err is an indication of an issue with installation or interference on the SmartPort wiring. It could also be as a result of a defective device being plugged in the 1: Check Device (Remote Receiver)If error message occurs when device is plugged into SmartPort, the device may be defective and should be 2: Check SmartPort WiringIf the Err message is displayed without a device attached, check that SmartPort wiring is correct. Make sure that the SmartPort wiring is not bundled with the field wiring. (Bundling wires may cause interference.) STEP 3: Replace the SmartPortThe SmartPort connector may be damaged.
3 Replace the SmartPort. Display Shows Station # & Err A display that shows a number and Err indicates that a station has faulted due to a short on that output. COMMON reasons for this station fault include: 1) a defective solenoid, 2) defective field wiring, or 3) poor wire 1: Verify Station FaultRemove the field wire for the faulted station. Start the controller manually. If the Err message is not present, the problem is with the valve or field 2: Check Valve WiringCheck the electrical resistance within the field wiring circuit for the defective zone. Troubleshoot field wiring. Display Shows P Err A P Err message is displayed when the P/MV circuit is drawing too much current. COMMON causes include: 1) a defective solenoid on the master valve, 2) incompatible or defective pump relay, or 3) wire run too long between the relay and 1: Check Master Valve Solenoid/WiringIf a master valve is being used, the problem may be a defective solenoid or faulty wiring.
4 Conduct a resistance check on the circuit to verify the 2: Check Pump RelayIf a pump relay is being used, problems may be caused by: 1) incorrect wire size and run from the controller to the relay, 2) a defective relay, 3) poor wire connections for circuit. If necessary, replace the defective pump relay or correct wiring Full Reset the Controller:1. Press and Hold the , , and PRG Press and release the reset Wait until 12:00 am is Release the , , and PRG buttons. The controller has been successfully Start Hunter Quick Check:1. Simultaneously press the , , , buttons (Press , , , PRG for ICC). All segments on the LCD will be Press the button to start Quick A fault will be displayed as the station number and - to the first AC terminalWHITE - to the 2nd AC terminalBLUE - to REM terminalREMACAC Blank DisplayCommon reasons for blank displays include: 1) no primary AC power at the controller, 2) a defective transformer, or 3) a defective front panel or 1: Check for Primary AC PowerCheck the main circuit breaker, any GFI outlets, and AC outlet (when used with plug-in transformers).
5 Verify with a voltmeter that there is 120 VAC +/- 10% (or 230 VAC if applicable) power at the 2: Check Transformer OutputWith a solenoid or voltmeter, check for 24 VAC power on the terminal strip. If there is power, from the transformer at the controller and no output, the transformer is defective and needs to be 3: Install New 9-volt BatteryInstall a new 9-volt battery and pull the ribbon connector. If the display is still blank, the front panel is defective. Replace the front panel. STEP 4: Check Ribbon ConnectorCheck for bent pins on back of the front panel. Re-install the ribbon connector into front 5: Check Station ModulesA defective station module may also cause a blank display. Remove all station modules from the controller. Insert one module and press the reset button. Repeat until the defective module is found. Replace the module. Scrambled or Locked DisplayScrambled or locked displays can be caused by electrical surges into the controller, which do not physically damage the controller, but result in locking up the microprocessor.
6 The most COMMON fix is to reset the controller. STEP 1: Reset the ControllerPress the reset button. If the controller display is still scrambled or locked, conduct a full reset. The controller will need to be 2: Replace the Front PanelIn rare cases, the front panel may be defective. Replace the front panel if resetting does not solve the problem. Display Shows No AC A display blinking No and AC is commonly due to the loss of primary AC power at the controller. COMMON causes include: 1) AC power is Off at the controller, or 2) a defective 1: Check for Primary AC PowerCheck the main circuit breaker is on, if any GFI outlets have tripped, or power at the outlet (for plug-in transformers). Verify with a voltmeter that there is 120 VAC +/- 10% (or 230 VAC if applicable) power at the 2: Check Transformer OutputWith a solenoid or voltmeter, check for 24 VAC power on the terminal strip. If there is power at the controller and no output, from the transformer, the transformer is defective and needs to be 3: Check Main ModuleIn some cases, a defective main module may cause a blank display.
7 Remove and replace the main module. No Station OutputNo station output (24 VAC) at the station terminal screw(s). COMMON causes for no station output include: 1) modules not properly installed, or 2) damage from high surges (lightning strike, etc.)STEP 1: Check Each Station OutputStart the controller manually by pressing the button. Use a solenoid or voltmeter to verify 24 VAC at each of the terminal 2: Check that Modules are Properly InstalledRemove and re-install each module. Verify they are locked in place. Press the reset 3: Replace the Defective ModuleRemove the module with no station output and replace with new one. Press the reset button. Controller Does Not Recognize Module(s)The display is showing too many or too few stations than the number of modules 1: Check that Modules are Properly InstalledRemove and re-install each module. Verify they are locked in place. Press the reset 2: Check Station ModulesRemove all modules from the controller.
8 Insert one module and press the reset button. With the dial in Set Station Run Times, verify the correct number of stations. Repeat this procedure until the defective module is found. Replace the 3: Check the Front PanelRemove and replace the front panel. Sensor Does Not Shut Controller OffFor systems with a rain sensor 1: Conduct a Quick Inspection Has enough rain fallen for sensor to shut system off? Is the metal sensor jumper installed? If so, remove it. Is the bypass switch in the active position? Verify SEN terminal screws are 2: Manually Test Sensor OperationStart the controller manually by pressing the button. Press the spindle on the rain sensor. The system should shut 3: Check Sensor and Sensor WiringRemove one sensor wire from one of the SEN terminals. If the controller displays SEN OFF, a problem exists with the sensor and/or sensor wiring. COMMON problems with sensor wiring include: 1) staples through wire insulation, 2) poor wire splices, 3) metal contacting sensor wires through cut in the 21-1648 5/07