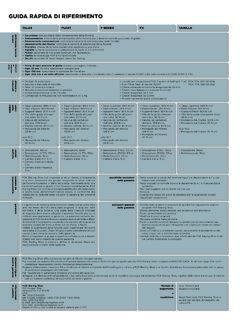
Transcription of TUNING GUIDE - RIDEFOX
1 Not exceed maximum air pressure:32 FLOAT and Rhythm maximum air pressure is 140 recommended settings in this TUNING GUIDE are designed to be a starting point, in order to get you out on your first ride in as few steps as possible. Consult your bike manufacturer s instructions for setup you ride and get used to your new fork, adjust your settings as needed. Detailed information and videos can be found in the online owner s Sag MeasurementsTravel15% sag (Firm)20% sag (Plush)80mm ( )12mm ( )16mm ( )100 mm ( in)15 mm ( in)20 mm ( in)110 mm ( in)17 mm ( in)22 mm ( in)120 mm ( in)18 mm ( in)24 mm ( in)130 mm ( in)20 mm ( in)26 mm ( in)140 mm ( in)21 mm ( in)28 mm ( in)O-RINGDUST WIPERSAG RANGETOTAL FORK TRAVELYour fork has a 4 digit ID code on the back of the lower leg.
2 Use this number on the Help page at to find out more information about your fork, including fork settingTo achieve the best performance from your FOX suspension, adjust the air pressure to attain your proper sag setting. Sag is the amount your suspension compresses under your weight and riding gear. Sag range should be set to 15 20% of total fork travel. Make sure to set sag with the compression lever in the OPEN position (see page 5).Watch the sag setup video at Starting Points for Setting SagRider Weight (lbs)Rider Weight (kgs)FLOAT & Rhythm Pressure (psi)120-13054-5965130-14059-6470140-150 64-6874150-16068-7380160-17073-7785170-1 8077-8290180-19082-8696190-20086-9110120 0-21091-95106210-22095-100111220-230100- 104117230-240104-109122240-250109-113126 Maximum rotor size for Step Cast forks is 180mm.
3 All other FOX forks can use up to a 203mm rotor (including SC 29in).3254 REBOUNDR ebound controls the rate of speed at which the fork extends after compressing. FLOAT & Rhythm Pressure (psi)Recommended Rebound Setting FIT4 Recommended Rebound Setting GRIP658137081274711807108569906896571015 61064511144117331222212611rebound ADJUST mentThe rebound adjustment is dependent on the air pressure setting. For example, higher air pressures require slower rebound settings. Use your air pressure to find your rebound setting. Turn your rebound knob to the closed position (full clockwise) until it stops.
4 Then back it out (counter-clockwise) to the number of clicks shown in the table ADJUST mentsFIT4 3-POSITION LEVERThe 3-position lever is useful to make on-the-fly adjustments to control fork performance under significant changes in terrain, and is intended to be adjusted throughout the the OPEN mode during rough descending, the MEDIUM mode for undulating terrain, and the FIRM mode forsmooth with the 3-position lever in the OPEN mode. OPENMEDIUMFIRM*Factory Series and Performance Elite Series forks onlyOPEN MODEADJUST*OPEN mode adjust is useful to control fork performance under rider weight shifts, G-outs, and slow mode adjust provides 22 additional fine TUNING adjustments for the OPEN mode.
5 Setting 18 will have a more plush feel and setting 1 will have a firmer feel.*OPEN MODE ADJUST Set the OPEN mode adjust to 18 clicks out (counter-clockwise until it stops).LEAST AMOUNT OF REBOUND DAMPING; FORK REBOUNDS FASTESTMOST AMOUNT OF REBOUND DAMPING; FORK REBOUNDS SLOWESTCLOSED(CLOCKWISE)OPEN(COUNTER-CLO CKWISE)987654321 CLOSED(CLOCKWISE)OPEN(COUNTER-CLOCKWISE) 18 CLICKSOUTLEAST AMOUNT OF COMPRESSION DAMPING; FORK COMPRESSION LIGHTEST MOST AMOUNT OF COMPRESSION DAMPING; FORK COMPRESSION FIRMESTGRIP COMPRESSION ADJUSTThe 3-Position Micro Adjust lever is useful to make on-the-fly adjustments to control fork performance.
6 Use the positions between the OPEN, MEDIUM, and FIRM modes to fine-tune your compression 2-Position Sweep Adjust (32 Rhythm forks only) lever is useful to make on-the-fly adjustments to control fork performance. Use the positions between OPEN and FIRM modes to fine-tune your compression the Front WheelWheel installation is identical for both the 15x100 mm and 15x110 mm Install the front wheel into the fork dropouts. Slide the axle through the non-drive side dropout and Open the axle nut keeper screwAxle nut keeperAxle nutAxle numberIndicator arrowInstall the Front WheelWheel installation is identical for both the 15x100 mm and 15x110 mm Install the front wheel into the fork dropouts.
7 Slide the axle through the non-drive side dropout and Open the axle Turn the axle clockwise 5-6 complete turns into the axle Close the lever. The lever must have enough tension to leave an imprint on your The closed lever position must be between 1-20 mm in front of the fork If the lever does not have enough tension, or has too much tension when closed at the recommended position (1-20 mm in front of the fork). See the next page for adjustment instructions. WARNING: Use hand pressure only. Never use any tool to tighten the 15QR levers onto the lower legs. Over-tightening the levers can damage the axle or fork dropouts, leading to a sudden failure with one or more of these components, resulting in SERIOUS INJURY OR DEATH.
8 WARNING: Failure to secure the axle properly can cause the wheel to become detached from the bicycle, resulting in SERIOUS INJURY OR mmKABOLT INSTALLATIONW heel installation is identical for both the 15x100 mm and 15x110 mm Kabolt Install the front wheel into the fork dropouts. Slide the Kabolt axle through the non-drive side dropout and Use a 6 mm hex wrench to torgque the Kabolt axle (clockwise) to 17 Nm (150 in-lb). 3298 Additional TUNING optionsclip-on Volume SpacersChanging volume spacers in the 32 FLOAT and Rhythm fork is an easy internal adjustment that allows you to change the amount of mid stroke and bottom out resistance.
9 If you have set your sag correctly and are using full travel (bottoming out) too easily, then you could install one or more spacers to increase bottom out you have set your sag correctly and are not using full travel, then you could remove one or more spacers to decrease bottom out procedure and TUNING options are available online at: FLOAT Volume Spacer ConfigurationsTravelVolume Spacers Factory In-stalled*Max Volume Spacers140 mm 25130 mm36120 mm14110 mm24100 mm2490 mm2480 mm35 All 32 Rhythm and 32 29 Rhythm 15x110 Volume Spacer ConfigurationsTravelVolume Spacers Factory Installed*Max Volume Spacers80 mm 26100 mm15110 mm04120 mm0432 29 Rhythm QR9 Volume Spacer ConfigurationsTravelVolume Spacers Factory Installed*Max Volume Spacers80 mm 58100 mm47110 mm36120 mm2632 Step Cast Volume Spacer ConfigurationsTravelVolume Spacers Factory Installed*Max Volume Spacers100 mm 1480 mm 14*Do not exceed the
10 Max Volume Spacers number, as this can damage your ADDITIONAL INFORMATION AND VIDEOS: 32 FLOAT TRAVELFORK AIR SPRING FORCEMAXIMUM SPACERS (LEAST AIR VOLUME)FACTORY SETTING (STOCK AIR VOLUME)MINIMUM SPACERS (MOST AIR VOLUME)typical air spring curvesFULL COMPRESSIONFULL EXTENSIONAIR SPRING VOLUME SPACERS, CONTINUED321110 NOTES605-00-160 REV A


