Transcription of Universal WiFi Range Extender WN2000RPT Installation Guide
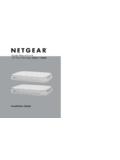
1 Universal wifi Range Extender WN2000 RPT Installation GuideExtended Wireless RangeExisting Router RangeWIRELESS EXTENSIONEXISTINGROUTERWIRELEEXTENSCONNE CT WIRED DEVICES WIRELESSLY 2011 NETGEAR, Inc. All rights part of this publication may be reproduced, transmitted, transcribed, stored in a retrieval system, or translated into any language in any form or by any means without the written permission of NETGEAR, NOT stack equipment, or place equipment in tight spaces or in drawers. Be sure your equipment is surrounded by at least 2 inches of air SupportThank you for choosing NETGEAR. To register your product, get the latest product updates, or get support online, visit us at Phone (US & Canada only): 1-888-NETGEARP hone (Other Countries): See , the NETGEAR logo, and Connect with Innovation are trademarks and/or registered trademarks of NETGEAR, Inc. and/or its subsidiaries in the United States and/or other countries. Information is subject to change without notice.
2 Other brand and product names are trademarks or registered trademarks of their respective holders. 2011 NETGEAR, Inc. All rights of ConditionsIn the interest of improving internal design, operational function, and/or reliability, NETGEAR reserves the right to make changes to the products described in this document without notice. NETGEAR does not assume any liability that may occur due to the use or application of the product(s) or circuit layout(s) described FeaturesThe LEDs on the front show how the Extender is working. Link Rate. The LED indicates a wireless connection between the Extender and the Green is Amber is Red is button Link Rate Status PC to Extender Status. The LED is lit when the Extender is powered on. PC to Extender . The LED is lit when the Extender is connected to a PC. WPS button. This LED indicates a WPS wireless Solid green. There is wireless security (WPA or WPA2).
3 - Blinking green. A WPS connection is in back panel has the following features:Factory Reset button. To use this button, stick a paper clip into the reset hole and hold it until the Status LED On/OffFactory Resetbutton Ethernetports Ethernet ports. You can use the Ethernet ports on the Extender to connect up to four Ethernet-enabled devices wirelessly to your button. Turns the device on and off. 45 Getting StartedThe wifi Range Extender extends the wireless network to include the area outside the Range of your existing Wi-Fi network. Follow these steps to correctly set up the the Extender and Applying Power1. Place the Extender an equal distance between your router and the wireless device located outside the Range of your TTip: If you have to use a different location, move the Extender closer to the device, but still within the wireless Range of the Plug the Extender into an electrical outlet, and wait 1 minute until the Extender starts.
4 The Status LED turns green. 6 Connecting the Extender to an Existing Wi-Fi NetworkTo extend the Range of your Wi-Fi network, you need to connect the Extender to your existing Wi-Fi network. You have two options to connect the Extender to your 1: Connecting with WPS (Wi-Fi Protected Setup)WPS lets you easily join a secure Wi-Fi network without typing the network name and password. The WPS button is a physical button on the Wi-Fi router, gateway, or access your router supports WPS (Wi-Fi Protected Setup ), NETGEAR recommends that you use Option 1; otherwise, go to Option : WPS does not support WEP network security. If you are using WEP security, use Option 2 to 2: Connecting without WPS, using web browser setup guideThe web browser setup Guide walks you through the necessary steps to connect your Extender to an existing Wi-Fi 1: Connecting with WPS (Wi-Fi Protected Setup)1. Press the WPS button on the Extender . 2. Within 2 minutes, press the WPS button on your wireless router, gateway, or access this point, the Extender should be connected to your existing Wi-Fi network, and the Link Rate LED on your Extender lights up.
5 3. The Extender s wireless network name (SSID) changes to your existing Wi-Fi network name, with _EXT at the end of the name. For example:Existing Wi-Fi network name:MyNetworkNameNew Extender network name:MyNetworkName_EXT4. To connect additional Wi-Fi devices to your Extender network, use the same network security key (passphrase) as is set on your existing wireless network/wireless 2: Connecting with web browser setup guide1. Once the Extender is powered on and the Status LED is green, use a wireless network manager on a PC to find and connect to the NETGEAR_EXT (SSID) wireless : You can use any wireless network manager utility on a PC or tablet to find and connect to the Extender wireless the connection with the PC is established, the PC to Extender LED turns green. Next, you need to connect the Extender to your existing Wi-Fi Open a web browser window on the same PC, and the browser should take you directly to the onscreen setup : You can always access the Extender settings again by typing in your browser URL The web browser setup Guide walks you through the following steps: Selecting the Wi-Fi network you would like to extend.
6 Entering the security passphrase for the existing network. Choosing the name for your new Extender network. Connecting your wireless devices to your new Extender If you want to make changes after using the web browser setup Guide or you wish to run the setup Guide again, use your browser to go to If prompted, log in as admin with password as the PerformanceThe Link Rate LED indicates performance. The best performance is delivered when the Link Rate LED is green. A workable performance is delivered when the Link Rate LED is amber. A red Link Rate LED indicates a poor connection or no connection. If the Link Rate LED is off, there is no connection between the Extender and the : Make sure your PC to Extender LED is green before you check the Link Rate LED for improve the Extender performance:1. Move the Extender closer to the router or to a different location with a better line of sight. 2. As you move the Extender , check the Link Rate and the PC to Extender LEDs on the front panel until you find a good location.
7 12 When to Use the Extender Wireless NetworkNETGEAR recommends that you connect to the Extender wireless network only when a PC or wireless device is in a dead zone where the network connection to your existing router is very poor or nonexistent. This is because data traffic routed through the Extender wireless network is slower than traffic directly from the original wireless router network. If you cannot connect from your wireless device to the Extender , move the Extender to a different location halfway between the device and the router. If, after you try several locations, the device cannot connect to the Extender , move the Extender closer to the Wi-Fi AdapterOnce the Extender is connected to your existing Wi-Fi network, you can use the Ethernet ports on the Extender to connect up to four devices wirelessly to your network. Simply plug the Ethernet cable from your Ethernet-enabled device (connected TV, Blu-ray player, or gaming console) to the Ethernet port of the Extender , and enjoy wireless connectivity for up to four devices simultaneously.
8 14 Wireless SSIDs and PassphrasesUse the space below to record your new Extender network name (SSID) and Extender security settings, in case you need to add additional wireless devices to your Extender in the future. Enter your wireless information here: Router network name (SSID) _____ Router security passphrase _____ Extender network name (SSID) _____ Extender security passphrase _____15 Frequently Asked QuestionsYou can find more information about your product in the User Manual available at The Smart Wizard keeps asking me for my passphrase, and I am sure I have entered the correct passphrase. What can I do?It is very likely that the Extender is placed at the borderline of the Range covered by the router. Follow the instructions in the previous section to resolve this. If you are using WEP security, make sure that you are typing the wireless key in the correct I connected to NETGEAR_EXT and launched a browser. Why am I unable to see the Smart Wizard?
9 First, make sure your computer is set up to use DHCP (most are). Second, make sure the PC to Extender status LED is green and you have a valid IP address. Finally, relaunch the browser, and enter Will the Extender work if I connect it to the router with an Ethernet cable?No. The Extender is designed to connect wirelessly to the What are the user name and password to log in to the Extender ?The user name is admin, and the default password is password. Both are of ConformityFor complete DoC please visit the NETGEAR EU Declarations of Conformity website at: For GNU General Public License (GPL) related information, please visit symbol is placed in accordance with the European Union Directive 2002/96 on the Waste Electrical and Electronic Equipment (the WEEE Directive). If disposed of within the European Union, this product should be treated and recycled in accordance with the laws of your jurisdiction implementing the WEEE , East Plumeria DriveSan Jose, CA 95134 USAS eptember 2011