Transcription of User guide. - VZW
1 User OF CONTENTSGETTING STARTEDB uttons and Ports ..6 Installing the SIM Card and micro SD Card ..7 Charging the Battery ..7 Turning Your Phone On/Off ..8 Setting Up Your Phone Out of the Box ..8 Home Screen ..9 Using the Touch Screen ..9 PERSONALIZING YOUR PHONEC hanging the System Language ..10 Setting Date and Time ..10 Ringtone, Notification and System Sounds ..10 Volume Adjustment/Silent and Vibrate Modes ..11Do Not Disturb ..11 Wallpaper ..12 Brightness ..12 Screen Pinning ..13 THE BASICSS tatus Bar ..14 Shortcuts and Widgets ..16 Folders and Organization ..16 Primary Shortcuts ..16 Entering Text.
2 16 Keyboard ..17 Glide Typing ..18 Google Voice Typing ..18 Using Applications ..18 getting CONNECTEDC onnect to a Wireless Network ..19 Add a Wi-Fi Network ..19 Forgetting a Wi-Fi network ..20 Connecting to Bluetooth Devices ..20 Forgetting a Bluetooth Device ..21 Connecting to a Computer ..21 Using micro SD Card for Storage ..21 Sharing Your Phone s Data Connection ..23 MAKING PHONE CALLSP lace a Call by Dialing ..24To End a or Rejecting a Call ..25 Call History ..25 Placing a Call from your Contacts List ..26 Checking Voice Mail ..26In-Call Options ..26 Managing Multi-party Calls ..27 Switching Between Current Calls.
3 27 Set up a Three Way Call ..27 Call Settings ..27 Voicemail ..28 CONTACTSA dding a New ..29 Edit a Contact ..29 EMAILA dding an Email Account ..30 Removing an Account ..30 Responding to Email ..30 Composing and Sending an Email ..31 Add a Signature to Email ..31 Email Settings ..3145 MESSAGINGS ending a Message ..32 Replying to a Message ..32 Forwarding a Message ..33 Deleting a Message or Thread ..33 Message an Event ..33 Calendar Settings ..34 INTERNET BROWSER - GOOGLE CHROMEOpen a web a Photo ..34 Recording A Video ..35 Camera Setting ..35 GOOGLE PHOTOSS hare Albums, Photos or Videos ..35 Delete Albums, Photos or Videos.
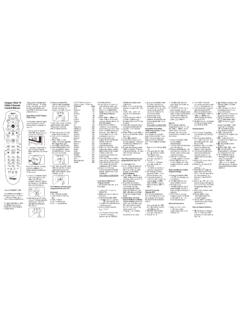
4 36 Editing Photos ..36 Create an Animation or Collage ..36 Playing Videos ..36 MUSICC opying Music Files to Your Phone ..36 View Your Music Library ..37 VIDEOSM anaging Video Files ..37 Delete a Video ..37 OTHER APPSC alculator ..38 Clock ..38 Google Apps ..39 SETTINGSW ireless & Network ..39 Apps and Notifications ..40 Battery ..41 Display ..41 Sound ..41 Storage ..41 Security & location ..41 Users & accounts ..41 Accessibility ..41 Google ..42 System .. STARTEDB uttons and Ports1 Home Button2 Back Button3 mm Headset Jack4 USB/Charging Port5 Microphone6 Recent Apps Button7 Front Camera8 Front Flash9 Earpiece 10 Flash11 Back Camera12 Power/Lock Key13 Speaker14 Volume Keys15 SIM/Micro SD card slot124567389101112141315 Installing the SIM Card and micro SD CardPhone should be powered off before installing or removing SIM or micro SD card.
5 Charging the BatteryWhile your phone s battery should have enough juice out-of-the box to power on, find a signal and even make a few calls, you should fully charge the battery as soon as possible. Connect the included USB cable to both the phone and wall charger. Plug the wall charger into a standard electrical outlet. If the phone is on, you will see a charging icon in the status the battery is extremely low, you may not be able to power on the phone. Wait 20 minutes and try again. WARNING! Use only an approved charging accessory to charge your phone. Improper handling of the charging port, and use of an incompatible charger, may cause damage to your device and void the warranty.
6 TIP: Extend your battery s life:Conserve battery power by adjusting the settings on select applications: Lower Screen Backlight Bluetooth and Wi-Fi off when not in GPS when not in the battery saver Your Phone On/OffTo turn your phone on, press and hold the power/lock key. Follow the prompts. Setting Up Your Phone Out of the BoxWhen you turn on your phone for the first time (or after a reset to factory settings), you will need to set it up before use. Select your language preference and follow the prompts. Home ScreenUsing the Touch ScreenYour phone s touchscreen allows you to control actions to move around the screen, open menus, select items like apps, zoom in and out of websites, take photos and more with a variety of touch or Slide quickly drag your finger across the screen horizontally or Touch and hold your finger on an item to move it into a new Place two fingers on the screen simultaneously and pinch them together to zoom out or spread your fingers apart to zoom the Screen Rotate your phone sideways to rotate the screen from portrait to landscape.
7 Note: The auto rotate function must be turned on for this to work. Touch BackHome KeyRecent AppsApp ShortcutsApps ListFoldersGoogle Search BarStatus Bar1011the Home screen > swipe up for apps > Settings > Display > When Device Is rotated > tap Rotate contents of YOUR PHONEC hanging the System LanguageTouch the Home key > swipe up for apps > Settings > Languages & Input > add a system language, touch Add a Language and select a and hold the language and drag it to the Date and TimeTouch the Home key > swipe up for apps > Settings > Date & & time and time zone are set automatically to network-provided time.
8 To set manually: Touch Automatic Date & Time to turn Off. Set the date and time manually. Touch Automatic Time Zone to turn Off. Select a time zone. Touch Use 24-hour format to turn , Notification and System SoundsTouch Home > swipe up for apps > Settings > a Phone Ringtone Touch Phone Ringtone. Scroll the list and select a ringtone. Touch Alarm Sounds On/Off Touch the Home key > swipe up for apps > Settings > Default alarm ringtone. Touch None to turn it Off or select a Ringtone > Ok to turn it Other sounds On/Off. Touch the Home key > swipe up for apps > Settings > Sound.
9 Scroll down to and touch Other sounds. Touch the icon next to each option to turn It On or Adjustment/Silent and Vibrate ModesTo adjust volume:Touch the Home key > swipe up for apps > Settings > slider below Media Volume, Alarm Volume, Ring Volume to set Silent and Vibrate Modes:Touch Home key > swipe up for apps > Settings > sliders to left to turn Silent ON. Ring volume will automatically go to vibrate. Or, lower the Volume Keys on the side of the phone until you feel the phone vibrate. Touch it again to enter Silent Not DisturbUse Do Not Disturb Mode to limit interruptions. Touch the Home key > swipe up for apps > Settings > Sound > Do Not Only Allows only notifications marked Priority will next to each option to turn it visual disturbances:1213 Touch next to each option to turn it On/Off.
10 Automatic Rules - schedule when notifications are on or off. Touch Weekend, Weeknight, Event or +Add rule. Add rule > Event rule > enter rule name > days, start time and end time, and preferences to set specific time periods during which Do Not Disturb mode is to delete a can customize the wallpaper on the home screen and lock screen. Touch and hold an empty space on the home screen. Touch WALLPAPERS. Swipe left/right to select an image. For Gallery images, touch My photos, select picture, move, pinch or spread to choose the part of the image you want to use. Touch SET Home screen, Lock screen or Home screen and lock Touch the Home key > swipe up for apps > Settings > Display > Brightness Level.