Transcription of VEHICLE - Amazon S3
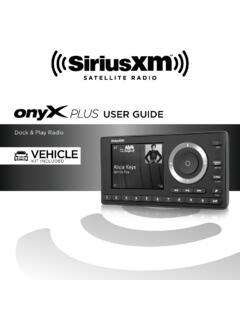
1 USER GUIDEDock & Play RadioVEHICLEKIT INCLUDED2 Table of ContentsIntroduction .. 3 Features .. 3 Safety and Care Information ..4 What s in the Box? ..6 Onyx EZ Functions .. 7 PowerConnect VEHICLE Dock ..8 VEHICLE Installation .. 10 Step 1: Choose a Location for Your Radio .. 10 Step 2: Install the Dash or Vent Mount 12 Step 3: Mount the Magnetic Mount Antenna .. 16 Step 4: Route the Magnetic Mount Antenna Cable ..22 Step 5: Connect the Magnetic Mount Antenna and PowerConnect Power Adapter ..33 Step 6: Connect the Audio ..34 Subscribe ..43 Using Your Onyx EZ ..45 The Main Display ..45 Navigation Basics ..46 Listening to Satellite Radio ..48FM Presets ..52 Parental Controls ..54 Where Else Can You Use Your Onyx EZ? ..59 Configuring Your Onyx EZ ..60 Radio ID ..60 Find Available FM Channels in Your Area ..61 Set and Select an FM Channel ..63 Jump Settings ..66 Set Brightness or Contrast ..67 Set Audio Level ..68 Signal Indicator ..69 Factory Settings ..70 Demo Mode.
2 73 Auto Shut Off ..74 Using the VEHICLE Dock From the Universal Xpress Car Kit ..76 Turn FM Transmitter On/Off ..77 Troubleshooting ..79 Product Specifications ..83 Patent and Environmental Information ..84 FCC Statement ..85 Copyrights and Trademarks ..86 Owners Record ..873 Table of ContentsFeaturesThank you for purchasing the XM Onyx EZ with VEHICLE Kit!XM Onyx EZ has these exciting features to enhance your overall experience: Hear SiriusXM through your existing VEHICLE radio with easy, do-it-yourself installation. View artist name, song title, and channel information on the large color display. Store your favorite channels for one touch access. Easily lock and unlock channels with mature content. One-Touch Jump to traffic and weather for the city of your choice from a list of 22 of the most congested cities, or to the previous channel to which you were listening. Listen in multiple vehicles, at home, in the office or outdoors - all with just one subscription.
3 VEHICLE Kit included add accessories for your home, office, or other read the entire User Guide before using your Onyx EZ!Introduction4 Safety and Care InformationIMPORTANT! Self installation instructions and tips are provided for your convenience. It is your responsibility to determine if you have the knowledge, skills, and physical ability required to properly perform an installation. SiriusXM shall have no liability for damage or injury resulting from the installation or use of any SiriusXM or third party products. It is your responsibility to ensure that all products are installed in adherence with local laws and regulations and in such a manner as to allow a VEHICLE to be operated safely and without distraction. SiriusXM product warranties do not cover the installation, removal or reinstallation of any product. Do not expose to extreme temperatures (above 140 F or below -4 F, or above 60 C or below -20 C). Do not expose to moisture. Do not use device near or in water.
4 Do not touch the device with wet hands. Do not let any foreign matter spill into device. Do not store in dusty areas. Do not expose to chemicals such as benzene and thinners. Do not use liquid or aerosol cleaners. Clean with a soft damp cloth only. Do not expose to direct sunlight for a prolonged period of time, and do not expose to fire, flame, or other heat sources. Do not try to disassemble and/or repair device yourself. Do not drop your device or subject it to severe impact. Do not place heavy objects on device. Do not subject device to excessive pressure. If the LCD screen is damaged, do not touch the liquid crystal ! Opening the case may result in electric shock. If the liquid crystal fluid comes in contact with your skin, wipe the skin area with a cloth and then wash the skin thoroughly with soap and running water. If the liquid crystal fluid comes into contact with your eyes, flush the eyes with clean water for at least 15 minutes and seek medical care.
5 If the liquid crystal fluid is ingested, flush your mouth thoroughly with water. Drink large quantities of water, and induce vomiting. Seek medical care. Make sure that you insert the PowerConnect Power Adapter all the way into the VEHICLE s cigarette lighter or power adapter socket. If you are using PowerConnect as your audio connection option, it is advisable not to insert a multi-outlet adapter into the same VEHICLE cigarette lighter or power adapter socket to simultaneously power other devices. Some multi-outlet adapters can prevent the PowerConnect feature from working properly. When using this product, it is always important to keep your eyes on the road and hands on the steering wheel. Not doing so could result in personal injury, death, and/or damage to your device, accessories, and/or to your VEHICLE or other property. VEHICLE installation, service activation, and Radio configuration functions should not be performed while driving. Park your VEHICLE in a safe location before beginning installation.
6 This product contains chemicals known to the State of California to cause cancer and birth defects or other reproductive device should be placed in your VEHICLE where it will not interfere with the function of safety features, , deployment of airbags. Failure to correctly place device may result in injury to you or others, if the unit becomes detached during an accident and/or obstructs the deployment of an s in the Box?234567890directjumpFMmenu1 Onyx EZ RadioMagnetic Mount AntennaAntenna & Dash Mount Alcohol Preparation PadsPowerConnect Power AdapterAux In CableCable Routing AdapterIntroductionPowerConnect VEHICLE DockDash MountScrews (4)Vent Mount and Extended Vent Clamps7 Onyx EZ Functions234567890directjumpFMmenu1 Power Button Press to turn Radio on and and Right Buttons Press to search for channels by and Down Buttons Press to preview and tune to channels through the channel lineup; also press to scroll through lists and highlight menu Button Press to access advanced features and configuration options; in configuration options, press and hold to return to main display Button Press to confirm selection of highlighted items in a menu or Button Press to access and cycle through FM Button Press to directly access traffic and weather for the city of your choice.
7 Or press it to go back to the previous channel to which you were Button Press first before entering the channel number, to directly tune to a Buttons Press to tune to a stored favorite channel, press and hold to store a favorite channel; also enter a channel VEHICLE DockColor-Coded ConnectionsThe color-coded PowerConnect VEHICLE Dock makes it simple to connect. Just match the colors on the cable ends to the colors on the dock to see what goes ViewIntroductionANT (Silver) Connection for the Magnetic Mount (Green) Connection for Aux In Cable or optional Cassette Adapter (sold separately). PWR (Red) Connection for PowerConnect Power Adapter. FM (Blue) Connection for optional FM Direct Adapter (sold separately).AUDIOANTPWRFM9 Wire GuideThe PowerConnect VEHICLE Dock has a wire guide at the top rear that can help you to organize the cables and wires connected to the dock. If you need to bring a cable or wire from one side of the dock to the other, utilize the wire guide by looping the cable though the wire guide as GuideIntroduction10 WARNING!
8 DO NOT attempt to install Onyx EZ while driving. Park your VEHICLE in a safe location before beginning 1: Choose a Location for Your RadioWhen installing Onyx EZ in your VEHICLE , choose a location where it will not block your vision, interfere with the controls, or obstruct the air bag. The location should be easily accessible and provide good visibility of the display, and should not be located where it will be in direct sunlight, which will affect the visibility of the display screen. Several examples of Onyx EZ mounted in a VEHICLE are shown: A is the on dash method using the Dash Mount, and B is the vent clip method using the Vent 1 Option 2234567890directjumpFMmenu1234567890dire ctjumpFMmenu1 VEHICLE 3 Option 4 Option 5234567890directjumpFMmenu1jumpFMmenu234 567890direct1jumpFMmenu234567890direct1 VEHICLE Installation12 VEHICLE InstallationStep 2: Install the Dash or Vent MountFollow the instructions on the next several pages for the mounting method you have ! The PowerConnect VEHICLE Dock included with Onyx EZ is compatible with the T-slot style Dash and Vent Mounts.
9 If you have an existing Dash Mount or Vent Mount in your VEHICLE , you can continue to use it with this dock, and skip this the Dash Mount:CAUTION! The adhesive used on the Dash Mount may be difficult to remove. Do not install this mount on leather surfaces (contact your automobile dealership if you are unsure about your dash surface), and make sure the air temperature is at least 60 F (15 C) during installation. If it s not at least 60 F, turn on the heater in your VEHICLE to bring the temperature up to 60 Locate a flat surface for the Dash Mount. Make sure there is ample room for the PowerConnect VEHICLE Dock and Onyx EZ Radio when Set the orientation of the Dash Mount before adhering it. Loosen the knob and adjust the adhesive foot for the location you selected in Step 1: Choose a Location for Your Radio on page 10. Option 1 & Option 3 should be oriented as I. Option 2 should be oriented as The dock mounting plate can 1213be tilted in different directions. Adjust as necessary for your particular VEHICLE .
10 When the orientation is correct, tighten the Attach the Dash Mount to the PowerConnect VEHICLE Dock using the 4 provided Before you attach the Dash Mount to the dash, skip ahead and finish the remainder of the VEHICLE installation so that the cables are attached to the Once the cables have been attached to the dock, clean the mounting surface in the VEHICLE with the alcohol preparation pad and let it dry Peel off the adhesive liner. Position, press, and hold the Dash Mount in place for 30 ! Allow the Dash Mount adhesive to cure (dry) for a minimum of 2-4 hours before using the mount. The best adhesion occurs after 24 ! To remove the Dash Mount, carefully lift the adhesive pad with your fingers or a spoon. Warming the pad with a hair dryer for several minutes will help soften the PWRFMV ehicle InstallationKnobAdhesive FootDock Mounting Plate14 Installing the Vent Mount:IMPORTANT! To make the cable connections easier, wait until after you have connected all the cables to the dock before you attach the Vent Mount to a Locate a vent with horizontal louvers sturdy enough to hold your PowerConnect VEHICLE Dock and Onyx EZ If the vent louvers in your VEHICLE are recessed, you may need to use the longer vent clamps with the Vent Mount.