Transcription of VW 2.0 ABA 16 valve conversion - VAGLinks.com
1 Contents: Parts List Removing the 8v The Bottom End Intermediate Shaft Installing the 16v Head Fuel, Air, and Spark Wiring and sensors Final Thoughts Parts List Engine Internals: OBDI ABA block and accesories 16v Cylinder Head ( or ) 16v Intake Manifold upper and lower 16v Exhaust manifold 16v Oil Pump Distributor block off plate Pistons: 9a on ABA rods for 9:1 CR (what I used) Stock ABA for :1 CR There are alot more options here for different Compression ratios. Misc. Gaskets Pulleys and Belts Timing Belt: I used an OEM ABF Belt 16v Crank Pulley 16v Intermediate shaft and pulley Machined Serpentine Belt pulley* Fuel and Ignition 16v Fuel rail: I used a Bahn Brenner rail with the FPR adaptor Older Syle Fuel Pressure Regulator 16v Distributor/plug wires G60 injector Cups Managment I decided to used the stock ECU with a TT chip.
2 I already had one from my cam shaft project so I just sent it back and had Collin reprogram it for me. So far it has been nothing but great. It was a very affordable alternative to standalone. Just give them a call and see what they can do for you. Great people to work with. Misc. This is far from a complete list of parts but it will be a great starting point. Without a doubt get a Bentley Repair manual. I also used a smaller Haynes manual because it was alittle easy to find quick reference things like torque and capacity. It is certain that Page 1 of 6 ABA 16v:Project10/2/2006 'll run into other things you'll need hoses, extended wiring, hardware ect. I will update this list as I remember more things you'll need. *The machined pulley I'm talking about bolts onto the crank pulley.
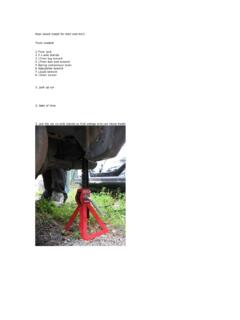
3 You'll need to shave alittle off of it because the crank pulley is now wider, so your accesory belts won't line up unless you trim down this pulley. Im not sure exactly how much you need to take off as I purchased mine from someone on Look around on there for someone with the exact numbers. Removing the 8v The Bottom End I suggest removing alot of the front end before you start the project. Take off the bumber and radiator as well as the hood. Get as much body out of your way so you can get at things alot easier. This was a pretty straight forward stage. Just reference the Bentley for this part. It covers an entire engine rebuild so there really isn't any info I can give here that it doesn't already have. As for the tool used for the head bolts, I was able to find somthing at a local auto supply warehouse for a couple of bucks.
4 Has alot of the VW tools if you can't find it locally. The biggest problem for me during this stage was removing the 8v exhaust manifold. Most of the bolts where pretty badly rounded and very difficult to get to. Craftsman makes a set of tools called Bolt outs, while they are fairly expensive they are well worth it. It took some creative use of ratchet extensions to get to the lower bolts but it wasn't too difficult. Just a note as you take off wiring and other hardware be sure to label it and put it someplace where you know where it is. One of the things that made this job much longer than it should have been was poor organization. Stock valve Cover Off The Head is Off In order to change the pistons you'll need to remove the oil pan.
5 You'll also be changing the oil pump while your down there. The reason you need to change the oil pump is because the 8v oil pump is driven off the distributor which will be removed because the 16v distributor is located on the side of the head. There are 20 or so torx screwes that hold the oil pan on. You will need to remove alittle plate on the left side of the tranny to get at two of the screws. If you don't take this plate off you won't be able to see them. Once the pan is off there are just a couple of bolts that hold the oil pump up, remove those and then pull the oil pump out. Each oil pan removed Page 2 of 6 ABA 16v:Project10/2/2006 Intermediate shaft Installing the 16v piston has two bolts hold the connecting rod on. Remove those two bolts, pull the cap off the rod then push the piston up through the block and remove from the top side.
6 There isn't a whole lot more that needs to be done here. Installing the new pistons is covered in the Bentley but basically its the opposite of removal. Oil the rings drop the pistons down in and torque to spec. I was able to reuse my rod bearings but make sure you measure the clearance with Plastlgage before you reuse them. Also be sure to replace the connecting rod bolts. Once you have the new pistons and oil pump back in you can put the oil pan back on if you feel its not going to be in the way of anything. Pistons are out Before you start this part make sure you remove the 8v distributor. You'll need that out in order to get the oil pump drive gear on the the pump drive shaft. The old distro. may be pretty tough to get out but just keep working at it.
7 If you can get it to turn alittle to loosen it up it'll help. Since the 16v engine uses a wider timing belt, all of the sprockets need to be wider then the 8v sprockets. The 16v intermediate shaft sprocket does not bolt up to the 8v shaft so you will need to change the intermediate shaft in order to use the wider sprocket. You will need to lift the block a few inches in order to slide the intermediate shaft out. If you disconnect the shift linkages and get alot of the other stuff out of the way you will be able to lift the block enough to get the shaft out without disconnecting the driveshafts. You can screw two of the old head bolts back into the head and use them as your lift points. The holes we used are circled in red in the picture on the right.
8 My block came up at an angle so we didn't have to go very far before we were able to get the shaft out. Once you have the shaft out just slide the new one in and drop the oil pump drive gear down onto the shaft though the distributor hole. Then put the block off plate on and tighten it down. Lift Points Intermediate Shaft Distributor block off Before you drop the head on the block, there are a few things to do first. Make sure the top surface of the block is very clean. Scrape all the remains of the old head gasket off but be carefull not to make the surface uneven. Also, make sure the head is in good shape. I took mine to a machine shop and had the bottom shaved to make sure it was perfectly flat. They also did a pressure check to make sure it didn't have any cracks or other problems.
9 Page 3 of 6 ABA 16v:Project10/2/2006 Fuel,Air, and Spark Get the exhaust manifold in place and bolted to the downpipe before you put the head on, so you don't have to mess with that later. Also there is a guide pin on the block that does not line up with the 16v head so you'll need to tap that out before you can seat the head. The pin comes out from the bottom and is very difficult to get to. I got my dad to hold a long slim peice of metal dowel on the bottom of the pin while I went under the car and tapped it with a hammer from below. It takes alittle patients to get the dowel right on the pin but it worked pretty well. Once you get the pin out and everything cleaned up and ready to go, install the new head gasket and make sure everything is perfectly lined up.
10 Then put the head on and start all the new bolts. Use the Bently to get the right torque spec. on the bolts. Its a three step process. If you are using a newer style head gasket there is no need to re-torque the head bolts after you've run the engine up to temp. Head installed valve cover is on Once the head it on bolt up the the exhaust manifold and get the vavle cover on. You may want to put the front coolant flange on before you get the intake manifold on. Also make sure you put the new injector cups in the lower intake manifold then bolt the upper and lower manifold to the head. Now its time to install the fuel rail and injectors. The rail just presses onto the injectors and the injectors just press into the cups. The only thing really holding it all down is the the rail connected to the intake mani.