Transcription of Wireless Illuminated Keyboard K800 Quick Start ... - Logitech
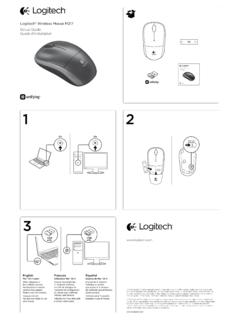
1 K800. Setup Guide | Guide d'installation English .. 3. Fran ais .. 9. Espa ol .. 15. Portugu s .. 21. 2. WHAT'S IN THE BOX. Important Safety, Compliance and Warranty Information Informations importantes concernant la s curit , la mise en conformit . et la garantie English 3. SET UP. 1. 2. 3 Software installation 4 English Keyboard FEATURES. 2 3. 1 4. 6 78. 5. 1. Application zone 3. Multimedia 5. key + F 1 Launch Internet navigation zone 6. Automatic light browser + F9 Launch media + F 2 Launch e-mail sensor (ALS). + F10 Previous track application + F11 Play/Pause 7. Battery status + F 3 Launch Search indicator + F12 Next track + F4 Flip 4.
2 Multimedia 8. Keyboard power 2. Convenience zone switch . volume zone + F 5 Backlight down by 25% Mute + F 6 Backlight up by 25% Volume down + F 7 Battery check Volume up + F 8 Sleep mode Calculator English 5. RECHARGING UNIFYING. Recharging the Keyboard Logitech Unifying technology Typically, you can expect about connects up to six compatible 10 days of battery life before you Logitech mice and keyboards will need to recharge the Keyboard to the same receiver, using only battery.* If the backlighting level is one USB port for multiple devices. set to 100%, you have about 15 hours To learn more, visit: of battery life.
3 To recharge the Keyboard , connect it to your computer using the USB. recharging cable. A full battery recharge takes about 5 hours and only 3 hours if the Keyboard has been switched off. Battery life varies with usage, backlighting level, and computing conditions. Heavy usage usually results in shorter battery life. 6 English TROUBLESHOOTING. Keyboard not working? 1. Slide the Keyboard 's Off/On switch 5. Try reconnecting the Keyboard to Off and then On. The Keyboard 's and Unifying receiver using battery status indicator LEDs the Logitech Unifying software should light up. (see the Unifying section). 2.
4 Confirm that the Keyboard 6. Restart the computer. is charged. The battery status indicator is red when the battery is low. 3. Try plugging the Unifying receiver into another USB port. 4. Move the Unifying receiver closer to the Keyboard . English 7. BATTERY REMOVAL INFORMATION. 1. 4. 2. 5. 3. 6. 1. Remove 1 screw and battery door. 2. Remove bottom panel. 3. Remove 17 screws. 4. Remove top case. 5. Remove 6 screws. 7. 6. Remove keyframe, light guide panel and metal plate. 7. Remove tape, then disconnect the battery cables from the main circuit board, remove battery from the bottom case. 8. Dispose of the battery and 8.
5 Product according to local laws. 8 English CONTENU DU COFFRET. Important Safety, Compliance and Warranty Information Informations importantes concernant la s curit , la mise en conformit . et la garantie Fran ais 9. CONFIGURATION. 1. 2. 3 Installation du logiciel 10 Fran ais FONCTIONNALIT S DU CLAVIER. 2 3. 1 4. 6 78. 5. 1. Zone d'applications 3. Zone de navigation 5. Touche + F1 Lance le navigateur multim dia 6. Capteur de luminosit . Internet + F9 Lance un dispositif + F2 Lance l'application multim dia automatique de courrier + F10 Piste pr c dente 7. T moin de charge lectronique + F11 Lecture/Pause des piles + F3 Lance la recherche + F12 Piste suivante + F4 Basculer 8.
6 Bouton 4. Zone de volume d'alimentation 2. Zone de fonctions multim dia du clavier. pratiques Sourdine + F5 R duit le r tro clairage de 25 % Volume - + F6 Augmente le Volume +. r tro clairage de 25 % Calculatrice + F7 V rifie le niveau de charge de la batterie + F8 Mode de veille Fran ais 11. RECHARGE UNIFYING. Recharge du clavier La technologie Logitech Unifying G n ralement, vous pouvez compter permet de connecter jusqu' . sur environ 10 jours d'autonomie six claviers et souris Logitech avant de devoir recharger les piles compatibles au m me r cepteur, du clavier.** Si le niveau de le tout avec un seul port USB.
7 R tro clairage est d fini sur 100 %, Pour en savoir plus, visitez le site: votre autonomie est d'environ 15 heures. Pour recharger le clavier, branchez-le l'ordinateur l'aide du c ble de recharge USB. Une recharge compl te prend environ 5 heures et seulement 3 heures si le clavier est hors tension. La dur e de vie des piles est susceptible de varier en fonction de l'environnement, du niveau de r tro clairage et du mode d'utilisation. Une utilisation quotidienne prolong e a pour effet d' courter la dur e de vie des piles. 12 Fran ais D PANNAGE. Votre clavier ne fonctionne pas? 1. Faites glisser le commutateur On/ 5.
8 Reconnectez le clavier Off du clavier en position Off, au r cepteur Unifying l'aide puis en position On. Le t moin du logiciel Logitech Unifying lumineux de charge des piles (voir la section Unifying). du clavier doit s'allumer. 6. Red marrez l'ordinateur. 2. V rifiez que le clavier est charg . Le t moin lumineux de charge des piles est rouge lorsque le niveau est faible. 3. Branchez le r cepteur Unifying sur un autre port USB. 4. Rapprochez le r cepteur Unifying du clavier. Fran ais 13. INSTRUCTIONS DE RETRAIT DE LA BATTERIE. 1. 4. 2. 5. 3. 6. 1. Retirez une vis et le capot du compartiment de la batterie.
9 2. Retirez la partie inf rieure du bo tier. 3. Retirez les 17 vis. 4. Retirez la partie sup rieure 7. du bo tier. 5. Retirez les 6 vis. 6. Retirez le plateau de clavier, le panneau de guidage optique et la plaque m tallique. 7. Retirez le ruban et d connectez 8. Mettez la batterie les c bles de batterie de la carte au rebut conform ment de circuit imprim principale, la r glementation puis retirez la batterie du bo tier 8. locale. inf rieur. 14 Fran ais CONTENIDO DE LA CAJA. Important Safety, Compliance and Warranty Information Informations importantes concernant la s curit , la mise en conformit . et la garantie Espa ol 15.
10 INSTALACI N. 1. 2. 3 Instalaci n de software 16 Espa ol CARACTER STICAS DEL TECLADO. 2 3. 1 4. 6 78. 5. 1. Secci n de 3. Secci n 5. Tecla aplicaciones de navegaci n 6. Sensor de luz + F 1 Abrir navegador de multimedia autom tico Internet + F 9 Abrir multimedia + F 2 Abrir aplicaci n de + F10 Pista anterior 7. Indicador de estado correo electr nico de bater a + F11 Reproducir/Pausa + F 3 Iniciar b squeda + F4 Voltear + F12 Pista siguiente 8. Conmutador de 4. Secci n de encendido de teclado. 2. Secci n de acceso volumen multimedia r pido Silencio + F 5 Retroiluminaci n reducida en un 25% Bajar volumen + F 6 Retroiluminaci n Subir volumen aumentada en un 25% Calculadora + F 7 Comprobaci n de bater a + F 8 Modo de suspensi n Espa ol 17.