Transcription of Wireless TV Receiver - AT&T
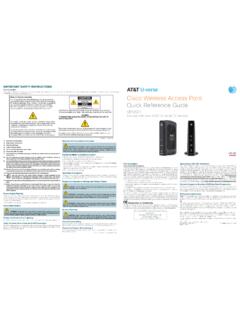
1 Approximate installation time: 20 minutesAT&T U-verse TVWireless TV ReceiverUVE415_Wireless_TV_Install_Guide _Back_ReleaseUVE415_Wireless_TV_Install_ Guide_Front_ReleaseRemote controlEthernet cable (gray) Wireless Access Point power cordInstallation/product guidesRemote Control User GuideAT&T U-verse Wireless TV Receiver ManualAT&T U-verse Wireless TV Receiver Installation GuideWireless Access Point (WAP)Product ManualIn the box:Locate your existing Gateway or Inside Unit and gather materials needed for setup:AT&T U-verse Wireless TV ReceiverThe appearance of your Receiver may differ from the picture Receiver power cordCustomer-provided materialsA cable, such as HDMI, Composite, or other, is required to connect the TV Receiver to your TV. This cable may be present in your current setup, and can be reused. However, if it is not, you will need to purchase this installation guide Get started These instructions will guide you through the process of installing your AT&T U-verse Wireless TV Access Point (WAP)ORORI nside UnitGatewayGatewayATT110900769-3 ATT110900769-3( Wireless TV Receiver ) 38/29/12 4:34 PM UVE415_Wireless_TV_Install_Guide_Inside_ ReleaseUVE415_Wireless_TV_Install_Guide_ Inside_ReleaseAABBCC onnect the provided WAP to your existing Gateway or Inside Unit by plugging one end of the Ethernet cable into the single port of the WAP and the other end into one of the four Ethernet LAN ports on the back of the Gateway or Inside Unit.
2 (It is not necessary to power down the Wireless Gateway or Inside Unit when conducting this step.)Connect the WAP to the provided power cord and plug the cord into a working electrical outlet. Once powered up, the Power LED light should be up the Wireless Access Point (WAP) Approximate time: 5 minutes1 Note: You need to have an open Ethernet port on your existing Gateway or Inside Unit before the installation of the first TV steps 2 and 3 in this guide with the second TV a second Wireless TV ReceiverPress the OK button on the TV Receiver . On your TV screen, you will see the gray/white antenna Searching for Wireless Access Point (see Figure 3A).Go to the WAP and press the Wi-Fi Protected Setup (WPS) button on the front of the unit. You should see a fast-blinking green LED bar under the WPS back to the TV and TV Receiver . Depending upon how quickly you return to your TV, you may see a green antenna on your TV once the pairing has been successful (see Figure 3B), or you may see the solid green Link LED light on the front of the TV Receiver .
3 Either indicator means a successful pairing. Pairing occurs very quickly. If you are pairing from another room, you may not see the connection confirmation screen with the green antenna as it appears only momentarily. If you see a red antenna as in Figure 3C, see the Specific issues section on the back of this guide. In order to ensure you have proper signal strength, at least three green LED bars should be displayed on the front of the TV Receiver (see Figure 3D). Please allow up to 10 minutes for your TV Receiver to boot up. Please do not turn off your TV Receiver during this time. TV programming will automatically appear when the boot-up process is ! You have paired your Wireless TV Receiver and are ready to enjoy U-verse up the TV and select the appropriate TV input (source) in the TV configuration. (Consult your TV manual for details.)Place the TV Receiver near the TV you want to connect the TV Receiver to your TV.
4 (Consult your TV manual for details.)Plug the provided TV Receiver power cord into the back of the TV Receiver and the other end into a working electrical outlet. The TV Receiver will power up automatically. After about one minute you should see the onscreen instructions shown in Figure 1A. Follow the onscreen instructions. Set up the Wireless TV Receiver Approximate time: 5 minutes2 Figure 1A Follow the onscreen 3A Searching for Wireless Access Point (WAP)AT&T U-verse Wireless TV Receiver (back)ABEthernet cableGatewayWireless Access Point (WAP)(color may vary)Note: Leave existing cables plugged into the Wireless Gateway. If there is not an available Ethernet port, see the Having trouble? section on the back of this Go online: Visit to learn more about the benefits and features of your AT&T U-verse Control Information Current AT&T U-verse customers swapping an existing Receiver for a new Wireless Receiver may use their existing remote control.
5 To use the new remote control, the new remote will require programming (programming instructions are available in the remote control user guide packaged with the remote control). New AT&T U-verse customers or current customers adding a new Receiver will need to program the new remote control (programming instructions are available in the remote control user guide packaged with the remote control).HDMI cable setupNote: To see examples of other TV cable connection options that might apply, refer to the included AT&T Receiver installation guide (Connecting Your TV Receiver ) or go to Receiver replacementABUnplug the existing Receiver from the electrical outlet and remove the power adapter. Stack the new Receiver on top of the old remove one connection at a time from the old Receiver and reconnect to the new steps 2 and 3 in this guide to pair the new Wireless UnitWireless Access Point (WAP)(color may vary)Ethernet 48/29/12 11:17 AM UVE415_Wireless_TV_Install_Guide_Inside_ ReleaseUVE415_Wireless_TV_Install_Guide_ Inside_ReleaseABCC onnect the provided WAP to your existing Gateway or Inside Unit by plugging one end of the Ethernet cable into the single port of the WAP and the other end into one of the four Ethernet LAN ports on the back of the Gateway or Inside Unit.
6 (It is not necessary to power down the Wireless Gateway or Inside Unit when conducting this step.)Connect the WAP to the provided power cord and plug the cord into a working electrical outlet. Once powered up, the Power LED light should be up the Wireless Access Point (WAP) Approximate time: 5 minutesABComplete the installation of the first TV steps 2 and 3 in this guide with the second TV a second Wireless TV ReceiverPress the OK button on the TV Receiver . On your TV screen, you will see the gray/white antenna Searching for Wireless Access Point (see Figure 3A).Go to the WAP and press the Wi-Fi Protected Setup (WPS) button on the front of the unit. You should see a fast-blinking green LED bar under the WPS back to the TV and TV Receiver . Depending upon how quickly you return to your TV, you may see a green antenna on your TV once the pairing has been successful (see Figure 3B), or you may see the solid green Link LED light on the front of the TV Receiver .
7 Either indicator means a successful pairing. Pairing occurs very quickly. If you are pairing from another room, you may not see the connection confirmation screen with the green antenna as it appears only momentarily. If you see a red antenna as in Figure 3C, see the Specific issues section on the back of this guide. In order to ensure you have proper signal strength, at least three green LED bars should be displayed on the front of the TV Receiver (see Figure 3D). Please allow up to 10 minutes for your TV Receiver to boot up. Please do not turn off your TV Receiver during this time. TV programming will automatically appear when the boot-up process is ! You have paired your Wireless TV Receiver and are ready to enjoy U-verse the Wireless TV Receiver to WAP Approximate time: 10 minutes3 Figure 1A Follow the onscreen 3B Successful connectionFigure 3D Signal strengthFigure 3C Access Point not found or connection errorFigure 3A Searching for Wireless Access Point (WAP)Visit to learn more about the benefits and features of your AT&T U-verse service.
8 New AT&T U-verse customers or current customers adding a new Receiver will need to program the new remote control (programming instructions are available in the remote control user guide packaged with the remote control).WAPFor Receiver replacementABUnplug the existing Receiver from the electrical outlet and remove the power adapter. Stack the new Receiver on top of the old remove one connection at a time from the old Receiver and reconnect to the new steps 2 and 3 in this guide to pair the new Wireless 58/29/12 11:18 AMUVE415_Wireless_TV_Install_Guide_Back_ ReleaseUVE415_Wireless_TV_Install_Guide_ Front_ReleaseNeed more help?Go online: Visit us: Dial and ask for U-verse technical support. 2012 AT&T Intellectual Property. All rights reserved. AT&T, the AT&T logo and all other AT&T marks contained herein are trademarks of AT&T Intellectual Property and/or AT&T affiliated companies. 1. Check your all cables and cords are connected properly and Check power/reboot/signal strength.
9 Confirm you have power. If you have power and the TV Receiver is turned on, the Power button on the front of the Receiver will have a green light surrounding it. If you do not have power, move the TV Receiver to a working electrical outlet. If no lights are on, ensure that the TV Receiver is turned on by pressing and releasing the AT&T button on the remote control, and then pressing and holding the POWER button on the Receiver for 10 seconds. Power cycle the Wireless Access Point (WAP) by unplugging the WAP from the electrical outlet for 10 seconds and then plugging it back in. Repeat the pairing process in Step 3. Wait two minutes to complete pairing. Move the Receiver closer to the WAP (to determine if the problem is a distance issue).3. View that your AT&T U-verse service is working properly by watching TV and navigating through the Menu or Guide issues AT&T U-verse Wireless TV Receiver power is on and TV power is on, but I still can t see AT&T U-verse your TV menu setup.
10 Be sure the proper input/source setting is selected. Picture is stretched or distorted. Check the aspect ratio setting. Press MENU on your remote control, use the RIGHT ARROW to select Options, and then select System Options, then OK, and then Aspect Ratio. Choose the correct setting for your TV Receiver doesn t respond to the remote control. Check the batteries in the remote control by pressing the AT&T button on the remote control to verify a red light is visible. If no light or dim light is visible, replace the batteries in the remote antenna on the TV screen. Disconnect your Wireless TV Receiver from the original location and reconnect the power cord at a location closer to the Wireless Access Point (WAP). Wait one minute for the Receiver software to load. Press the OK button on the front of the Wireless TV Receiver and press the WPS button on the WAP. Wait two minutes for the Receiver and WAP to pair. After two minutes, the Link light on the front of the Wireless TV Receiver should be solid green.