Transcription of Wiring Around Your Home - Purdue Extension
1 4-H-1021-WPILOTAGRICULTUREEXTENSIONW iring Around your Home4-H Electric Division V Wiring Around your home Welcome to Division V of the 4-H Electric Project Congratulations! You've successfully completed the first four units of the 4-H electric program and are now ready to learn about even more complex aspects of the world of electricity. In the Division V manual you will build upon those things you learned in the first four manuals and learn some very useful new skills. Each category listed below contains background information and activities that will help you learn a major project skill associated with electricity. The project skills learned in this manual include: Understanding the need for and purpose of electrical Codes. Being able to use the correct technical terms associated with residential electrical Wiring .
2 Understanding how electricity is distributed and controlled throughout your home . Recognizing the different kinds of circuits that may be found in your home . Reading and creating Wiring diagrams and understanding the associated symbols. Determining the size of a circuit (ampacity) needed for the appliance(s) you wish to use. Determining if a circuit is energized by using testing equipment. Understanding grounding and the reason it is important. Understanding why/when/where circuits should be GFCI protected. Knowing about arc-fault interrupters and when they should be used. Recognizing the different types of wires (conductors) and cables and how they are coded. Understanding the process of mechanically/electrically connecting two or more wires together. Understanding how to determine t he different sizes and types of receptacles and switches (including three-way).
3 Being able to safely replace a receptacle and/or switch. In Wiring Around your home you need to: 1. Attend your county's 4-H electric meeting(s). 2. Read this manual. 3. Complete the activities presented in this manual. 4. Complete the record sheet in the back of this booklet and submit it as instructed by county 4-H youth educator or 4-H electric leader. Upon completion of Wiring Around your home you will exhibit one of the following at your local or county fair: Display board, poster, equipment Wiring board, or written report in one of the following areas: electrical work that you did Around your home or other location and how you accomplished it (preferably with models, pictures or a small part of your total installation). Be sure to include a Wiring diagram of your project with your exhibit. analyze the current Wiring situation in your home or out buildings and develop a new system that you feel would be better.
4 Be sure to show diagrams of the old and new systems. Also, explain why the new proposed system is better. any topic covered in this manual. Note: Poster and display boards should be 22" tall by 28" wide. Equipment Wiring boards differ from display boards in that they show hands-on Wiring techniques ( , complete Wiring of a light controlled by a three-way switch system). Equipment Wiring boards should be no larger than 3' by 3'. The boards should be designed so that they can be displayed horizontally. ACKNOWL EDGM ENTS Using Elect ri c it y was writ t en by Karen Tormoehlen, Roger T ormoehlen, Bill Vollmer, Purdue University Cooperative Extension Specialist, 4-H and t he Indiana St ate 4-H Joint Electric Committee composed of Fred Bauman, Rex P rincell, Wayne Newhart, Roy Mohr, Dave Millis, Betty Baut e, Valerie Sharp, Brad Henderson, Dan Endris, Jim Rupp, Brandon St evens, Rob Wilson, Rachel Cruz, Darby O Conner, Fred Jakubowicz.
5 2 What's To Come? Introduction 3 The National Electric Code 3 How Electricity Travels Throughout the home 4 electrical Sym bols and Building Plans 4 Activity #1 Identify electrical Plan Symbols 4 Service Entrance Panel Control starts here! 7 Circuit Breakers and Fuses 7 Activity #2 Draw your home s electrical Plan 8 Activity #3 Diagram your Service Entrance Panel 8 W hat are Branch Circuits? 8 Types of Branch Circuits 9 Activity #4 Is your Permanent Wiring Adequate? 9 Activity #5 Typical Branch Circuits and Their Loads 10 Activity #6 Is the Circuit Overloaded? 11 Is the Circuit Live? 12 Activity #7 Is the Circuit Live (and wired properly)? 12 Grounding 13 Ground Fault Circuit Interrupters (GFCI) 14 Activity #8 Identifying GFCIs in your home 14 Arc Fault Circuit Interrupters (AFCI) 15 W iring Types, Sizes, Insulation, Color Coding 15 Connecting W ires with Solderless Connectors 16 Activity #9 Using Wire Nuts/Making Good Connections 16 Types of electrical Cable 17 Activity #10 Symbols/Markings on Wires/Cables 18 electrical Boxes 19 Receptacles/Plug-in Outlets 19 Activity #11 Identifying Different Receptacles Available 20 Switches 21 Im portant Safety Guidelines 23 Putting it Together 24 Activity #12 Redesigning your Bedroom 24 4-H Club Record 25 Poster and Display Board Check Sheet 27 Appendices: #1.
6 Replacing an Outlet/Receptacle 28 Replacing an End of the Run Receptacle 28 Replacing a Middle of the Run Receptacle 29 #2. Replacing Switches 30 Replacing Single Pole Switches with Term inal Screws 30 Replacing Three-W ay Switches 31 Installing a Dim m er 33 #3. electrical Term inology Glossary 34 Introduction What s the first thing you do when you walk into a darkened room? Reach for the light switch? You probably do this without giving it a second thought unless a bulb has burned out, a fuse is blown or a circuit breaker has tripped and you are left in the dark. Have you ever given thought to what makes it possible to microwave popcorn, listen to your stereo or have light to read with? Permanent indoor Wiring is responsible for bringing electricity throughout your home . This manual will explore types of permanent indoor Wiring that make our lives comfortable through the ability to use lights and appliances in our homes.
7 You will also be given instructions on how to make safe and simple repairs to your existing electrical system. The National Electric Code The National electrical Code (NEC) was developed by the National Fire Prevention Association (NFPA) as a set of rules to encourage safe practices while working with electricity. It states The purpose of this Code is the practical safeguarding of persons and property from hazards arising from the use of electricity. The NEC is updated every few years. In addition to the NEC, cities, counties, and states may adopt regulations that need to be followed by consumers, electricians and builders. A permit may be required to be obtained from a local inspector whenever you make major changes to, or install something new in, your home - Wiring system. Before attempting any electrical work, contact a local inspector to learn more about the electrical code(s) in your area and the rules that you need to follow when making changes to your electrical system.
8 your local electrical utility may also have certain Wiring and inspection requirements. Remember to always turn off the power to any circuit that you may be working on. 3 This manual does not attempt cover each and every aspect of the residential Wiring rules as set forth in the National Electric Code (NEC). The NEC is, if fact, a very detailed and complete set of rules governing the safety and use of electricity in business, industry and the home . This manual serves as more of overview of how to make some basic repairs or improvements to an existing home electrical system which would be consistent with the rules set forth in the NEC. The language of the NEC specifies what the MINIMUM safety standards to be used are. How Electricity Travels Throughout the home Electricity is supplied to your home through your electric utility s overhead or buried power lines.
9 * Before entering your home , electricity passes through a watt-hour meter which measures the amount of electricity used. It then continues into your house through the Service Entrance Panel (also called a load center ), where circuit protection devices such as circuit-breakers or fuses are located (Figure 1). Electricity is then distributed throughout your home using branch circuits to provide power to appliances and lights through receptacles, switches, and fixtures. Electricity arrives at your home on two energized ( hot ) conductors and one non-energized ( neutral ) conductor. Between the two hot conductors a typical voltage of 240 Volts AC will be present and between either of the hot conductors and the neutral or grounded conductor approximately 120 Volts will be present (Figure 1). Under the right circumstances, 120 volts can injure or kill you; 240 volts could present an even greater risk for injury or electrocution.
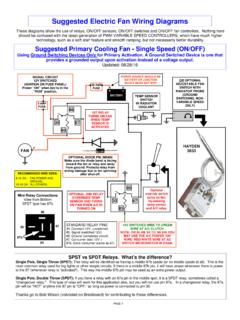
10 Therefore, it is very important that power be removed from a circuit before any repairs or changes are made to it. There are a number of testing devices that can check for the presence of voltage in the circuit and one of these should be used to make sure that the power is off. These testing devices will be discussed later in this manual. Electrica l Symbols and Building Plans electrical symbols are used on home building plans in order to show the location, control point(s), and type of electrical device(s) required at those locations. These symbols, which are drawn on top of the floor plan, show lighting outlets, receptacle outlets, special purpose outlets, fan outlets and switches. Dashed lines are drawn between the symbols to denote which switch(es) control specific light(s) or receptacle(s). There are quite a few symbols used to represent the devices used in home Wiring but some of them are very similar, so care should be used when working with them.