Transcription of www.daikinac.com
1 AMERICAS EDUS72-975 Contents1 Contents1. Features .. Clear Display .. Simple Multilingual Other Features .. 72. 83. Specifications .. 94. Dimensions .. 105. Applicable Models .. Applicable Models .. 106. Operation Safety Precautions .. Button Locations and Descriptions .. Names and Functions .. Basic Quick Menu Options .. Reference 337. Installation manual .. Safety Precautions .. Accessories .. Remote Controller Installation Procedure .. Functions and Menu Items of Remote Controller Power-on .. Field Test Procedure for Checking Error History .. Entering Maintenance Contact Information .. Confirmation Registered Clock & Calendar .. Language .. 44 FeaturesEDUS72-9752 BRC1E711.
2 FeaturesBRC1E71 Clear Display .. Equipped with backlight and large sized character display and buttons. Stylish .. Basic tone is white and arrow keys are located at the center. Simple Operation .. Simple operation used with arrow keys and menu-driven method. Multilingual Display .. Available for selection of 3 languages to display arbitrarily Other Wide variety of functions to meet customer needs such as schedule Display Dot matrix displayA combination of fine dots enables texts and icons to be displayed smoothly and makes the display of a wide variety of text and illustrations possible. Backlight displayNewly equipped backlight helps operation in dark and Functional OperationCompared to the conventional structure of button allocation for each function, the number of buttons has been decreased (from 15 to 9).
3 Can intuitively handle frequently performed basic operations .(1) Large text display (2) Large buttons (3) Backlight (4) No-cover design(1)(2)(3)(1) "Mode" button(3) "Menu/OK" button(6)-(9) Arrow Keys(5) "Cancel" button(4) "On/Off" button(2) "Fan Speed" buttonFeaturesEDUS72-9754 BRC1E71 Available for simple operation with arrow keys and menu-driven for simple operation with arrow keys and menu-driven for simple operation with arrow keys and menu-driven "Menu/OK" button to change the screen and then the main menu the item you wish to set with direction keys and press "Menu/OK" button at the item you wish to set and the setting entry screen for simple operation with arrow keys and menu-driven on displayThe item you wish to set can be changed with up or down display gives an explanation of each setting for easier Display Available for display in 3 different available for switching display by selecting from main languages (English, French, Spanish) Features FunctionsEDUS72-9758 BRC1E712.
4 {: Possible*1 Used for setting Standard Display mode or Detailed Display mode.*2-1 When an error occurs, the error code blinks and the contact address and model names appear. 2-2 The contact address must be registered when the controller is installed. 2-3 For some models, model codes are displayed instead of model names.*3 Can display for some model only.*4 Setback In the case of two remote control system.{:Connectable :Not connectable Due to the limited power supply capacity, there are some restrictions when controlling 2 remote controllers.<Common restriction for SkyAir and VRV> When controlling one indoor unit with 2 remote controllers, the remote controller operated first turns the backlight on. When controlling 2 remote controllers, the following functions cannot be set with the sub remote Schedule function and Setback temperature function2.}}
5 Auto Changeover function by the remote controller<Restriction for VRV only>Adaptor for wiring (KRP1C*) or power supply adaptor for indoor unit PCB (X18A or X35A) cannot be used for 2 remote controller FunctionsDrawing displayLCDO peration methodMenu selectionBacklight function{Convenient FunctionsClock function (time display){Display switch function{ *1 Keylock function{Schedule (weekly) timer*4{Maintenance/ServicesModel name display{ *2 Contact dealer display{ *2 Operation time display{ *3 Operational data display{*3 MainBRC1E71 BRC1D71 WirelessBRC4**BRC7**SubBRC1E71{ BRC1D71{{ WirelessBRC4**BRC7** { EDUS72-975 SpecificationsBRC1E7192. In the case of Centralised remote controller connection. When connecting a centralised related device(*1), the following functions cannot be Schedule function and Setback temperature function2.}}}}}}}}}}}}}
6 Auto Changeover function by the remote controller(*1) this means All Centralised remote Touch Controller [DCS601C71]intelligent Manager [DAM602A71,72]BACnet Gateway [DMS502B71]Central remote controller [DCS302C71]Unified ON/OFF controller [DCS301C71]Schedule timer [DST301BA61]Residential central remote controller [DCS303A71]Wiring adaptor for electrical appendices [KRP2A5*/6*]DMS-IF [DMS504C71]3. SpecificationsNew Remote Controller BRC1E71 Dimension (in.) H W D4 3/4 4 3/4 3/4 LCDD isplay size (in.)H W1 25/32 2 13/16 Display methodFull dot method (dot 160 255)BacklightYes (Background color: white)ColorFresh whiteCover for operation partNoDimensionsEDUS72-97510 BRC1E714. Dimensions5. Applicable Models3D065275 Applicable Indoor unitVRVAll models that can be connectedBRC1D71 SkyAirAll models that can be connectedBRC1D71 EDUS72-975 Operation ManualBRC1E71116.
7 Operation Precautions3P243520-2C2 EnglishSafety ConsiderationsRead these SAFETY CONSIDERATIONS carefully before operating the remote the customer to operate and maintain the customers that they should store this operations manual with the Installation manual for future of WARNING and CAUTION Symbols:WARNINGI ndicates a potentially hazardous situation which, if not avoided, could result in death or serious a potentially hazardous situation which, if not avoided, may result in minor or moderate may also be used to alert against unsafe following pictograms are used in this manual . Never follow the instructions sure to ground the wet hands water and moisture not modify or repair the remote controller. Consult your Daikin dealer for any modifi cation or for not relocate or reinstall the remote controller by yourself.
8 Improper installation may result in electric shocks or fi re. Consult your Daikin dealer to relocate or for any not use fl ammable materials ( , hairspray or insecticide) near the remote not clean the product with organic solvents such as paint use of organic solvents may cause cracking, damaging the product, causing electric shocks, or fi the dealer if the remote controller was submerged under water due to a natural disaster, such as a fl ood or not operate the remote controller at this time or a malfunction, electric shock, or fi re can 28/27/2009 1:48:26 PMEnglish 1 NoticesSafety Considerations Items to be Strictly Observed .. 2 Button Locations and Descriptions .. 4 Basic OperationCool/Heat/Auto/Fan Operation .. 10 Dry Mode .. 12 Setback .. 14 Ventilation Mode .. 15 Setting the Cool / Heat Changeover Master.
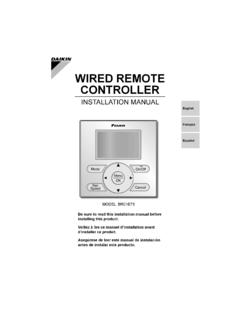
9 16 Key Lock .. 18 Quick ReferenceMain Menu Items .. 20 Menu OptionsMoving Within the Main Menu Screen .. 22 Air Flow Direction .. 23 Ventilation .. 26 Schedule .. 28 Off Timer .. 33 Maintenance Information .. 35 Confi guration .. 36 Current Settings .. 39 Clock & Calendar .. 39 Language .. 42 MaintenanceReset Filter Indicator .. 43 Maintaining the Unit and LCD Display .. 44 Reference InformationError Code Display .. 45 After-sale Service .. 46 18/27/2009 1:48:26 PMOperation Locations and Descriptions3P243520-2C4 EnglishOn/OffModeFanSpeedCancelMenuOKBut ton Locations and DescriptionsFunctions other than basic operation items ( , On/Off, Operation mode selector, Fan speed control, and temperature setpoint) are set from the menu screen.
10 NOTE Do not install the remote controller in places exposed to direct sunlight, otherwise the LCD will be not pull or twist the remote controller cord, otherwise the remote controller may be not use objects with sharp ends to press the buttons on the remote controller otherwise damage may result. 2. Fan speed control button 3. Menu/OK button 8. On/Off button10. Cancel button 9. Operation lamp11. LCD (with backlight) 4. Up button 5. Down button 6. Right button 7. Left button 1. Operation mode selector 48/27/2009 1:48:27 PMEnglish 3 Items to be Strictly Observed CAUTIONDo not allow children to play with the remote controller to avoid causing damage to the product. Never disassemble the remote controller. Touching the interior parts may result in electric shocks or fi your Daikin dealer for internal inspections and not touch the remote controller buttons with wet fi ngers.