Transcription of Zimmer Maxera Cup - Hip
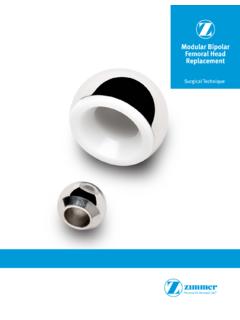
1 Zimmer Maxera CupSurgical TechniqueThis device is not available for commercial distribution in the United TechniqueGeneral Description of the ImplantThe Maxera Cup (Fig. 1) is a monoblock BIOLOX delta acetabular solution that is intended to be used in conjunction with BIOLOX OPTION* and BIOLOX delta* heads with an appropriate, corresponding diameter. Primary fixation is achieved by under-reaming the acetabulum to achieve a press-fit. The external surfaces of the cup include paired fins which provide supplemental fixation and a titanium vacuum plasma spray coating (Ti-VPS) to create a scratch fit. Patient SelectionIndications/Intended Use** For non-cemented use in skeletally mature individuals undergoing primary surgery for rehabilitating hips damaged as a result of noninflammatory degenerative joint disease (NIDJD) including but not limited to osteoarthritis, avascular necrosis, post-traumatic arthritis and congenital hip dysplasia and inflammatory joint disease (IJD), , rheumatoid arthritis, if bone quality is adequate.
2 Trademark of CeramTec GmbH* For additional information on BIOLOX OPTION and BIOLOX delta heads, please refer to the latest version of Design Rationale Ref. **Please refer to the Package Insert for the list of contraindications Fig. 1 Maxera CupSurgical Technique3 Overview of Implant SizingThe true external diameter (Fig. 2) of the Maxera Cup component corresponds directly to the labeled size. Adequate bone stock is necessary for a press-fit application. Surgical judgment is required to assess appropriate reaming, in order to achieve an optimal press-fit. Optimal press-fit will be achieved by careful acetabular bone preparation and accurate implant placement. Note: The Maxera Cup in sizes 50mm to 66mm is a full hemisphere while sizes 42mm, 44mm, 46mm and 48mm have an extended cylinder making them taller than a full hemisphere.
3 (Fig. 3) Note: The cups are labeled with their actual diameter, , a cup size 44mm/56mm has an inside diameter of 44mm and an outside diameter of 56mm. An implant sized 2mm over the reamed preparation (size of last reamer used) will provide 2mm press-fit. A 1mm press-fit may be desired with hard bone. Note: The 40mm through 47mm Shell Provisionals have an extended cylinder and duplicate the height of the Reamer Size 46mm Shell Provisional size 46mm Maxera Cup size 46mmCup Sizes42444648505254565860626466 BIOLOX Head SizesBIOLOX delta32mm36mm40mmBIOLOX OPTION32mm36mm40mm44mm48mm Fig. 4 Sizing Guide : Do not attempt to remove the preassembled ceramic liner which is locked into the shell s height of the Shell Provisional corresponds to the appropriate implant, , the 44mm and 45mm Shell Provisional is the same height as the 46mm Maxera Cup.
4 This allows the surgeon to accurately assess the depth and orientation of the final implant based on the trial position. We recommend careful Shell Provisional placement to assess for adequate bone preparation. When inserting the actual implant, the previous position of the Shell Provisional provides important visual cues to the surgeon that the final implant is fully seated in the desired component corresponds to the appropriate BIOLOX OPTION or BIOLOX delta femoral head component. (Fig. 4)For further combination options please refer to Fig. 3 Cylinder Height 180 Hemisphere (40mm-47mm)180 Hemisphere (48mm-65mm) Fig. 2 A Maxera Cup size 36/46 has a nominal outside diameter of 46mm and an inside diameter of Technique4 Preoperative PlanningAccurate preoperative planning and acetabular templating are essential.
5 Important Parameters for Planning the Procedure planned optimal position of the acetabular component center of rotation size of the implant depth final component position achieving the recommended abduction angleTemplates of the Maxera Cup component are available for preoperative planning (Fig. 5). They are available in 115% magnification for conventional radiographs and 100% magnification for digital X-rays. It is necessary to combine these templates with that of the chosen stem by making the centers of rotation correspond. The final size of the prosthesis is determined during the surgical procedure. When templating, it is important to establish the planned optimal position of the acetabular component, center of rotation, size of the implant, depth, and final component position.
6 Achieving an abduction angle to a maximum of 45 degrees and 10 to a maximum of 20 degrees of anteversion is appropriate in most Variation in placement of the cup will depend on the patient s anatomy and intraoperative surgical 5 AP Templating Technique5 Surgical ApproachThe Maxera Cup may be implanted using a variety of surgical approaches. The specific approach depends on the surgeon s preference and therefore may differ from the procedure shown. Note: Each surgeon s approach may vary. The surgical approach must provide adequate exposure to visualize the entire acetabular Maxera Cup should not be used in cases where there is inadequate or poor bone quality to support the PreparationThe acetabular labrum is completely excised, and any large peripheral osteophytes are removed.
7 The ligamentum teres is excised, and the true floor of the acetabulum ( , true acetabular region2) is identified. (Fig. 6)Technique Tip: It is important to visualize the entire bony rim of the acetabulum (Fig. 7). This will help when using Shell Provisionals to assess the depth reamed. It will also reduce the likelihood of soft tissue entrapment which may prevent the cup from fully 6 Labrum 7 Entire bony rim is Technique6 Fig. 8 180 hemispherical Maxera Cup is a full 180 hemisphere for sizes 50mm to 66mm. Note: As previously mentioned (Page 3), the four smallest sizes (42mm, 44mm, 46mm, and 48mm) have an extended cylinder. The extended cylinder may be exposed or proud of the reamed acetabular cavity per surgeon assessment of the technique demonstrates the use of 180 hemispherical reamers to prepare the acetabulum (Fig.)
8 8). If another type of reamer is used, reaming should be adjusted per the surgeon s discretion. Hold the reamer steady and apply pressure in the same direction that the prosthesis will be implanted. Start with a reamer at least 2 4mm smaller than the templated implant size. Care should be taken not to over-medialize. Acetabular reaming must progress in 1 2mm increments with frequent assessment of the depth and orientation of the prepared acetabular bone, coverage, and rim integrity (Fig. 9). To achieve the appropriate abduction angle, some of the posterior-superior portion of the implant may be uncovered, as long as adequate initial press-fit is achieved. Sequential reaming should be carried out until adequate acetabular preparation has been achieved, as assessed by careful use of the Shell Provisionals.
9 Regular use of Shell Provisionals as reaming progresses is highly recommended to determine the depth of reaming. Technique Tip: In hard bone, it is advisable to use reamers in 1mm increments when approaching the definitive acetabular size. Fig. 9 Reaming Technique7 Use of the Acetabular Shell Provisionals Place the selected size Shell Provisional inverted ( , cup and pins facing up) so the Inserter Handle can mate with the two pins at the pole of the Shell Provisional. Ensure that the mating shape features of the Inserter Handle are aligned for insertion. (Fig. 10) Snap the Inserter Handle into the Shell Provisional for a temporary hold prior to locking the assembly with the Locking Screw. Insert Ball Head Hex Screwdriver through the window and into the Locking Screw at the tip of the Inserter Handle.
10 (Fig. 11) While holding the Shell Provisional in place, securely thread the Locking Screw into the Polar Hole of the Shell Provisional. Note: This acetabular implant does not allow the option of cup repositioning after final implantation. The success of acetabular implantation and subsequent fixation is dependent on achieving adequate primary stability. For this reason, acetabular Shell Provisionals of 1mm increments are provided to allow optimal assessment of the acetabulum as preparation progresses. (Fig. 12) Note: It is highly recommended that the surgeon uses 1mm increments in Shell Provisonal sizing to ensure optimal press-fit (either 1 or 2mm, based on surgeon preference and discretion) for the conditions present at the time of implantation. The accuracy of reaming and the optimal position of the implant are assessed using an acetabular Shell Provisional the same size as the last reamer used.