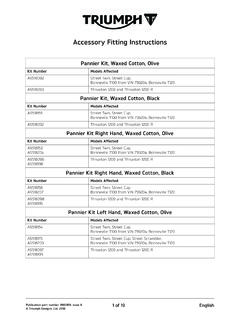
Accessory Fitting Instructions - Triumph …
2 of 19 Thank you for choosing this Triumph genuine accessory kit. This accessory kit is the product of Triumph's use of proven engineering, exhaustive testing, and continuous striving for superior reliability, safety and
Download Accessory Fitting Instructions - Triumph …

Information
Domain:
Source:
Link to this page:
Documents from same domain

Accessory Fitting Instructions
www.triumphinstructions.com5 of 15 5. Fit the right hand rear footrest hanger from the kit with the original fixings and spacers provided. Position the spacers between the footrest
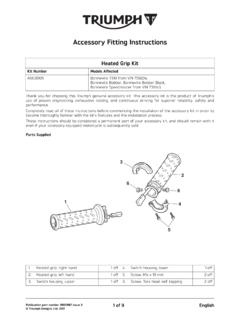
Accessory Fitting Instructions
www.triumphinstructions.com3 of 9 6. Remove the two fixings and detach the switch housing from the clutch lever housing. Without disconnecting any wiring, move the switch housing clear of the clutch lever housing.

English Fitting Instructions: Speed Triple R, Speed …
www.triumphinstructions.com3 of 6 1. Read and note the eight-digit wheel sensor ID from each sensor label taking care to accurately identify the front and rear sensors. 1. Tyre pressure sensor

English Fitting Instructions: America and …
www.triumphinstructions.com4 of 14 Fitting Kit A9708237, A9708238 and A9838004 1. Disconnect the battery, negative (black) lead first. Note: • For Triumph Speedmaster, continue from step 2

English Fitting Instructions: Bonneville, Bonneville …
www.triumphinstructions.com4 of 4 America and Speedmaster 23. Position the right hand foot control plate to the mounting bar and secure with the new bolt supplied with the kit.

English Fitting Instructions: Tiger XR, Tiger XRT X, …
www.triumphinstructions.com1 of 10 English Publication part number A9900585 issue 11 © Triumph Designs Ltd. 2017 Fitting Instructions: Tiger XR, Tiger XRT, Tiger XRX, Tiger XC, Tiger XCA, Tiger …
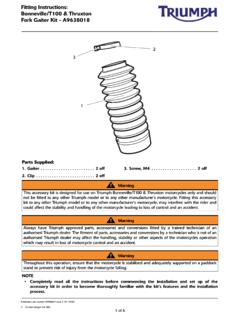
Fitting Instructions: Bonneville/T100 & Thruxton …
www.triumphinstructions.com2 of 6 1. Slacken and remove the front wheel spindle nut and washer. 1. Front wheel spindle fixings (Bonneville shown) 2. Slacken the spindle clamp bolt fitted to the right

English Fitting Instructions: Sprint GT 1050 A9808088
www.triumphinstructions.com3 of 7 Reed-switch Fitment 1. Position the motorcycle on a paddock stand. 2. Remove the seat as described in the owner’s handbook. 3. Disconnect the battery, negative (black) lead first.

Accessory Fitting Instructions - Triumph Instructions.com
www.triumphinstructions.com2 of 4 Note: • Triumph offers a broad range of approved genuine accessories for your motorcycle. We cannot therefore cover all possible equipment variations in these instructions.

Accessory Fitting Instructions - Triumph …
www.triumphinstructions.com4 of 7 Direction Indicator Relay (Not applicable to Street Triple R from VIN 793032, Street Triple R LRH, Street Triple RS, Explorer, Tiger 800 XRX, Tiger 800 XRX LRH, Tiger 800 XCX, Tiger 800 XRT, Tiger 800 XCA, Tiger 1200 models) 1.
Related documents
Operating Instructions - California Institute of …
mmrc.caltech.eduOperating Instructions DCU 002 DCU 110, DCU 180, PT 0250 BE/B (0809) DCU 310, DCU 400 Display And Operating Unit
NSTALLATION N ANUAL N - All the Help You Need
www.cardale.comimportant safety instructions for installation warning – incorrect installation can lead to severe injury follow all installation instructions carefully
CANOPY CP0015a INSTALLATION INSTRUCTIONS …
www.egrdealernet.comPage 1 of 24 30/11/10 CP0015a Place these instructions in vehicle’s glove box after installation is complete Clean Canopy with a mild detergent and water solution.

Elite 10 Color Pyrometer EGT Gauge - glowshift.com
www.glowshift.comElite 10 Color Pyrometer EGT Gauge For Product Numbers: GS-ET08_1500, GS-ET08_2200, GS-EWT08_1500 and GE-EWT08_2200 Wire Harness Color Code Red: Vehicle / Engine Ground (12v Constant (un-switched) Source (+) Black: -)
Roth Double-Wall Oil Storage Tank Installation …
www.roth-usa.com2 of 21 Roth EcoDWT plus 3 Installation Instructions US & CAN March. 2009 US Help Line: 888.266.7684 CAN Help Line: 800.986.7684 Table of Contents
ACCESSORY KIT INSTALLATION INSTRUCTIONS - …
www.upgnet.comjohnson controls unitary products 247589-uai-f-0210 accessory kit installation instructions propane conversion – 1np0680 for use with all modulating furnace models with white rodgers 36e27 gas valve