
Configuring a RAID Set - GIGABYTE
RAID Levels Configuring SATA Controllers A. Installing hard drives Install the hard drives/SSDs in the Intel® Chipset controlled connectors on the motherboard. Then connect the power connectors from your power supply to the hard drives. RAID 0 RAID 1 RAID 5 RAID 10 Minimum Number of Hard
Download Configuring a RAID Set - GIGABYTE

Information
Domain:
Source:
Link to this page:
Documents from same domain
Configuring Audio Input and Output 2
download.gigabyte.comThe recordings will saved in Documents>Sound Recordings. Voice Recorder records audio in MPEG-4 (.m4a) format. You can play the recording with a digital media player program that supports the audio file format. After setting up the audio input device, to open the Voice Recorder, go to the Start menu and search for Voice Recorder.

Configuring a RAID Set (B450 Series)
download.gigabyte.comTo delete a RAID array, select the array to be deleted on the RAIDXpert2 Configuration Utility\Array Management\Delete Array screen. Press <Enter> on Delete Array to enter the Delete screen. Then set Confirm to Enabled and press <Enter> on Yes (Figure 8). Figure 8

Configuring Audio Input and Output 2
download.gigabyte.comB. Playing the Recorded Sound The recordings will saved in Documents>Sound Recordings. Voice Recorder records audio in MPEG-4 (.m4a) format. You can play the recording with a digital media player program that supports the audio file format. After setting up the audio input device, to open the Voice Recorder, go to the Start menu and search for

Unique Features (X570 Series) - GIGABYTE
download.gigabyte.cominstructions to complete. 2. Update the BIOS without Using the Internet Update Function: Click Update from File, then select the location where you save the BIOS update file obtained from the Internet or through other source. Follow the on-screen instructions to complete. 3. Save the Current BIOS File: Click Save to File to save the current ...

User's Manual - GIGABYTE
download.gigabyte.com* Due to a Windows 32-bit operating system limitation, when more than 4 GB of physical ... BIOS 1 x 64 Mbit flash Use of licensed AMI UEFI BIOS PnP 1.0a, DMI 2.7, WfM 2.0, SM BIOS 2.7, ACPI 5.0 ... Support for Q-Flash Support for Smart Switch
BIOS Setup - GIGABYTE
download.gigabyte.comA user password only allows you to view the BIOS settings but not to make changes. Server Management Server additional features enabled/disabled setup menus. Boot This setup page provides items for configuration of boot sequence. Exit Save all the changes made in the BIOS Setup program to the CMOS and exit BIOS Setup. (Pressing

G32QC - GIGABYTE
download.gigabyte.comNote: The default Profile folder is located at the OSDsidekick installation path. D Click and do any of the following to customize the profile: - Rename the profile. - Click to modify the profile picture. Browse for the picture, and click OK to upload. - Click to confirm the modifications. - Click to reject the modifications.
Copyright
download.gigabyte.comAddress: 17358 Railroad street, City Of Industry, CA91748 Tel.: 1-626-854-9338 Internet contact information: https://www.gigabyte.com FCC Compliance Statement: This device complies with Part 15 of the FCC Rules, Subpart B, Unintentional Radiators. Operation is subject to the following two conditions: (1) This device

Configuring a RAID Set (Z590 Series)
download.gigabyte.comthe power connectors from your power supply to the hard drives. RAID 0 RAID 1 RAID 5 RAID 10 Minimum ... An M.2 PCIe SSD cannot be used to set up a RAID set either with an M.2 SATA SSD or a SATA hard drive. ... launch the Intel® Optane™ Memory and Storage Management utility from the Start menu. Step 1: Go to the Manage menu and click Rebuild ...

GAMING MONITOR - GIGABYTE
download.gigabyte.comD Click the q icon to select the available option. • All the changes will be applied directly to the monitor. DISPLAY SETTING Configure the game, image, multi-picture, Dashboard, and Game Assist related settings. Gaming & Picture PIP/PBP Game Assist Dashboard Picture Mode Crosshair Configuring the Picture Mode Profiles
Related documents
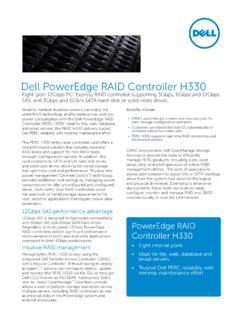
Dell PowerEdge RAID Controller H330
i.dell.comDell’s entry-level RAID controllers cover the spectrum of tiered storage requirements for cost-sensitive applications that require robust data protection. 12Gbps SAS performance advantage 12Gbps SAS is designed for backward compatibility …
Intel PCH RAID Configuration Utility - Supermicro
www.supermicro.comFeb 01, 2013 · RAID controllers designed for the Windows OS. 2. Two RAID controllers (AHCI and SCU) are supported by the Intel PCH. The AHCI controller supports SATA drives and the SCU controller supports both SATA and SAS drives (Note: The SCU controller for PCH C602 supports SATA only). 3. The current version (v 3.5) of the Intel PCH RSTe SATA/SAS RAID ...
AMD RAID Quick Start Guide
drivers.amd.comcontrollers SoC RAID RAID RAID NvMe (But no NVMe devices are connected to the system) RAID driver installation should happen for AMD and PT controllers SoC RAID SATA RAID RAID Not supported with this release SoC RAID RAID SATA …

Intel® RAID Software User Guide for full featured and ...
www.intel.comfeatured and entry level RAID controllers Guidance for configuring different families of Intel® RAID Controllers. Rev 1.4 October 2020 <Blank page> Intel® RAID Software User Guide 3 Document Revision History Date Revision Changes July 2017 1.0 Initial release. June 2018 1.1
Dell PowerEdge RAID Controller H310
i.dell.comDell PowerEdge RAID Controller H310 The PERC H310 is a low-cost, green RAID solution for high-density, entry-level servers. An eight-port 6Gb/s PCI Express RAID controller, the Dell PowerEdge RAID Controller (PERC) H310 offers robust data protection, seamless migration, and the flexibility to use both SATA, SAS, and solid-state drives.
Configuring a RAID Set (Z590 Series)
download.gigabyte.comRAID Levels Configuring SATA Controllers A. Installing hard drives Install the hard drives/SSDs in the Intel® Chipset controlled connectors on the motherboard. Then connect the power connectors from your power supply to the hard drives. RAID 0 RAID 1 RAID 5 RAID 10 Minimum Number of Hard Drives