
Installation and User Guide
Installation and User Guide Kwikset 1-866-863-6584 www.kwikset.com Parts in the box Latch Strike “B” is not included. If needed, please contact Kwikset to order a drive-in latch for your lock. Adapter Ring Keys Exterior Keypad Mounting Plate Fasteners SmartKey Tool Batteries Allen Wrench Interior Assembly
Download Installation and User Guide

Information
Domain:
Source:
Link to this page:
Documents from same domain

Programming and Troubleshooting Guide 1 Mastercode 2
kwiksetprodstorage.blob.core.windows.netTroubleshooting: Touchscreen Screen activation To activate the screen, use one of the three options below: 1. Touch screen with palm or back of hand until digits illuminate. 2. Touch lower left area of screen (where Checkmark is located) until digits illuminate. 3. Touch screen with three or more fingers until digits illuminate. One-second pause

Interior A Assembly ENGLISH F W B Installation and User Guide
kwiksetprodstorage.blob.core.windows.netCAUTION: Prevent unauthorized entry. Since anyone with access to the back panel can change the user codes, you must restrict access to the back panel and routinely check the user codes to ensure they have not been altered without your knowledge. The use of a mastercode can help protect your system’s settings.
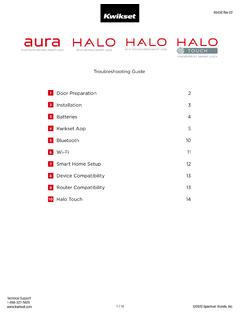
Troubleshooting Guide 1 Door Preparation 2
kwiksetprodstorage.blob.core.windows.netHanding, or latch calibration, is the way that the smart lock learns the orientation of your door (left- or right-handed). A1: The first time the battery is inserted, the lock will perform automatic calibration, or “handing.” You will know the handing is taking place when the latch bolt retracts and extends on its own.

Programming and Troubleshooting Guide 1 Mastercode 2
kwiksetprodstorage.blob.core.windows.net1. Keep door open. Press and HOLD the Program button until the keypad flashes green (about 5 seconds). 2. Enter new Mastercode. 3. Press Lock button once. 4. Re-enter Mastercode. 5. Press Lock button once. If programming is successful, the keypad will flash green once with one beep. If programming is unsuccessful, the keypad will flash red ...

Rev 03 Parts List - .NET Framework
kwiksetprodstorage.blob.core.windows.net4 Install exterior assembly A Route the cable below the latch. Insert the torque blade through the horizontal slot in the latch. D G Secure the mounting plate with the supplied screws. IMPORTANT: Hold the exterior assembly on the outside firmly (or have a second

264 Contemporary ENGLISH Electronic Deadbolt
kwiksetprodstorage.blob.core.windows.netIMPORTANT: Make sure the latch bolt is fully retracted (in the unlocked position). A2 Optional: Remove square corner face and replace with round corner face (if needed). Ensure A2 snaps into place. A2 A Install latch in door with supplied screws. 1 / 4 ENGLISH 66882 Rev 02 Installation and User Guide Kwikset Technical Support 1-800-327-5625 www ...

A B C - .NET Framework
kwiksetprodstorage.blob.core.windows.netwant to operate the lock. For new purchases, the current key is the one that was supplied in the box with the purchased lockset. The new key must be the same key type (KW1) as the current key. Consult your local hardware store for more information. Before performing this procedure, make sure the lock is installed on the door. Re-key the lock while

Interior A Assembly F ENGLISH W K L M B Installation and ...
kwiksetprodstorage.blob.core.windows.netand Troubleshooting Guide on the SmartCode 910 page at www.kwikset.com. 2x One green flash with one beep* Three red flashes with three beeps* Two beeps* or or Programming time out. Make sure not to pause for more than 5 seconds during programming. Tip: You can press the Lock button before entering your user code to light up the keypad at night.
Related documents

Installation Guide - Lenel
kb.lenel.comInstallation Guide 13 Steps for Installing OnGuard The following steps will take you through OnGuard installation process. Use the following list as a guide while working through the installation process. Installations can be performed by a member of the Administrators Group. Installing OnGuard with …

Kofax Power PDF Advanced - Network Installation Guide
docshield.kofax.comJul 24, 2020 · Kofax Power PDF Advanced – Network Installation Guide 7 . Installation in Distributed Environments . In a distributed environment, system administrators can use a two-step procedure for software deployment: 1. Customization The Kofax Customization Kit is available from the Tools folder in your installation media

Installation Guide - Ubuntu
help.ubuntu.comInstalling Ubuntu 20.04 “Focal Fossa” For amd64 x

Quick Installation Guide
images-na.ssl-images-amazon.comThe extended network shares the same wireles network name and password as that of your host network. MyHome MyHome ... Quick Installation Guide 1. Some ISP gateways disable the WPS function by default. ... For more information about using WPS on your router, please refer to the router manufacturer's user guide. Option TWO Quick Setup Using Your ...

IVG Installation and Troubleshooting Guide
traxxisgps.cominstallation. This assigns the unit to the correct customer account and registers it on the cellular network. Online Activation Online activation process should have already been completed at least one day prior to installation. This assigns the unit to the correct customer account and registers it on the cellular network.

RNDIS Windows Driver Installation Guide
www.digitalcheck.comRNDIS Windows Driver Installation Guide 6. Press the “Browse…” button and navigate to the driver you downloaded. 7. Select the USB Ethernet/RNDIS Gadget and press Next to load the driver. 8. After the driver update is complete, cycle power on …

CounterACT Installation Guide - Forescout
www.forescout.comMar 13, 2018 · Preface ForeScout CounterACT Installation Guide 6 Chapter 4: Enterprise Manager Setup and Configuration, and Post-Installation Procedures How to install and upgrade the CounterACT

TELSTRA BUSINESS SIP INSTALLATION GUIDE
www.telstra.com.auTelstra Business SIP – Installation, Configuration and Number Migration Guide 7/69 The Business SIP product is designed to be installed over any type of internet connection fixed or mobile broadband.