
Installation Instructions - KitchenAid
Use and Care Guide. Keep Installation Instructions and Guide close to oven for easy reference. This oven is manufactured with white (neutral) power supply wire and a cabinet-connected bare grounding wire twisted together. 4. Feed oven cable through opening in the cabinet. Make electrical connection following the steps needed for your ...
Download Installation Instructions - KitchenAid

Information
Domain:
Source:
Link to this page:
Documents from same domain
Use & Care Guide - kitchenaid.com
www.kitchenaid.com3 INSTALLATION INSTRUCTIONS Installer: Leave Use and Care Guide with the homeowner. Homeowner: Keep Use and Care Guide for future reference and for local electrical inspector’s use, if required. Unpacking IMPORTANT: Do not grasp console to move compactor. Begin in the room where the compactor will be located. 1. Remove compactor from shipping carton.

KSMSFTA - kitchenaid.com
www.kitchenaid.comPrecise Heat Mixing Bowl, Ice Cream Maker, or the Pouring Shield. The Sifter+Scale attachment can be used in multiple ways: to weigh and sift ingredients while ... WARRANTY AND SERVICE KITCHENAID SIFTER+SCALE ATTACHMENT WARRANTY FOR THE 50 UNITED STATES, THE DISTRICT OF COLUMBIA, PUERTO RICO, AND CANADA

KITCHENAID ICE MAKER WARRANTY
www.kitchenaid.com19 KITCHENAID® ICE MAKER WARRANTY THREE YEAR LIMITED WARRANTY (PARTS AND LABOR) For three years from the date of purchase, when this major applia nce is installed, operated and maintained according to instructions

KITCHENAID DISHWASHER WARRANTY
www.kitchenaid.com21 KITCHENAID® DISHWASHER WARRANTY TWO YEAR LIMITED WARRANTY For two years from the date of purchase, when this major appliance is operated and maintained according to instructions attache d to or

BOWL LIFT STAND MIXER
www.kitchenaid.comreplacement stand mixer, use the carton and packing materials to pack up your “failed” stand mixer. In the carton, include your name and address on a sheet of paper along with a copy of the proof of purchase (register receipt, credit card charge slip, etc.). For a detailed explanation of warranty terms and conditions, including how to ...

STAND MIXER - KitchenAid
www.kitchenaid.comreplacement stand mixer, use the carton and packing materials to pack-up your “failed” stand mixer. In the carton, include your name and address on a sheet of paper along with a copy of the proof of purchase (register receipt, credit card charge slip, etc.). For a detailed explanation of warranty terms and conditions, including how to ...

Use & Care Guide
www.kitchenaid.comWhen using electrical appliances, basic safety precautions should always be followed, including the following: 1. Read all instructions. Misuse of appliance may result in personal injury. 2. To protect against risk of electrical shock, do not put Stand Mixer in water or other liquid. 3. This appliance can be used by children aged from 8 years

Owners Manual - KitchenAid
www.kitchenaid.comDrying - Rinse aid is essential. You must use a drying agent such as a rinse aid for good drying performance (sample included). Rinse aid along with the Heat Dry or ProDry™ option will provide best drying and avoid excessive moisture in the dishwasher interior. For best drying, use the Heat Dry or ProDry™ option. Dispensers vary by model

INSTALLATION INSTRUCTIONS 27 (68.6 CM) AND 30 (76.2 CM ...
www.kitchenaid.com4 Cabinet Dimensions - Double Ovens, Flush Installations A 253/ 8" (64.4 cm) minimum cutout depth is required. These dimensions will result in a 1/4" (6 mm) reveal on the top, a 1/4" (6 mm) reveal on the sides, and a 1/8" (3 mm) reveal on
TOUCH-ACTIVATED ELECTRONIC INDUCTION COOKTOP
www.kitchenaid.comThe touch-activated electronic controls offer a variety of heat settings for optimal cooking results. When melting foods such as chocolate or butter, the surface cooking area can be set to the Melt function for minimal cooking power. For maximum surface cooking power, all cooktop touch-activated electronic controls can be set to Performance Boost
Related documents
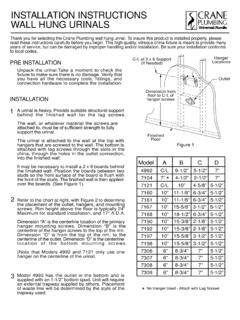
INSTALLATION INSTRUCTIONS WALL HUNG URINALS
www.craneplumbing.comINSTALLATION Figure 1 Dimension from floor to C-L of hanger screws Model A 4992 9-1/2” Refer to the chart at right, with Figure 2 to determine the placement of the outlet, hangers, and mounting screws. Rim height above the floor is typically 24” Maximum for standard installation, and 17” A.D.A. Dimension “A” is the centerline location ...
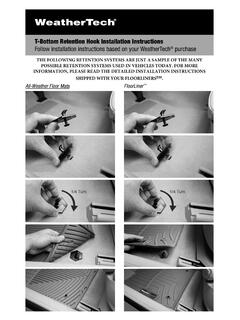
Weathertech Car & Truck Floor Mats Installation Instructions
images.carid.comT-Bottom Retention Hook Installation Instructions Follow installation instructions based on your WeatherTech® purchase All-Weather Floor Mats FloorLiner™ ТНЕ FOLLOWING REТENTION SVSTEMS ARE JUST А SAMPLE OF THE MANY

Installation Instructions - ssdiesel.com
ssdiesel.comInstallation Instructions . F.00H.LML.CP3 – 50 State LML CP3 Conversion Kit CARB Exemption EO #D-756 . 2011 – 2016 GMC Sierra 2500/3500 – Diesel LML . 2011 – 2016 Chevrolet Silverado 2500/3500 – Diesel LML

INSTALLATION INSTRUCTIONS - Fisher & Paykel
www.fisherpaykel.comis accessible after installation. Care should be taken when the appliance is installed or removed to reduce the likelihood of damage to the power supply cord and hoses. iMPOrtANt SAfety iNStrUCtiONS if the dishwasher is to be relocated from one installation to another it must be kept upright to avoid damage from water spillage.
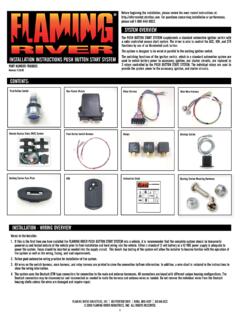
INSTALLATION INSTRUCTIONS PUSH BUTTON START …
www.jegs.comINSTALLATION INSTRUCTIONS PUSH BUTTON START SYSTEM SYSTEM OVERVIEW The PUSH BUTTON START SYSTEM supplements a standard automotive ignition switch with a radio controlled secure start system. The driver is able to control the ACC, IGN, and STR functions by use of an illuminated push button.

INSTALLATION INSTRUCTIONS AND OWNER’S MANUAL
www.whirlpool.comINSTALLATION INSTRUCTIONS AND OWNER’S MANUAL Side by Side Refrigerator Do Not Throw Away - Additional important safety information included. ... If door removal is necessary, see the instructions below. IMPORTANT: Before you begin, unplug refrigerator or disconnect power. Remove food, the ice storage bin (on some models), and

INSTALLATION INSTRUCTIONS 30 (76.2 CM) AND 36 (91.4 …
www.whirlpool.comINSTALLATION INSTRUCTIONS 30" (76.2 CM) AND 36" (91.4 CM) GAS BUILT-IN COOKTOP INSTRUCTIONS D’INSTALLATION DE LA TABLE DE CUISSON À GAZ ENCASTRÉE DE 30" (76,2 CM) ET 36" (91,4 CM) Table of Contents/Table des matières W11116971C IMPORTANT: Installer: Leav e installation instructions with the homeo wner.
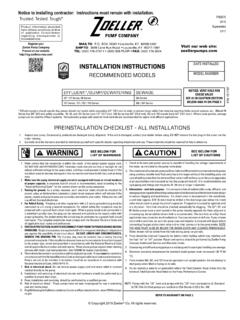
INSTALLATION INSTRUCTIONS - Zoeller Pump Company
www.zoellerpumps.comINSTALLATION INSTRUCTIONS RECOMMENDED MODELS P/N 151797 Notice to installing contractor: Instructions must remain with installation. FM2676 0419 Supersedes 0117 PREINSTALLATION CHECKLIST - ALL INSTALLATIONS DATE INSTALLED: MODEL NUMBER: 1. Inspect your pump. Occasionally, products are damaged during shipment.