Example: tourism industry
INSTALLATION INSTRUCTIONS PUSH BUTTON START …
INSTALLATION INSTRUCTIONS PUSH BUTTON START SYSTEM SYSTEM OVERVIEW The PUSH BUTTON START SYSTEM supplements a standard automotive ignition switch with a radio controlled secure start system. The driver is able to control the ACC, IGN, and STR functions by use of an illuminated push button.
Tags:
Information
Domain:
Source:
Link to this page:
Documents from same domain
Ford Installation Instructions - jegs.com
www.jegs.comMarch 21, 2006 Ford Performance Transmission Instructions 1 BD PERFORMANCE TRANSMISSION Ford Installation Instructions ... product returned prepaid with a complete service history and proof of purchase. A valid proof of purchase is a dated bill of sale. Repaired or replaced product will be returned to the customer freight collect.

INSTALLATION INSTRUCTIONS 426 / 472 / 528 CID HEMI …
www.jegs.comThe Hemi Crate engines are assembled entirely from NEW Chrysler engineered components. The following is a list of potential issues which may arise during installation and the initial "fire up” process. If any problems arise, contact the Mopar Direct Connection Tech Line at 1-888-528

Holley 12-804 Fuel Pressure Regulator Installation ...
www.jegs.com2 PUMP MOUNTING AND INSTALLATION: The best location for mounting any electric fuel pump is the rear of the vehicle. The inlet and outlet of the pump must be

HOLLEY SUPERCHARGER INSTALLATION …
www.jegs.comThe Ultra Charger Cam for big block Chevrolet has a slightly rough idle, acceptable vacuum for most street applications and outstanding mid and top range power.
PERFORMER RPM FE MANIFOLD CATALOG #7105 …
www.jegs.comA- Carburetor will work with non-EGR ... Remove dowel pins from end seal surface on Ford and Chrysler products. Use grip pliers for removal.
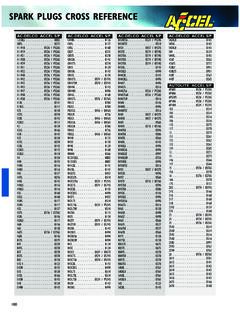
SPARK PLUGS CROSS REFERENCE - jegs.com
www.jegs.com1.This application listing is to be used as a guide only. Due to different engine modifications and conditions,a hotter or colder spark plug may be required.

WHEEL NUT TORQUE SPECIFICATIONS (shown in ft. …
www.jegs.comLEXUS All Models Except: 2010-90 76 All Models Except: 2012 103 CT, ES, GS, IS, LS 2013 76-84 CT200h, ES350 2012-11 76 GS305 2013 76 GS350, GS450h, GS460 2011 76 HS250h, IS250, IS250c, IS350, IS350c, ISF 2012-11 76 IS250c, IS350c, ISF 2013 76 LS460, LS600h 2012-07 103 LINCOLN Continental 2002-90 85-105 LS 2006-00 100 …
INTRODUCTION TABLE OF CONTENTS - jegs.com
www.jegs.com3 Edelbrock Performer Series Carburetor Owner’s Manual 8/94 METERING SYSTEMS The Edelbrock carburetor has three (3) basic systems that meter fuel to the engine: The Idle System, Primary Main System, and Secondary Main System.

HYFIRE IV SERIES OF ELECTRONIC IGNITION CONTROLS
www.jegs.comThe HYFIREfi IV Electronic Ignition Controls are designed to work with most original equipment ignition coils. For optimum performance use the Mallory PROMASTER fi Coil Part

Recommended Crate Engine Start-Up Procedure
www.jegs.comRecommended Crate Engine Start-Up Procedure 1. SAFETY FIRST! If the car is on the ground, be sure the emergency brake is set, the wheels are chocked, and the transmission cannot fall into gear.
Related documents

Weathertech Car & Truck Floor Mats Installation Instructions
images.carid.comT-Bottom Retention Hook Installation Instructions Follow installation instructions based on your WeatherTech® purchase All-Weather Floor Mats FloorLiner™ ТНЕ FOLLOWING REТENTION SVSTEMS ARE JUST А SAMPLE OF THE MANY

INSTALLATION INSTRUCTIONS AND OWNER’S MANUAL
www.whirlpool.comINSTALLATION INSTRUCTIONS AND OWNER’S MANUAL Side by Side Refrigerator Do Not Throw Away - Additional important safety information included. ... If door removal is necessary, see the instructions below. IMPORTANT: Before you begin, unplug refrigerator or disconnect power. Remove food, the ice storage bin (on some models), and

INSTALLATION INSTRUCTIONS 30 (76.2 CM) AND 36 (91.4 …
www.whirlpool.comINSTALLATION INSTRUCTIONS 30" (76.2 CM) AND 36" (91.4 CM) GAS BUILT-IN COOKTOP INSTRUCTIONS D’INSTALLATION DE LA TABLE DE CUISSON À GAZ ENCASTRÉE DE 30" (76,2 CM) ET 36" (91,4 CM) Table of Contents/Table des matières W11116971C IMPORTANT: Installer: Leav e installation instructions with the homeo wner.

INSTALLATION INSTRUCTIONS - Zoeller Pump Company
www.zoellerpumps.comINSTALLATION INSTRUCTIONS RECOMMENDED MODELS P/N 151797 Notice to installing contractor: Instructions must remain with installation. FM2676 0419 Supersedes 0117 PREINSTALLATION CHECKLIST - ALL INSTALLATIONS DATE INSTALLED: MODEL NUMBER: 1. Inspect your pump. Occasionally, products are damaged during shipment.

INSTALLATION INSTRUCTIONS - Fisher & Paykel
www.fisherpaykel.comis accessible after installation. Care should be taken when the appliance is installed or removed to reduce the likelihood of damage to the power supply cord and hoses. iMPOrtANt SAfety iNStrUCtiONS if the dishwasher is to be relocated from one installation to another it must be kept upright to avoid damage from water spillage.

INSTALLATION INSTRUCTIONS WALL HUNG URINALS
www.craneplumbing.comINSTALLATION Figure 1 Dimension from floor to C-L of hanger screws Model A 4992 9-1/2” Refer to the chart at right, with Figure 2 to determine the placement of the outlet, hangers, and mounting screws. Rim height above the floor is typically 24” Maximum for standard installation, and 17” A.D.A. Dimension “A” is the centerline location ...

Installation Instructions - ssdiesel.com
ssdiesel.comInstallation Instructions . F.00H.LML.CP3 – 50 State LML CP3 Conversion Kit CARB Exemption EO #D-756 . 2011 – 2016 GMC Sierra 2500/3500 – Diesel LML . 2011 – 2016 Chevrolet Silverado 2500/3500 – Diesel LML

Installation Instructions - KitchenAid
www.kitchenaid.comUse and Care Guide. Keep Installation Instructions and Guide close to oven for easy reference. This oven is manufactured with white (neutral) power supply wire and a cabinet-connected bare grounding wire twisted together. 4. Feed oven cable through opening in the cabinet. Make electrical connection following the steps needed for your ...