
Installation Instructions - KitchenAid
The built-in oven serial number. Both numbers are listed on the model/serial rating plate, located on the oven door or on the oven frame. 1 1 1 2 23 IMPORTANT: Read and save these instructions. Installation Instructions IMPORTANT: Installer: Leave Installation Instructions with the homeowner. Homeowner: Keep Installation Instructions for future ...
Download Installation Instructions - KitchenAid

Information
Domain:
Source:
Link to this page:
Documents from same domain
Use & Care Guide - kitchenaid.com
www.kitchenaid.com3 INSTALLATION INSTRUCTIONS Installer: Leave Use and Care Guide with the homeowner. Homeowner: Keep Use and Care Guide for future reference and for local electrical inspector’s use, if required. Unpacking IMPORTANT: Do not grasp console to move compactor. Begin in the room where the compactor will be located. 1. Remove compactor from shipping carton.

KSMSFTA - kitchenaid.com
www.kitchenaid.comPrecise Heat Mixing Bowl, Ice Cream Maker, or the Pouring Shield. The Sifter+Scale attachment can be used in multiple ways: to weigh and sift ingredients while ... WARRANTY AND SERVICE KITCHENAID SIFTER+SCALE ATTACHMENT WARRANTY FOR THE 50 UNITED STATES, THE DISTRICT OF COLUMBIA, PUERTO RICO, AND CANADA

KITCHENAID ICE MAKER WARRANTY
www.kitchenaid.com19 KITCHENAID® ICE MAKER WARRANTY THREE YEAR LIMITED WARRANTY (PARTS AND LABOR) For three years from the date of purchase, when this major applia nce is installed, operated and maintained according to instructions

KITCHENAID DISHWASHER WARRANTY
www.kitchenaid.com21 KITCHENAID® DISHWASHER WARRANTY TWO YEAR LIMITED WARRANTY For two years from the date of purchase, when this major appliance is operated and maintained according to instructions attache d to or

BOWL LIFT STAND MIXER
www.kitchenaid.comreplacement stand mixer, use the carton and packing materials to pack up your “failed” stand mixer. In the carton, include your name and address on a sheet of paper along with a copy of the proof of purchase (register receipt, credit card charge slip, etc.). For a detailed explanation of warranty terms and conditions, including how to ...

STAND MIXER - KitchenAid
www.kitchenaid.comreplacement stand mixer, use the carton and packing materials to pack-up your “failed” stand mixer. In the carton, include your name and address on a sheet of paper along with a copy of the proof of purchase (register receipt, credit card charge slip, etc.). For a detailed explanation of warranty terms and conditions, including how to ...

Use & Care Guide
www.kitchenaid.comWhen using electrical appliances, basic safety precautions should always be followed, including the following: 1. Read all instructions. Misuse of appliance may result in personal injury. 2. To protect against risk of electrical shock, do not put Stand Mixer in water or other liquid. 3. This appliance can be used by children aged from 8 years

Owners Manual - KitchenAid
www.kitchenaid.comDrying - Rinse aid is essential. You must use a drying agent such as a rinse aid for good drying performance (sample included). Rinse aid along with the Heat Dry or ProDry™ option will provide best drying and avoid excessive moisture in the dishwasher interior. For best drying, use the Heat Dry or ProDry™ option. Dispensers vary by model

INSTALLATION INSTRUCTIONS 27 (68.6 CM) AND 30 (76.2 CM ...
www.kitchenaid.com4 Cabinet Dimensions - Double Ovens, Flush Installations A 253/ 8" (64.4 cm) minimum cutout depth is required. These dimensions will result in a 1/4" (6 mm) reveal on the top, a 1/4" (6 mm) reveal on the sides, and a 1/8" (3 mm) reveal on

TOUCH-ACTIVATED ELECTRONIC INDUCTION COOKTOP
www.kitchenaid.comThe touch-activated electronic controls offer a variety of heat settings for optimal cooking results. When melting foods such as chocolate or butter, the surface cooking area can be set to the Melt function for minimal cooking power. For maximum surface cooking power, all cooktop touch-activated electronic controls can be set to Performance Boost
Related documents
INS2153C - 6/14 - Moen Incorporated
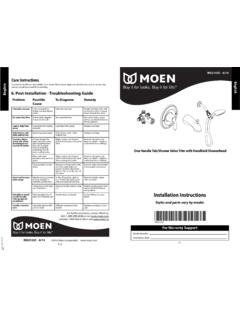
assets.moen.comInstallation Instructions Styles and parts vary by model. English E1 One Handle Tub/Shower Valve Trim with Handheld Showerhead Model Number Installation Date For Warranty Support INS2153C - 6/14 ... Thick walls are usually built up with materials such as cement board, drywall, tile etc. The plaster ground will aid

Thermostat E Installation Guide - Google Nest
nest.comfor installation. Secure the steel plate to the electrical box with two of the screws. Use the other two screws to attach the Nest base and trim plate. Optional in most homes Use the included trim plate if needed If you don’t want to paint over holes or marks left by your old thermostat, you can use the optional trim plate. Snap the ...

HardieTrim Boards - Installation Instructions
www.buildsite.comNOTE: Follow your window/door manufacturer’s installation instructions for caulking guidance between window and trim. Butt to Siding Trim the opening prior to the installation of the siding. Position trim boards on the wall and secure. Allow proper fastener spacing at edges and ends. corner studs Figure 12 Figure 13 2 in. Finish nail 2 in ...

INSTALLATION GUIDE for walls, ceilings, and laminated panels
www.cranecomposites.comInstallation should not begin until building is enclosed (windows and doors are installed), permanent heating and cooling equipment is in . operation, and residual moisture from plaster, concrete, or terrazzo work has dissipated. Installation temperature range should be 60°F to . 75°F (16°C to 24°C) and relative humidity range should be 35% ...

MICROWAVE OVEN BUILT-IN TRIM KIT INSTALLATION …
www.kitchenaid.comINSTALLATION INSTRUCTIONS Built-In Trim Kit Models MK2227 MK2220 UL listed for use over any electric or gas built-in oven, up to 30" (76.2 cm) wide INSTRUCTIONS D’INSTALLATION GARNITURE ENCASTRÉE POUR FOUR À MICRO-ONDES Garniture encastrée pour modèles MK2227 MK2220

SAITEK X52 FLIGHT CONTROL SYSTEM - PRODUCT TOUR …
www.saitek.comsoftware has been installed, you will automatically be taken to the installation to continue with the next step. 5 Follow the on-screen instructions and select Yes, I want to restart my computer now when prompted. 6 After the restart, at the Device Driver Installationscreen, click on Nextand follow the on-screen instructions.