
User's Manual - SJM
Peel off the inner tray cover, starting with the corner labeled with an arrow. 4. Use the recessed areas to facilitate removing the tools from the tray. Choosing the Insertion Location The Confirm Rx™ ICM is inserted under the skin in the left pectoral region. Common insertion locations are listed in the table below. Table 3. Insertion locations
Download User's Manual - SJM

Information
Domain:
Source:
Link to this page:
Documents from same domain
Allure™, Allure™ RF, Allure Quadra™, Allure Quadra™ RF ...
manuals.sjm.comTesting has demonstrated that the St. Jude Medical™ MR Conditional pacing system is conditionally safe for use in the MRI environment when used according to the instructions in the MRI Procedure Information document. The St. Jude Medical MR Conditional pacing system includes a St. Jude Medical MR Conditional pulse generator

MRI-Ready Systems Manual - St. Jude Medical Instructions ...
manuals.sjm.comThe St. Jude Medical MR Conditional system includes a St. Jude Medical MR Conditional device connected to one or more St. Jude Medical MR Conditional leads. For a list of the device/lead combinations that have been tested, see the device/lead combinations tables (page . …
MRI Procedure Information - SJM
manuals.sjm.comuse this information to review the following requirements carefully because different device-lead combinations have different scanning restrictions. NOTE: For information about the MRI equipment that will be used to scan the patient, including important safety
![Tendril STS 2088 [OUS] - St. Jude Medical Instructions for ...](/cache/preview/0/1/6/5/9/9/f/b/thumb-016599fbc524e50a7f361018615dac17.jpg)
Tendril STS 2088 [OUS] - St. Jude Medical Instructions for ...
manuals.sjm.com1. Inside sterile field : Sterilization The package contents have been sterilized with ethylene oxide before shipment. This lead is for single use only and is not intended to be resterilized. If the sterile package has been compromised, contact St. Jude Medical. Implanting the Tendril™ STS Lead : Pre-Implantation : Before implanting the lead:
User's Manual - SJM
manuals.sjm.comElectrosurgery. Do not use electrosurgical devices in the vicinity of an implanted device. If electrocautery is necessary, use a bipolar cauterizer or place the indifferent electrode as far from the device as possible. Lithotripsy. Do not focus a lithotripsy beam within 16 cm of the device. Program the device to

User's Guide - SJM
manuals.sjm.comThe St. Jude Medical™ Patient Controller app is intended to be used with the generator to help the patient manage prescribed stimulation programs. Indications for Use . This neurostimulation system is indicated as an aid in the management of chronic, intractable pain of the trunk and/or limbs, including unilateral or bilateral

Ellipse Fortify Assura - SJM
manuals.sjm.comAdditional pacemaker implanted. These devices provide bradycardia pacing. If another pacemaker is used, it should have a bipolar pacing reset mode and be programmed for bipolar pacing to minimize the pos sibility of the output pulses being detected by the device. Modifying the device. This device has been tested for compliance to FCC regulations.

MRI-Ready Systems Manual - SJM
manuals.sjm.coman MRI scanner when used according to the instructions in this manual. CAUTION Not all of the products listed as MR Conditional are approved for MR Conditional use in all countries or regions. Before performing an MRI scan on patients implanted with …
MRI Ready Monitor Systems Manual - SJM
manuals.sjm.comDuring the MRI scan, visually and audibly monitor the patient, including verbal communication. The following potential effects during the scan should be considered: When selecting the field of view and imaging parameters, consider that image distortion may occur around the ICM. Consider these factors also when interpreting the MRI images.
![Merlin@home Transmitter [RF] [symbol update] [RED ... - SJM](/cache/preview/3/8/9/5/7/2/3/7/thumb-38957237608c5ac8c02fd53fbfb77bde.jpg)
Merlin@home Transmitter [RF] [symbol update] [RED ... - SJM
manuals.sjm.com3 all right, carefully repackage the transmitter in its original packaging. If you are using a telephone with your Merlin@home transmitter, you may want to …
Related documents

How Long Does It Take Garbage to Decompose?
storage.neic.orgdepends on the type of food. Normally, an orange peel takes 6 months but an apple core or a banana peel takes around one month to decompose. The Time Taken by Other Waste Items to Decompose . Different sources have different information on actual time various waste items take in landfills to decompose. But the numbers don’t vary much. •
LOCTITE EA 9394 AERO 9-2013 - Henkel
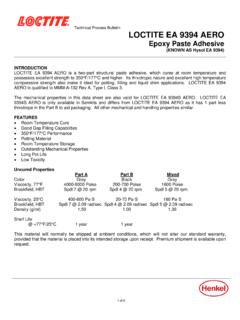
tdsna.henkel.comPeel Strength T-Peel strength tested per ASTM D1876 after curing for 5 days @ 77°F/25°C. Adherends are 2024-T3 AlClad aluminum treated with phosphoric acid anodized per ASTM D3933. Typical Results Test Temperature, °F/°C Lb/in N/2 mm 77/25 5 22 Bell Peel strength tested per ASTM D3167 after curing for 7 days @ 77°F/25°C.
29/2020 Controlled Document Please use online version …
www.familydollar.comRSPI document . 6. R. OUTING, S. HIPPING AND . P. ACKAGING . I. NSTRUCTIONS . Part 1: General Information . Purpose, Application, and Expense Offset Policy . PURPOSE

List of packaging standards developed by ASTM
www.pac.grStandard Guide for Design and Evaluation of Primary Flexible Packaging for Medical Products F2559 / F2559M - 06(2010)e1 Standard Guide for Writing a Specification for Sterilizable Peel Pouches F2825 - 10e1 Standard Practice for Climatic Stressing of Packaging Systems for Single Parcel Delivery Package Integrity Designation Title D3078 - 02(2013)

Quick Cooker Cooking Guide - Pampered Chef
www.pamperedchef.comthe original packaging and freezing it in a resealable plastic bag in a single layer. This will make it easier to remove meat from the packaging before cooking. 1. Add at least 1 cup (250 mL) of water, broth, or sauce to the inner pot of the Quick Cooker. 2. Remove meat from packaging and add the meat to the inner pot. Lock the lid and choose the

FITTING YOUR KITCHEN GUIDE PAGE 1 - Screwfix
www.screwfix.comstacked with the packaging between each component to prevent damage and scratches to the fronts. STEP TWO Place the base cabinets on their backs and fit the adjustable legs. ... Peel back any protective film if applied. Finally, screw the handles onto the doors being careful not to over-tighten them. p. 1. 2. 3. 4.