Transcription of Parallel Lapping of Semiconductor Devices for …
1 Page 1 of 5 1120 Via Callejon San Clemente, CA 92673 USA Voice: Fax: Sales: Email: Visit us at: : Purpose Parallel Lapping is a commonly used process in failure analysis, debug, and general construction analysis in the production of integrated circuits. In many cases it is necessary to remove layers from the integrated circuit for inspection, whether it be electrical testing, deposition uniformity, or device integrity investigation. The precise removal of these layers requires accuracy, knowledge of components and materials systems, and equipment capable of implementing precision polishing techniques. Parallel Lapping (often called delayering ) is useful to remove specific device layers when evaluating the design of any device or for specific failure analysis techniques. Equipment used for this type of specimen preparation must be adaptable to many different materials such as Nitrides, Oxides, Aluminum, and for current Devices Copper and low dielectric constant materials.
2 Planarity is critical in deprocessing applications where individual device layers are m and below. This report outlines specific procedures and equipment processing for the production of individual die. : Materials and Methods Precision Lapping and polishing experiments were carried out using SBT precision Lapping and polishing equipment. A set of integrated circuit Devices were obtained for Lapping and polishing experiments which were to be de-processed to Metal 2. The Devices were planarized Devices containing a variety of standard IC materials, including BPSG, PETEOS, and SACVD. Below is a diagram of the basic layout of the device. Figure 1: Schematic diagram of the Devices used for delayering applications. The device shown is fabricated using a planarized process with five layers of metallization (shown in blue). Barrier metals and PETEOS are shown between metal layers with the transistors shown at the bottom where the source and drains are located.
3 : Setting up the Lapping Fixture Lapping the mounting block to be Parallel with the outside ring of the Lapping fixture initially planarized the Model 155D Lapping and Polishing Fixture. Planarizing the fixture is an important step in Parallel Lapping on such a fine scale. Creating a co-planar surface between the outer housing of the fixture (feet) and the specimen mounting block is critical in applications such as device deprocessing where the geometry of the specimen is so tightly controlled. Lapping and Polishing Applications Laboratory Report 57 Parallel Lapping of Devices for Deprocessing Model 920 / Model 155D Page 2 of 5 1120 Via Callejon San Clemente, CA 92673 USA Voice: Fax: Sales: Email: Visit us at: Device Blank Si A 2 diameter mounting block was installed into the Model 155D. The Lapping fixture was then mounted onto the Model 920 Lapping and Polishing Machine and planarized using a cast iron Lapping plate and boron carbide (B4C) abrasive slurry.
4 The fixture was lapped for 30 minutes using 23 m B4C slurry until the feet and the mounting block were coplanar. Cast iron Lapping is beneficial due to it s high Lapping rates and high flatness tolerance. After the fixture was lapped the mounting block and feet were cleaned using a lint-free brush and acetone to remove all of the abrasive. The specimen mounting block was then cleaned with acetone and isopropyl alcohol before mounting the specimens. : Specimen Mounting After the Lapping fixture had been planarized, mounting the specimen to the block was done. Several methods of mounting are available and the methods depend on the flatness requirements, specimen material, and other factors. For these samples the use of super glue was employed. Super glue is a fast curing glue that is acetone soluble and give good flatness for mounting samples. A single die of a device was mounted to the bottom of the mounting block using a drop of super glue.
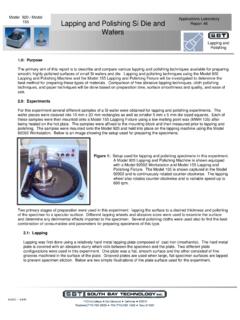
5 A 4lb weight with a TeflonTM disc mounted to the bottom for protection was used to squeeze out the glue and create a uniform glue layer. The sample was mounted while the specimen mounting block was installed in the fixture to ensure a plane surface. Three individual blank Si die were also mounted using this technique to help distribute the load and maintain a planar surface. Below is a diagram of the specimen mounting. Figure 2: Illustration of the specimen mounting technique used for preparing the Parallel polished die. Three blank pieces of Si wafer were used to distribute the Lapping load. The die and Si were all mounted using super glue. : Specimen Processing Four individual die were processed using the Model 155D Lapping and Polishing Fixture with the Model 920 Lapping and Polishing Machine. Different polishing cloths were used to determine if there was a large difference in delayering applications with different cloth materials.
6 Three different cloths were used to compare the results qualitatively. The cloths were as follows: a. MultiTexTM Polishing Cloth b. SanyPol Hard Polishing Cloth c. CMP Cloth (test) Each cloth has distinct properties that may or may not affect the final outcome of the specimen. The MultiTex is characterized as a hard, polyurethane pad material that is slightly compliant but provides a high quality, well polished surface. The SanyPol Hard cloth is a harder cloth type material that is used for planar applications where flatness is the critical parameter. The CMP cloth is a pourous polyurethane material that provides maximum removal rates with maximum flatness. All of the specimens produced were processed using colloidal silica polishing solution applied to the cloth using a slurry-dispensing bottle attached to the Model 920 Lapping and Polishing Machine.
7 The Lapping fixture was placed onto a granite leveling block and used to zero the micrometer position of the Model 155D. The fixture was set up to remove 1 micron of material and the entire system was placed onto the Model 920. After each processing time interval was completed, the fixture was leveled again on the granite plate and setup for 1 m removal. See diagram below for illustration of the setup used for polishing. Page 3 of 5 1120 Via Callejon San Clemente, CA 92673 USA Voice: Fax: Sales: Email: Visit us at: Model 92002 Lapping Wheel Model 155D Small o-ring Knuckle assembly Figure 3: Schematic illustration of the setup used for processing specimens with the Model 155D. The fixture is setup on the Model 920 Lapping and Polishing machine and held into place using the Model 92002 Workstation. The fixture is automatically rotated during processing using o-ring drive belts.
8 The digital indicator displays removal of material in real time. : Delayering the Device Delayering of the device was done at various intervals of polishing time using the different cloths. Various images were taken at different stages of the process. All of the specimen processing was done using the micron colloidal silica with a pH of Figure 4: Image of the die surface prior to specimen processing. Magnification = 100X. Figure 5: Image of the die following polishing for 5 minutes. The metal 5 layer is almost removed along with the PSG and Nitride passivation. Magnification = 100X. Page 4 of 5 1120 Via Callejon San Clemente, CA 92673 USA Voice: Fax: Sales: Email: Visit us at: Figure 6: Image of the die following polishing for +20 minutes. Metal layers 5 and 4 have been removed.
9 Removal of the interlayer dielectric (ILD) is being shown. Removal is uniform. Magnification = 200x. Figure 7: Image showing the die following processing for +5 minutes. Removal of Metal layer 3 is being shown. Magnification = 100X. Figure 8: Image of the die following processing for +5 minutes. Removal of Metal layer 3 has been completed and the ILD is now being removed. Exposure of the Metal 2 layer is almost complete. Magnification = 100X. Figure 9: Image of the die following final polishing to expose Metal 2 layer after +10 minutes. Uniform exposure of the layer is shown. Magnification = 200X. Page 5 of 5 1120 Via Callejon San Clemente, CA 92673 USA Voice: Fax: Sales: Email: Visit us at: : Results Processing of the die (as shown in Section ), was extremely successful.
10 Using the CMP polishing pad and the MultiTexTMpolishing pad exhibited similar results, although the CMP cloth exhibited higher removal rates. Processing times varied from 2 hours to 4 hours depending upon the cloth used. Specimen mounting techniques proved to be a critical factor as well. Use of mounting wax was not as successful due to uneven wax layers. Also, mounting of samples with wax requires the removal of the mounting block following planarization, which may cause further inconsistencies in the parallelism of the fixture. Mounting using super glue was very successful and removal of specimens was relatively fast (about 2 hours). Use of the Model 155D proved to be a valuable tool for preparing specimens for delayering applications. Precisely controlling the removal is critical and the Model 155D provides a quick and accurate means to accomplish this.