Transcription of An Introduction to Microsoft Word - …
1 For Adult Learners An Introduction to Microsoft Word A Project-Based Approach This work by Virginia Commonwealth University is licensed under the Creative Commons Attribution International License. 1 Introduction Why should you use Microsoft Word? Microsoft Word is one of the most common tools in any business. It may be used to create professional-looking documents. Microsoft Word documents may be organized and saved electronically. How will you use Microsoft Word? This workbook will introduce you to the basics. Of course, the more that you practice and explore the program on your own, the better! You are only limited by your own imagination! 2 Create a Recipe In this chapter, you will practice creating a Microsoft Word document and formatting your favorite recipe. You will accomplish the following: 1. Create a Microsoft Word document. 2. Format the title. 3. Format the ingredients.
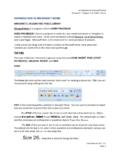
2 4. Format the directions. 5. Ad d a picture. 6. Save the document. 3 1. Create a Microsoft Word document. Click on Start. Click the Microsoft Word icon. A white page will open up. Write the recipe. Use the keyboard and type the title of your favorite specialty at the top of the page. Press the Enter key to continue to the next line. List the each ingredient necessary on a separate line. 2. Format the title. Select the title by holding and clicking on the text with the mouse. The text will appear highlighted. 4 Select the style of your title from Styles on the ribbon. Select the size you prefer. In the Font section of the ribbon, click on the arrow next to number. 3. Format the ingredients. Click and select all of the ingredients. 5 Click on the line and paragraph spacing icon. Try both options to see which one you like better. 4. Format the directions. Select the directions. They will be highlighted.
3 Select the spacing. Minimize your window by clicking on the solid line icon in the upper right hand side of the screen. 6 5. Add a picture. Click on an Internet browser. In a search engine, type the name of your recipe. 7 Click Images. On the left hand side, click Labeled for reuse. 8 5. Add a picture. Choose the image that you prefer. Right click on the image, and the image will appear on its original web page. Right click and select Copy. 9 Return to your Microsoft Word document by clicking the Word icon at the bottom of the screen. Use the mouse to place the cusor on the document. Right click and select Paste. Click the Page Layout tab, click on the image, and click Position. Choose the option on the upper right hand corner. 10 Click on the picture. An outline with circles will appear around the picture. Click on a corner circle and re -size the picture to fit the recipe.
4 Click on the picture. Move it to an appropriate place on your document. 6. Save your work. Click on the Save icon in the upper left corner of the ribbon. Name your document in the File name field. Click Save. 11 Assessment Check your understanding by selecting the correct words : Copy highlighted Font paste Paragraph Save 1. The function allows you to copy an image. 2. The function allows you to add an image that you copied. 3. allows you to select the style and size of the text. 4. When you select text, it will appear . 5. allows you to change the spacing between lines. 6. allows to you to name and to keep your document. Check your understanding by matching the icons to the directions. 1. Create a Word document. A. 2. Access the Internet. B. 3. Change the size of the text. C. 4. Save. D. 5. Change the spacing of text. E. 12 Use your Skills Create your own Microsoft Word document, and explain how to do something.
5 Title your work. List the materials needed. Explain each step of the procedure. Format all of the text. Add an image from the Internet. Save your work. Notes: 13 Write a letter In this chapter, you will practice formatting a letter. You will accomplish the following: 1. Create a Microsoft Word document. 2. Use tabs to create paragraphs. 3. Align text to right and left margins. 4. Adjust spacing of lines and paragraphs. 5. Save the document. 6. Print the document. 14 1. Create a Microsoft Word document. Click on Start. Click the Microsoft Word icon. A white page will open up. Use the keyboard and type a letter. 15 2. Create paragraphs. Click the cursor in front of the text. Use the tab key to indent the text. This will make the cursor move a pre-set number of spaces to the right. 3. Align text to right and left margins. Click and select the return address. 16 Select the text by holding and clicking on the text.
6 The text will appear highlighted. Select the alignment icon in the Paragraph section of the ribbon. Click on the line and paragraph spacing icon. Select the spacing that you prefer. 17 4. Adjust the spacing of lines and paragraphs. Select the text of your letter. It will be highlighted. Select the spacing. 5. Save your document. Click on the Save icon in the upper left corner of the ribbon. Name your document in the File name field. Click Save. It will be saved to the last location opened. 6. Print the document. Select the File tab at the top of the ribbon. 18 A new page will appear with a menu on the left hand side. Select the Print option on the left. Click the print icon. If more than one printer option appears, ask you instructor which is the best to use. 19 Assessment Check your understanding by selecting the correct words . Print tab paragraph cursor save 1. A writer will indent at the beginning of a.
7 2. The allows who to indent at the beginning of paragraphs. 3. The function allows you keep and name your document. 4. The tab key will indent wherever the is. 5. will allow the document to be printed. Check your understanding by ordering the following steps: Use the tab key to create paragraphs. Place the cursor in front of the text. Create a Microsoft Word document. Print the document. Type the letter. 1. 2. 3. 4. 5. 20 Use your Skills Create your own Microsoft Word letter. Align the return address and signature to the right margin. Indent each paragraph. Change the spacing. Save the letter. Print the letter. Notes: 21 Create a Schedule In this chapter, you will practice creating a table. You will accomplish the following: 1. Create a folder. 2. Create a Microsoft Word document. 3. Create a table. 4. Format the text within the table. 5. Add shading and colors to the table.
8 6. Save the document to a particular folder. 22 1. Create a folder. This is where you will be able to save your documents that you can find them easily later. To create a folder, choose the start icon on the desktop Click on Documents on the right menu. Click on New Folder. 23 A highlighted field will appear. Click on Documents on the left menu. Click on New Folder. 24 A highlighted field will appear Type the name of your folder in the field. 2. Create a Microsoft Word document. Click on Start. Click the Microsoft Word icon. A white page will open up. 25 3. Create a table. Click on the Insert tab at the top of the ribbon. A new series of icons will appear. Click on Table. A grid will appear. 26 Select the 6 rows across and 8 columns down for the table. The number selected will become highlighted. The table will appear on the document. Type weekdays into the top row of the table.
9 Type hour intervals into the first column of the table. 4. Format the text in the table. Highlight the top row. Click the Bold icon on the in the Font section of the ribbon. 27 Select the first column of the table. It will appear highlighted. Click on the Italics icon in the Font section of the ribbon. Select a section of the schedule. Click on the Fill Color icon in the Paragraph section of the ribbon. 28 Click on the arrow, and a palette of theme colors will appear. Click on a section of the schedule. Select the color of your choice. Repeat for each section of the schedule. 5 . Adjust spacing of the table. Add text to the cells; the rows will enlarge to accommodate the text. 29 Place the cursor on a vertical line. A dotted line will appear and the width may be adjusted by moving the line with the mouse. 6. Save your document to a particular folder. Click the File on the upper left corner of the ribbon.
10 Select Save As from the menu. 30 A screen will appear. Choose Documents. Select the folder where you will save the schedule. Click on the Save icon in the upper left corner of the ribbon. 31 Name your document in the File name field. Click Save. Print the document. Select the File tab at the top of the ribbon. A new page will appear with a menu on the left hand side. Select the Print option on the left. 32 Assessment Check your understanding by selecting the correct words . Documents bold italics Color dotted l ine 1. is a location for file folders and files. 2. The I in the font section of the ribbon indicates . 3. When the cursor is placed on a vertical line, a appears. 4. To make the text appear darker, you can use the icon. 5. can make your table more visually in teresting. Describe what each of the following does. 1. 2. 3. 4. 5. 33 Use your Skills Create your own weekly schedule.