Transcription of Vinyl Windows and Doors Part Number: V984528 …
1 SLIDING PATIO DOOR installation INSTRUCTIONS USING FRAME SCREWSV inyl Windows and DoorsManufactured by Pella CorporationPart number : V984528 2012 Pella CorporationInstallation Instructions for Typical Wood Frame instructions were developed and tested for use with typical wood frame wall construction in a wall system designed to manage water. These instructions are not to be used with any other construction method. installation instructions for use with other construction methods or multiple units may be obtained from Pella Corporation or local Pella retailer.
2 Building designs, construction methods, building materials, and site conditions unique to your project may require an installation method different from these instructions and additional care. Determining the appropriate installation method is the responsibility of you, your architect, or construction professional. Handling and Storage: Provide full support under the framework while storing, moving and installing the product. DO NOT lift the product by the head member only. Remove the plastic shipping material prior to storing or installing the product.
3 DO NOT store in direct sunlight. Allow sufficient spacing between products for : This instruction is not for use in applications that have Vinyl , steel or aluminum siding where water may be behind the siding above the door. In these applications, the siding may need to be removed and the door installed using the new construction installation instruction that is attached to the WILL NEED TO SUPPLY:TOOLS REQUIRED: Cedar or Impervious shims/spacers (12 to 20) Closed cell foam backer rod/sealant backer (12 to 30 ft.) Pella SmartFlash foil backed butyl window and door flashing tape or equivalent Pella Window and Door installation Sealant or equivalent high quality, multi -purpose sealant (2 to 3 tubes per door) Low expansion, low pressure polyurethane insulating window and door foam sealant - DO NOT use high pressure or latex foams.
4 Wood blocking for sill Optional corrosion resistant screws and anchors for installation on concrete floor (7 to 10) #10 x 2" Pan head square drive corrosion resistant wood screws (30) Screw covers (optional) #6 x 1/2" Phillips round head wood screw (2) #10 Bonded sealing washers (7 to 10) Tape measure 2' or 4' Level Square Hammer Stapler Sealant gun Scissors or utility knife Screwdrivers (#2 Phillips with 8" shaft and small flat blade) Drill 5/32" drill bit 3/8" drill bit with drill guide 3" long #2 square drive screwdriver bitSEALANTSEALANTI nstallation will require two or more persons for safety read the Vinyl Window and Door Limited Warranty before purchasing or installing Vinyl Windows and Doors manufactured by Pella Corporation.
5 By installing this product, you are acknowledging that this Limited Warranty is part of the terms of the sale. Failure to comply with all Pella installation and maintenance instructions may void your Pella product warranty. See Limited Warranty for complete details at Confirm the opening is plumb and level. Ensure the bottom of the rough opening does not slope toward the : It is critical the bottom is level and the door frame is fully supported from the interior to the Confirm the door will fit the opening. Measure all four sides of the opening to make sure it is 1/2" larger than the door in width and 3/8" larger in height.
6 Measure the width at the top, bottom, and center. Measure the height at the far left side, the far right side, and in the : Fix any problems with the rough opening before Apply sill flashing tape #1. Cut a piece of flashing tape 12" longer than the opening width. Apply at the bottom of the opening as shown. If the sheathing or water resistive barrier is exposed, apply the flashing tape (1C) so it overhangs 1" onto the exterior sheathing or water resistive : The tape is cut 12" longer than the width so that it will extend 6" up each side of the Tab the sill flashing tape and fold.
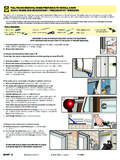
7 Cut 1" wide tabs at each corner (1/2" from each side of corner) (1D). Fold tape to the exterior and press firmly to adhere it to the weather resistive Apply sill flashing tape #2. Cut a piece of flashing tape 12" longer than the opening width. Apply at the bottom, overlapping tape #1 by at least 1". DO NOT allow the tape to extend past the interior face of the framing. 4 JMM 'MBTIJOH 5 BQF 4 JMM 'MBTIJOH 5 BQF 4 JMM)FBE8 PPE #MPDLJOHREMEMBER TO USE APPROPRIATE PERSONAL PROTECTIVE EQUIPMENT. 1 ROUGH OPENING PREPARATION*OUFSJPS *OUFSJPS 1A1B1C1C1D1 ETWO OR MORE PEOPLE WILL BE REQUIRED TO HANDLE THE PANEL Remove the packaging from the door.
8 Inspect the frame, fixed and vent panels for damage. DO NOT install damaged : If screens or hardware are removed from the door at this time, label them and store them in a protected Remove the vent panel. Slide the panel to the open position, making sure it clears the anti-lift clip. Lift the panel out of the lower track and tilt the bottom of the panel away from the door frame. Then, lower the panel out of the top track. Carefully set the panel aside in a safe place. REVERSING DOOR SLIDE: If changing the slide of the door panel, refer to Instructions (Reversing Door Slide) section of this instruction.
9 Note: Doors with Blinds-Between-the-Glass are not reversible. *OUFSJPS 7 JFX C. Remove the fins. Lay the door down with the interior facing up. With a utility knife, carefully score the entire length of the fin three times where it meets the frame. Bend the fin back and forth a few times, then peel the fin : Keep the body of the knife against the frame to prevent gouging the Relocate the vent panel bumper. Remove the bumper located at the top of the fixed jamb, and install in the fixed jamb against the sill View 2DF. Drill 5/32" holes through the head and sill 4" from each corner and 1-1/2" from the interior of the door.
10 Drill additional installation holes per locations shown in the illustration. Follow up by counter drilling the holes with a 3/8" drill making sure to only penetrate the interior wall of the door : You will need a drill guide set at 1/4" from the end of the drill bit. Without a drill guide, it is extremely difficult to prevent drilling through both walls of Vinyl with the 3/8" bit. Penetrating the lower wall with this drill will make it very difficult to seal against water penetration and difficult to Remove the sill track by beginning at one end and carefully pulling it up.