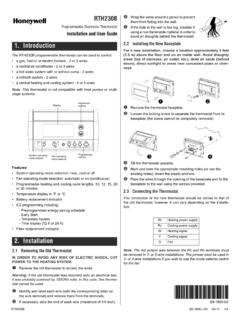
Transcription of 69-2698EFS-03 - FocusPRO® TH5000 Series
1 FocusPRO 5000 SeriesInstallation InstructionsNon-Programmable Digital ThermostatM29368 Wallplate installationRemove the wallplate from the thermostat, then follow directions below for Remove battery Pull here to remove wallplate from new Pull wires through wire Position wallplate on wall, level and mark hole positions with Drill holes at marked positions as shown below, then tap in supplied wall Place wallplate over anchors, insert and tighten mounting 7/32" holes for 3/16" holes for holeMounting screws2 Power optionsWiring terminal designationsShaded areas below apply only to TH5320U/TH5220D or as otherwise wires in this shaded areaConnect C for primary AC power (optional if batteries are installed).Insert batteries for primary or backup factory-installed jumper only for two-transformer Terminals:Rc 24 VAC power from cooling transformerR 24 VAC power from heating transformerW Heat relay (stage 1)W2 Heat relay (stage 2)Y Compressor contactor (stage 1)Y2 Compressor contactor (stage 2)G Fan relayC 24 VAC common.
2 For 2 transformer systems, use common wire from cooling Pump Terminals:Rc 24 VAC power from cooling transformerR 24 VAC power from heating transformerO/B Changeover valveY Compressor contactorY2 Compressor contactor (stage 2) -TH5320U onlyG Fan relayAux/E Auxiliary/Emergency heat relayL Sends output when set to Em. Heat C 24 VAC commonTH5110 DRcYWGRCTH5220 DRcYWGW2Y2 RCTH5320 URcYWGW2Y2 RCTH5110 DRcYO/BGRCRcYGLRCTH5220 DRcYGAuxEY2 LRCOB/OB/TH5320 UMCR29371 AAuxE3 Wiring conventional systemsShaded areas below apply only to TH5320U/TH5220D or as otherwise System (1 transformer)Rc Power [1]R [R+Rc joined by jumper]Y Compressor contactorC 24 VAC common [3]W Heat relayG Fan relayHeat-only SystemRc Power [1]R [R+Rc joined by jumper]C 24 VAC common [3]W Heat relayHeat-only System ( Series 20) [5]Rc [R+Rc joined by jumper]R Series 20 valve terminal R [1]Y Series 20 valve terminal W C 24 VAC common [3]W Series 20 valve terminal B Heat-only System (normally open zone valve) [5]Rc [R+Rc joined by jumper]R Power [1]Y Normally open zone valveC 24 VAC common [3]1H/1C System (2 transformers)Rc Power (cooling transformer) [1, 2]R Power (heating transformer)
3 [1, 2]Y Compressor contactorC 24 VAC common [3, 4]W Heat relayG Fan relayHeat-only System with FanRc Power [1]R [R+Rc joined by jumper]C 24 VAC common [3]W Heat relayG Fan relayCool-only SystemRc Power [1]R [R+Rc joined by jumper]Y Compressor contactorC 24 VAC common [3]G Fan relay2H/2C System (1 transformer) [6]Rc Power [1]R [R+Rc joined by jumper]Y Compressor contactor (stage 1)C 24 VAC common [3]W Heat relay (stage 1)G Fan relayW2 Heat relay (stage 2)Y2 Compressor contactor (stage 2)2H/2C System (2 transformers) [6]Rc Power (cooling transformer) [1, 2]R Power (heating transformer) [1, 2]Y Compressor contactor (stage 1)C 24 VAC common [3, 4]W Heat relay (stage 1)G Fan relayW2 Heat relay (stage 2)Y2 Compressor contactor (stage 2)RcYWGRCM29372 RcWRCM29373 RcYWRCM29374 RcYRCM29375 RcYWGRCM29376 RcWGRCM29377 RcYGRCM29378 RcYWGW2Y2 RCM29379 RcYWGW2Y2 RCM29380 NOTESWire specifications: Use 18- to 22-gauge thermostat wire.
4 Shielded cable is not required.[1] Power supply. Provide disconnect means and overload protection as required.[2] Remove jumper for 2-transformer systems.[3] Optional 24 VAC common connection.[4] Common connection must come from cool-ing transformer.[5] In Installer Setup, set system type to Heat Only.[6] In Installer Setup, set system type to 2 Heat/2 Cool Conventional.[7] In Installer Setup, set changeover valve to O or B.[8] In Installer Setup, set system type to 2 Heat/1 Cool Heat Pump.[9] In Installer Setup, set system type to 2 Heat/2 Cool Heat Pump.[10] In Installer Setup, set system type to 3 Heat/2 Cool Heat Pump.[11] L terminal sends a continuous output when thermostat is set to Em. Heat. Connect to Honeywell zoning panels to switch the panel to Emergency mounting1. Push excess wire back into the wall Plug wall opening with non-flammable Align the 4 tabs on the wallplate with corresponding slots on the back of the thermostat.
5 4. Push gently until the thermostat snaps in Heat Pump SystemRc Power [1]R [R+Rc joined by jumper]Y Compressor contactorC 24 VAC common [3]O/B Changeover valve [7]G Fan relay2H/1C Heat Pump System (TH5220D only) [8]Rc Power [1]R [R+Rc joined by jumper]Y Compressor contactorC 24 VAC common [3]O/B Changeover valve [7]G Fan relayAux/E Auxiliary/Emergency heat relayL Sends output when set to Em. Heat [11]2H/1C Heat Pump System (TH5320U only) [8]Rc Power [1]R [R+Rc joined by jumper]Y Compressor contactorC 24 VAC common [3]O/B Changeover valve [7]G Fan relayAux/E Auxiliary/Emergency heat relayL Sends output when set to Em. Heat [11]2H/2C Heat Pump System (TH5320U only) [9]Rc Power [1]R [R+Rc joined by jumper]Y Compressor contactor (stage 1)C 24 VAC common [3]O/B Changeover valve [7]G Fan relayY2 Compressor contactor (stage 2)L Sends output when set to Em. Heat [11]3H/2C Heat Pump System (TH5320U only) [10]Rc Power [1]R [R+Rc joined by jumper]Y Compressor contactor (stage 1)C 24 VAC common [3]O/B Changeover valve [7]G Fan relayAux/E Auxiliary/Emergency heat relayY2 Compressor contactor (stage 2)L Sends output when set to Em.
6 Heat [11]See Notes on page heat pump systemsShaded areas below apply only to TH5320U/TH5220D or as otherwise the procedure below to configure the thermostat to match the installed heating/cooling system, and customize feature operation as To begin, press and hold the s and FAN buttons until the display Press s or t to change Press NEXT to advance to next Press DONE to exit and save setupSetup function Settings & options (factory default in bold)Shaded areas below apply only to TH5320U/TH5220D or as otherwise noted. 1 System type0 1 heat/1 cool conventional1 1 heat/1 cool heat pump (no aux. heat)2 Heat only 2-wire systems, 3-wire zone valves ( Series 20), and normally open zone valves3 Heat only with fan4 Cool only5 2 heat/1 cool heat pump (with aux. heat)6 2 heat/2 cool conventional7 2 heat/1 cool conventional8 1 heat/2 cool conventional9 2 heat/2 cool heat pump (no aux. heat) - TH5320U only10 3 heat/2 cool heat pump (with aux.)
7 Heat) - TH5320U only 2 Changeover valve (O/B terminal)0 Changeover valve (O/B terminal energized in cooling)1 Changeover valve (O/B terminal energized in heating) 3 Fan control (heating)0 Gas or oil furnace equipment controls fan in heating1 Electric furnace thermostat controls fan in heating 5 Stage 1 heat cycle rate (CPH: cycles/hour)*5 For gas or oil furnaces of less than 90% efficiency1 For steam or gravity systems3 For hot water systems & furnaces of over 90% efficiency9 For electric furnaces 6 Stage 2 heat cycle rate/Auxiliary heat cycle rate (CPH)*5 For gas or oil furnaces of less than 90% efficiency1 For steam or gravity systems3 For hot water systems & furnaces of over 90% efficiency9 For electric furnaces 7 Auxiliary heat cycle rate (CPH)* Only TH5320U for 3H/2C Heat Pumps5 For gas or oil furnaces of less than 90% efficiency1 For steam or gravity systems3 For hot water systems & furnaces of over 90% efficiency9 For electric furnacesFunction numberSetting10 DoneNextM29387*[Other cycle rate options: 2, 4, 6, 7, 8, 10, 11 or 12 CPH]6 9 Stage 1 compressor cycle rate (CPH)3 Recommended for most compressors [Other cycle rate options.]
8 1, 2, 4, 5 or 6 CPH] 10 Stage 2 compressor cycle rate (CPH)3 Recommended for most compressors [Other cycle rate options: 1, 2, 4, 5 or 6 CPH] 12 Manual/Auto changeover0 Manual changeover (Heat/Cool/Off)1 Auto changeover (Heat/Cool/Auto/Off)2 Auto changeover only (Auto) 14 Temperature display0 Fahrenheit1 Celsius 15 Compressor protection5 Five-minute compressor off time [Other options: 0, 1, 2, 3 or 4-minute off time] 26 Auxiliary heat control0 Comfort1 Economy 27 Heat temperature range stops90 Max. heat temperature setting is 90 F (32 C) [Other options: 40 F to 89 F ( C to C)] 28 Cool temperature range stops50 Min. cool temperature setting is 50 F (10 C) [Other options: 51 F to 99 F ( C to 37 C)]Setup function Settings & options (factory default in bold)Shaded areas below apply only to TH5320U/TH5220D or as otherwise functionAuxiliary heat control (Setup Function 26):Comfort Setting: The thermostat will prioritize comfort over economy depending on heat pump performance, load conditions and whether the thermostat is calling for the heat pump.
9 Raising the temperature just a few degrees will often activate the auxiliary Setting: The thermostat will attempt to reach the temperature setting without activating the auxiliary heat. The thermostat will wait to activate the auxiliary heat depending on heat pump performance, load conditions and how many degrees the temperature setting is system test1. To begin, press and hold the s and t buttons until the display Press s / t to turn system Press NEXT to advance to next test4. Press DONE to terminate system RangesHeat: 40 to 90 F ( to 32 C)Cool: 50 to 99 F (10 to 37 C)Operating Ambient Temperature32 to 120 F (0 to C)Shipping Temperature-20 to 120 F ( to C)Operating Relative Humidity5% to 90% (non-condensing)Physical DimensionsTH5220D3-9/16 H x 5-13/16 W x 1-1/2 D91 mm H x 147 mm W x 38 mm DTH5220D3-7/16 H x 4-1/2 W x 1-5/16 D86 mm H x 114 mm W x 33 mm DElectrical RatingsTerminal Voltage (50/60Hz) Running CurrentW Heating 20-30 Vac A(Powerpile) 750 mV DC 100 mA DCW2 (Aux/E) Heating 20-30 Vac AY Cooling 20-30 Vac AY2 Cooling 20-30 Vac AG Fan 20-30 Vac AO/B Changeover 20-30 Vac AL Output 20-30 Vac ASpecifications100 M29388100 M29388 System test System statusShaded areas below apply only to TH5320U/TH5220D or as otherwise noted.
10 10 Heating system0 Heat and fan turn Stage 1 heat turns on. Fan turns on if Setup Function 1 is set to 1, 5, 9 or 10 OR Setup Function 3 is set to 12 Stage 2 heat turns on3 Stage 3 heat turns on - TH5320U only 20 Emergency heating system0 Heat and fan turn off1 Heat and fan turn on 30 Cooling system0 Compressor and fan turn off1 Compressor and fan turn on2 Stage 2 compressor turns on 40 Fan system0 Fan turns off1 Fan turns onSystem test numberSystem statusAutomation and Control Solutions Honeywell International Inc. 1985 Douglas Drive North Golden Valley, MN 55422 Honeywell Ltd 705 Montrichard Avenue Saint-Jean-sur-Richelieu, Qu bec J2X 5K8 Registered Trademark. 2013 Honeywell International 03 Rev. 07-13 Printed in assistance with this product, please visit call Honeywell Customer Care toll-free at assistanceTurn thermostat over to find model number and date at bottom to remove thermostat from : EQUIPMENT DAMAGE HAZARDC ompressor protection is bypassed during testing.