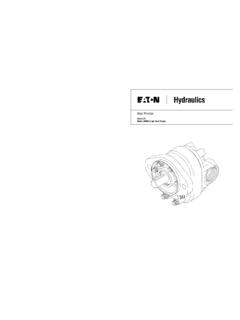
Transcription of 3” & 4” Inline Pressure Control Valves - Eaton
1 SM64500 September 2008 Applicable addition manuals: None Maintenance & Repair Manual 3 & 4 inline pressure control valves Models 64500 & 64510 Aerospace GroupConveyance Systems Division Carter Brand Ground Fueling Equipment SM64500 September 2008 2 TABLE OF CONTENTS PAGE INTRODUCTION .. 3 EQUIPMENT 3 TABLE OF OPTIONS AND ORDERING 3 DISASSEMBLY .. 4 6 REASSEMBLY.
2 6 8 ILLUSTRATED PARTS CATALOG .. 10 FIGURE 1 - Inline VALVE 11 FIGURE 2 - MANIFOLD PARTS BREAKDOWN .. 12 FIGURE 3 - 3" VALVE 13 FIGURE 4 - 4" VALVE 15 FIGURE 5A - INNER PISTON SEAL INSTALLATION - OLDER UNITS .. 17 FIGURE 5B - INNER PISTON SEAL INSTALLATION - NEWER UNITS .. 17 FIGURE 6 - OUTER PISTON SEAL INSTALLATION .. 18 NOTE: The information in this manual is to the latest revision of the products listed above at the time of this printing. Eaton reserves the right to change this manual at its discretion. SM64500 September 2008 3 MAINTENANCE, OVERHAUL & TEST INSTRUCTIONS CARTER PART NUMBERS 64500 & 64510 3 & 4 inline pressure control valves INTRODUCTION This manual furnishes detailed instructions covering the maintenance and overhaul of Carter part numbers 64500, 3 & 64510.
3 4 inline pressure control valves and the various options listed in Section EQUIPMENT DESCRIPTION The Carter part numbers 64500 and 64510 are the latest versions of the 3 & 4 Inline Air Reference Pressure Control Valves that replace the older 64080 and 64124. Because they have many characteristics in common, a single manual is used to present both units. The Valves listed above are designed to provide a constant nominal Pressure at a remote sense point as a function of reference AIR Pressure . The Valves are direct operating spring loaded piston type Valves .
4 When reference AIR Pressure is applied to the proper port on the manifold the fuel Pressure will increase. If the Valves are to be used at a flow rate below approximately 100 gpm the reference Pressure may have to be increased to obtain the desired fuel Pressure . The reference Pressure may vary slightly from unit to unit. Changing the reference Pressure is the only way of adjusting fuel discharge Pressure . A minimum line size of 3/8 inch should be used as a fuel sense line. Stainless tubing for this line is recommended. If two venturis are used, a three-way valve with at least a -inch internal orifice should be used to obtain proper surge Control .
5 The opening and closing time of the valve is adjusted by a Control screw located in the manifold. The check valve under the fuel sense port of the manifold allows restricted flow out of the piston chamber and relatively unrestricted flow into the piston chamber. When a change of approximately psi downstream Pressure is created, the check valve will open and flood the piston chamber, causing the valve to close rapidly. The valve has a vent port located on the manifold. This port provides the capability of draining any internal leakage and prevents fuel from entering the air system on air reference type Valves .
6 We recommend this port be plumbed to a slop tank, pump inlet or the product tank. The bleeder on the manifold allows bleeding of air from the fuel sense line. The valve should be installed with the bleeder in the upward position to facilitate proper bleeding. TABLE OF OPTIONS AND ORDERING INFORMATION The 64500 and 64510 have common options as listed below. Carter recommends that at least one end of the valve be flange mounted to the piping system, if both inlet and outlet are Victaulic connections, proper bracing must be provided. OPTIONS TO BE ADDED TO 64500 or 64510 Inline Pressure Control Valves OPTION LETTER DESCRIPTION OPTION LETTER DESCRIPTION D Adds one Victaulic Adapter Assembly for use on either the inlet or outlet of the unit.
7 (The parts are shipped as loose parts to be used on either end). Mounting fasteners are not provided. E Adds two Victaulic Adapter Assemblies for use on both the inlet and outlet of the unit. (The parts are shipped as loose parts to be used on both ends). Mounting fasteners are not provided. Example: 64500D Basic 3 Inline Pressure Control Valve with a kit of parts to convert the standard ASA flange on either end to mate a Victaulic fitting. 64500E - Basic 3 Inline Pressure Control Valve with a kit of parts to convert the standard ASA flange both ends to mate Victaulic fittings.
8 SM64500 September 2008 4 DISASSEMBLY 64500 & 64510 Valves Note that, due to the similarity between the units, this manual covers both units. The appropriate part numbers for the same type of part are noted Section Refer to Figure 1 for this operation. The valve consists of two basic items, the Valve Assembly (1-1) and the Manifold Assembly (1-2). If a Victaulic fitting is present on the outlet of the valve assembly remove it.
9 Discard the o-ring (from a Carter furnished fitting) or the gasket that is used to seal the fitting to the valve. MANIFOLD ASSEMBLY - Refer to Figure 2. Remove the Manifold Assembly (1-2) from the unit by removing Bolt (2-15) and pulling the manifold from the unit being careful to not lose any of the four Retainers (2-13). Discard O-rings (2-14) when removed. Note: Repairs to the Manifold Assembly (1-2) can be accomplished without removing the main valve from the vehicle system. Be sure that the Pressure is relieved before doing this. Remove Housing Check Valve (2-6) and then remove all of the internal parts contained by it.
10 Remove and discard O-rings (2-4) and (2-5). Plug (2-16) need not be removed unless there has been a leak from its thread. Do not remove Bleeder Assembly (2-12) unless it is to be replaced due to leakage from its threaded fastener or from the bleeder valve itself. If it is removed then it can be disassembled by removing the retainer ring with the proper pliers and all other parts will then come out. Remove Plug (2-9) and then discard O-ring (2-10). The opening/closing time Control Screw (2-7) and its Spring (2-8) can then be removed. 3 VALVE ASSEMBLY Refer to Figure 3 for this operation.