Transcription of 5.4 LITER FORD INTAKE MANIFOLD INSTALLATION …
1 LITER FORD INTAKE MANIFOLD . INSTALLATION INSTRUCTIONS. ATTENTION! Refer to the appropriate shop manual for your vehicle to obtain specific service procedures for this part. If you do not have a service manual or lack the skill to install this part, it is recommended that you seek the services of a qualified technician. Pay special attention to all cautions and warnings included in the shop manual! Read and follow all instructions carefully! Failure to do so will result in severe damage to the INTAKE MANIFOLD and to the engine! 1. Carefully remove INTAKE MANIFOLD per the service procedure outlined in shop manual.
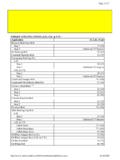
2 2. Clean all mounting surfaces. 3. Reinstall INTAKE MANIFOLD per shop manual. 4. Tighten INTAKE bolts as follows: Stage One: 2 Nm (18 in-lbs). Stage Two: 25 Nm (18 ft-lbs). 5. Install INTAKE bolts in sequence shown. TECH TIPS. This air INTAKE MANIFOLD design does not require additional INTAKE gaskets. The INTAKE gaskets are already installed into the MANIFOLD . Be sure to fully seat the injectors into INTAKE MANIFOLD when installing the fuel rail. Failure to do so will result in a vacuum leak and/or may prevent fuel rail from being properly attached.
3 There are two sizes of thread-forming screws. The small thread-forming screws are used for mounting the ignition coils. Tighten to to Nm torque. DO NOT OVERTIGHTEN! The large thread-forming screws are to be tightened to 6 to 7 Nm. DO NOT. OVERTIGHTEN! To install fuel rail fasteners, start each large fasteners for three full rotations before tightening any fastener completely. Some large self tapping screws provided may not be used in your application number of fasteners used will vary based upon vehicle application To attach PCV system connector at back of MANIFOLD , after installing o-ring, point PCV connector towards passenger side of vehicle, lower connector into INTAKE MANIFOLD and rotate connector clockwise until PCV.
4 Connector locks/clicks into place. Transferring NVH cover from original MANIFOLD is not required, if original MANIFOLD was provided with one. AUXILIARY COOLANT FITTING. Provided in the component kit will be an auxiliary coolant fitting that has sealant pre-applied to the threads. Installed plug should be replaced only Only for original applications that require an additional by customers that require second coolant connection, the installed plug must be removed. coolant connection. Install fitting wrench-tight. Do not exceed 10 Nm The provided auxiliary coolant fitting should be installed torque.
5 1-3 threads will be showing for wrench-tight. Do not exceed 10 Nm. 1-3 threads properly installed fitting. DO NOT. showing. DO NOT BOTTOM OUT FITTING! BOTTOM OUT FITTING! 615-188 INSTALLATION Instructions RN036-238 Rev C.
