Transcription of 790XV - directeddealers.com
1 790 XVInstallation Guide 2002 Directed Electronics, Inc. Vista, CA N554V 11-02 NOTE:This product is intended for installation by a professional installer only!Any attempt to install this product by any person other than a trained professionalmay result in severe damage to a vehicle s electrical system and Bitwriter (p/n 998T)requires chip version ornewer to program this 880000--999999--11332299 TTeecchhnniiccaall SSuuppppoorrtt 880000--775533--00880000 These resources are for authorized Directed Dealer use device complies with Part 15 of FCC rules. Operation is subject to the following conditions: (1) This device may not causeharmful interference, and (2) This device must accept any interference received, including interference that may cause undesiredoperation. Changes or modifications not expressly approved by the party responsible for compliance could void the user'sauthority to operate this , Code Hopping , DEI , Doubleguard , ESP , FailSafe , Ghost Switch , Learn Routine , Nite-Lite ,Nuisance Prevention Circuitry, NPC , Revenger , Silent Mode , Soft Chirp , Stinger , Valet , Vehicle RecoverySystem , VRS , and Warn Away are all Trademarks or Registered Trademarks of Directed Electronics, Inc.
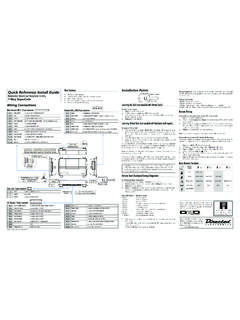
2 2 2002 Directed Electronics, Inc. 2002 Directed Electronics, of ContentsWWaarrnniinngg!! SSaaffeettyy PPooiinnttss ttoo Beginning the Installation ..5 Finding the Tachometer Wir ..5 Finding the WAIT-TO-START BulbWire for Diesels ..6 After the Installation ..6 Vehicle Anti-Theft Systems(Immobilizers) ..6 PPrriimmaarryy HHaarrnneessss ((HH11))WWiirree CCoonnnneeccttiioonn Harness (H1) Wiring Diagram 7 Primary Harness Wire Descriptions ..7 SSeeccoonnddaarryy HHaarrnneessss ((HH22)),,WWiirree CCoonnnneeccttiioonn Harness (H2)Wiring Harness Wire Descriptions .12 RReellaayy SSaatteelllliittee KKeeyy SSwwiittcchh IInntteerrffaacceeWWiirree CCoonnnneeccttiioonn Gauge Relay SatelliteWiring Gauge Relay SatelliteWire Descriptions ..14 Remote Start Ribbon HarnessWiring SSttaarrtt HHaarrnneessss ((HH33)),,WWiirree CCoonnnneeccttiioonn Start Harness (H3)Wiring Start HarnessWire Descriptions ..16 NNeeuuttrraall SSaaffeettyy SSwwiittcchh IInntteerrffaaccee.
3 1188 Testing the Neutral Safety Switch ..18 DDoooorr LLoocckk HHaarrnneessss ((HH44)),, WWiirree CCoonnnneeccttiioonn GGuuiiddee ..1199 PPeerriipphheerraall PPlluugg--IInn HHaarrnneessss ..1199 Super Bright LED, 2-Pin WHITE Plug ..19 Valet/Program Switch, 2-Pin BLUE Plug 20 Programmer Interface, 3-Pin Port ..20 Shock Sensor Harness, 4-Pin the Transceiver ..21 PPrrooggrraammmmiinngg Flash Jumper ..22 Tach Threshold On/Off ..22 SSyysstteemm FFeeaattuurreess LLeeaarrnn FFeeaattuurreess #1 - Basic #2 - Advanced #3 - Remote Start Features ..26 FFeeaattuurree #1 - Basic #2 - Advanced #3 - Remote Start Features ..29 TTrraannssmmiitttteerr//RReecceeiivveerr LLeeaarrnn Configuration ..32 Single Button Arm/DisarmConfiguration ..33 TTaacchh SSeeccuurriittyy PPrreevveennttiioonn RReessuummee Diagnostics ..36 System Status Chirps ..36 Table of Zones ..36 LLoonngg--TTeerrmm EEvveenntt Troubleshooting ..39 Remote Start QQuuiicckk RReeffeerreennccee 2002 Directed Electronics, !
4 Safety First Due to the complexity of this system, installation of this product must only be performed by anauthorized Directed dealer. When properly installed, this system can start the vehicle via a command signal from the trans-mitter/receiver. Therefore, never operate the system in an area that does not have adequateventilation. The following precautions are the sole responsibility of the user; however, authorizedDirected dealers should make the following recommendations to all users of this system: 1. Never operate the system in an enclosed or partially enclosed area without ventilation. 2. When parking in an enclosed or partially enclosed area or when having the vehicle serviced,the remote start system must be disabled using the installed toggle switch. 3. It is the user's sole responsibility to properly handle and keep out of reach from children alltransmitter/receiver to assure that the system does not unintentionally remote UUSSEERR MMUUSSTT IINNSSTTAALLLL AA CCAARRBBOONN MMOONNOOXXIIDDEE DDEETTEECCTTOORR IINN OORRAABBOOUUTT TTHHEE LLIIVVIINNGG AARREEAA AADDJJAACCEENNTT TTOO TTHHEE AALLLL DDOOOORRSSLLEEAADDIINNGG FFRROOMM AADDJJAACCEENNTT LLIIVVIINNGG AARREEAASS TTOO TTHHEE EENNCCLLOOSSEEDD OORRPPAARRTTIIAALLLLYY EENNCCLLOOSSEEDD VVEEHHIICCLLEE SSTTOORRAAGGEE AARREEAA MMUUSSTT AATT AALLLL TTIIMMEESSRREEMMAAIINN Use of this product in a manner contrary to its intended mode of operation may result inproperty damage, personal injury, or death.
5 Except when performing the Safety Check outlinedin this installation guide, (1) Never remotely start the vehicle with the vehicle in gear, and (2)Never remotely start the vehicle with the keys in the ignition. The user will be responsible forhaving the neutral safety feature of the vehicle periodically checked, wherein the vehicle mustnot remotely start while the car is in gear. This testing should be performed by an authorizedDirected dealer in accordance with the Safety Check outlined in this product installation the vehicle starts in gear, cease remote start operation immediately and consult with the userto fix the problem immediately. After the remote start module has been installed, test the remote start module in accordance withthe Safety Check outlined in this installation guide. If the vehicle starts when performing theNeutral Safety Shutdown Circuit test, the remote start unit has not been properly installed. Theremote start module must be removed or properly reinstalled so that the vehicle does not start ingear.
6 All installations must be performed by an authorized Directed dealer. OOPPEERRAATTIIOONN OOFFTTHHEE RREEMMOOTTEE SSTTAARRTT MMOODDUULLEE IIFF TTHHEE VVEEHHIICCLLEE SSTTAARRTTSS IINN GGEEAARR IISSCCOONNTTRRAARRYY TTOO IITTSS IINNTTEENNDDEEDD MMOODDEE OOFF OOPPEERRAATTIINNGG TTHHEERREEMMOOTTEE SSTTAARRTT SSYYSSTTEEMM UUNNDDEERR TTHHEESSEE CCOONNDDIITTIIOONNSS MMAAYY RREESSUULLTT IINNPPRROOPPEERRTTYY DDAAMMAAGGEE OORR PPEERRSSOONNAALL IIMMMMEEDDIIAATTEELLYY CCEEAASSEE TTHHEEUUSSEE OOFF TTHHEE UUNNIITT AANNDD RREEPPAAIIRR OORR DDIISSCCOONNNNEECCTT TTHHEE IINNSSTTAALLLLEEDDRREEMMOOTTEE SSTTAARRTT DDIIRREECCTTEEDD WWIILLLL NNOOTT BBEE HHEELLDD RREESSPPOONNSSIIBBLLEEOORR PPAAYY FFOORR IINNSSTTAALLLLAATTIIOONN OORR RREEIINNSSTTAALLLLAATTIIOONN 2002 Directed Electronics, Points to RememberBefore Beginning the Installation Please read this entire installation guide before beginning the installation. The installation of thisremote start system requires interfacing with many of the vehicle s systems.
7 Many new vehiclesuse low-voltage or multiplexed systems that can be damaged by low-resistance testing devices,such as test lights and logic probes (computer safe test lights). Test all circuits with a high-qualitydigital multi-meter before making connections. Do not disconnect the battery if the vehicle has an anti-theft-coded radio. If equipped with anair bag, avoid disconnecting the battery if possible. Many airbag systems will display a diagnosticcode through their warning lights after they lose power. Disconnecting the battery requires thiscode to be erased, which can require a trip to the dealer. Check with the customer on status LED location. Remove the domelight fuse. This prevents accidentally draining the battery. Roll down a window to avoid being locked out of the car. Finding the Tachometer WireTo test for a tachometer wire, a multimeter capable of testing AC voltage must be used. Thetachometer wire will show between 1V and 6V AC. In multi-coil ignition systems, the system canlearn individual coil wires.
8 Individual coil wires in a multi-coil ignition system will register loweramounts of AC voltage. Also, if necessary, the system can use a fuel injector control wire for enginespeed locations for a tachometer wire are the ignition coil, instrument cluster, fuel injectors, orengine to find a tachometer wire with your multimeter:1. Set to ACV or AC voltage (12V or 20V is fine).2. Attach the (-) probe of the meter to chassis !Do not test tachometer wires using a test light or logic probe! This willdamage the !This product is designed for fuel-injected, automatic transmissionvehicles only. Installing it in a standard transmission vehicle is dangerous and iscontrary to its intended 2002 Directed Electronics, Start and run the vehicle. 4. Probe the wire you suspect of being the tachometer wire with the red probe of the If this is the correct wire the meter will read between 1V and 6V. Increase the , and thevoltage should increase approximately the WAIT-TO-START Bulb Wire for DieselsIn diesel vehicles it is necessary to interface with the wire that turns on the WAIT TO START lightin the dashboard.
9 This wire illuminates the bulb until the vehicle s glow plugs are properly the light goes out the vehicle can be started. This wire is always available at the connectorleading to the bulb in the dashboard. It can also be found at the Engine Control Module (ECM)in many vehicles. However, there are some instances of diesel vehicles without WAIT TO START wires. In this case, please contact Technical test and determine the polarity of this wire:1. Set your multimeter to DCV or DC voltage (12 or 20V is fine).2. Attach the (+) probe of the meter to (+) Probe the wire that you suspect leads to the bulb with the (-) probe of the Turn the ignition switch to the ON If the meter indicates 12 volts until the light goes out you have isolated the correct wire and thewire's polarity is negative (ground while the bulb is on).6. If the meter reads zero volts until the light goes out and then reads 12 volts, you have isolatedthe correct wire and the wire's polarity is the Installation Test all functions.
10 The Using Your Systemsection of the Owner's Guide is very helpful whentesting. Review and complete the Safety Checksection of this guide prior to the vehicle Anti-Theft Systems (Immobilizers)Vehicle anti-theft systems (immobilizers) require a bypass module. The bypass module allows foreasy interfacing, while still maintaining the OEM security system s integrity. For vehicle listings andrequired bypass, see DirectFax Document 1059, available only to authorized dealers through thetechnical resources listed at the front of this guide. 2002 Directed Electronics, Harness (H1) Wire Connection GuidePrimary Harness (H1) Wiring Diagram_____Primary Harness Wire DescriptionsH1/1 ORANGE (-) Ground-When-Armed OutputThis wire supplies a (-) 500 mA ground as long as the system is armed. This output ceases as soonas the system is disarmed. The orange wire is pre-wired to control the 8618 starter kill : If using the H1/1 ORANGE wire to activate an add-on accessory such as windowautomation, pager or voice module a 1 Amp diode must be installed to ensure proper the diode as shown in the following !