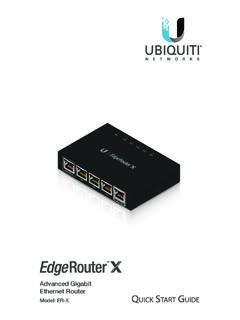
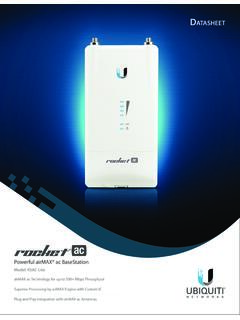
Transcription of AirRouter User Guide - Ubiquiti
1 AirRouter user GuideiTable of ContentsUbiquiti Networks, of ContentsChapter 1: Product Overview ..1 Package Contents ..1 System Requirements ..1 Top View ..1 Rear View ..1 Chapter 2: Installation ..2 Hardware Installation ..2 Connecting a Wireless Client to the AirRouter ..3 Chapter 3: AirOS ..4 Navigation ..4 Main ..4 Wireless ..8 Network ..13 Advanced ..25 Services ..27 System ..29 Tools ..30 Appendix A: Specifications ..34 Appendix B: Warranty ..35 General Warranty ..35 Appendix C: Contact Information ..36 Ubiquiti Networks Support ..361 Ubiquiti Networks, 1: Product OverviewAirRouter user GuideChapter 1: Product OverviewThank you for purchasing the Ubiquiti AirRouter . Package ContentsAirRouterPower AdapterEthernet CableQuick Start GuideSystem Requirements Microsoft Windows XP, Windows Vista, Windows 7, Linux, or Mac OS X Java Runtime Environment (or above) for the AirView utility Web Browser: Mozilla Firefox, Apple Safari, or Microsoft Internet ExplorerTop ViewLAN LEDs (1-4) Displays the status of the wired connections to Ethernet ports 1-4.
2 Solid green indicates a good connection. Flashing indicates activity on the specific Ethernet LED Displays the status of the Main Ethernet port connection. Solid green indicates a good connection. Flashing indicates LED Displays solid green when the AirRouter is connected to the Internet. Flashes to indicate Internet LAN LED Displays solid green when the wireless LAN is enabled. It will flash to indicate wireless activity. Power LED Displays solid green once the AirRouter is connected to the power adapter and the power adapter is connected to a power outlet. Rear ViewMain Ethernet Port Functions as the WAN port in SOHO Router mode and connects your AirRouter to your broadband modem or Internet connection using a standard Ethernet cable. LAN Ports (1-4) Connects devices to your AirRouter using standard Ethernet cables. Reset Button Resets the AirRouter to the factory default : Resetting the AirRouter to factory default settings will erase custom settings you have made.
3 You can backup your configuration from System > Backup Configuration > Download in the browser-based management Port Reserved for future Port The power adapter connects here to provide power to the Networks, 2: InstallationAirRouter user GuideChapter 2: InstallationHardware InstallationTo install the AirRouter , perform the following steps:1. Connect the power adapter to the port labeled Power on the AirRouter . Connect the other end to of the power adapter to a power Connect an Ethernet cable to Ethernet port Connect the other end of the Ethernet cable to your Launch your Web browser and type in the address field and press enter (PC) or return (Mac).Note: Your computer needs to be on the subnet. If you have DHCP enabled on your Ethernet adapter, it should receive an address automatically. If not, you will need to set a static IP address in the - range. 5. The login screen will appear. Enter ubnt in the Username and Password fields and click The AirOS interface will appear.
4 Go to the Wireless tab3 Ubiquiti Networks, 2: Installation AirRouter user Guide7. Customize your wireless network and secure your network by entering the basic wireless network information:a. Enter a name for your wireless network in the SSID Select the type of security that you want to use for your wireless network from the Security : WPA2-AES security is the srongest wireless security method. If all of your devices support this option, it is recommended that you select it. c. Enter a passphrase in the WPA Preshared Key field. You can click the Show option to see the characters that you are typing. d. Click Change. You will be prompted to apply the changes. To proceed, click If necessary, disconnect the power and Ethernet cables to move the router so that you can connect it to your Internet Connect an Ethernet cable from your broadband modem or other Internet connection to the port labeled < > on the back of the ! Basic router installation is complete.
5 Proceed to Connecting a Wireless Client to the AirRouter for information on connecting wireless clients. Connecting a Wireless Client to the AirRouterWindows1. Go to Connect to Network. Windows 7 Right-click on the Network icon. Windows Vista Go to Start > Connect To. Windows XP Right-click the Wireless Network icon in the System Tray (lower right corner of the screen) and then click View Available Wireless Select the wireless network (SSID) that you entered in the SSID field in step 7a and then click Type the passphrase that you entered in the WPA Preshared Key field in step 7c and click OK or Launch your web browser to begin browsing the web. Mac1. Click the AirPort icon in the menu bar (top left side of the screen).2. Select the wireless network (SSID) that you entered in the SSID field in step Type the passphrase that you entered in the WPA Preshared Key field in step 7c and click Once connected the AirPort icon will change from gray to solid black.
6 The number of black lines indicates the signal strength. Launch your web browser to begin browsing the Networks, 3: AirOS AirRouter user GuideChapter 3: AirOS AirOS is an advanced operating system that is capable of powerful wireless and routing features. AirOS is built upon a simple and intuitive user interface. AirOS allows you to maximize the wireless performance of Ubiquiti products which are based on IEEE To access the interface, perform the following steps:1. Launch your Web browser and type in the address field and press enter (PC) or return (Mac).2. The login screen will appear. Enter ubnt in the Username and Password fields and click interface contains six main tabs: Main The Main tab displays AirRouter status information and provides network monitoring links. Wireless The Wireless tab allows you to configure the wireless mode, the basic wireless settings and the wireless security settings for the AirRouter . Network The Network tab covers the configuration of the network operating mode, IP settings, packet filtering routines and network services.
7 Advanced The Advanced tab settings are available for additional wireless interface controls. The AirMax feature and advanced wireless settings can be configured in this tab. The Advanced tab also includes advanced Ethernet and traffic shaping settings. Services The Services tab covers the configuration of system management services like SNMP, NTP, System Log, Ping Watchdog and SSH/Telnet server. System The System tab contains controls for system maintenance routines, administrator account management, device customization, firmware upgrade and configuration backup. The interface language can also be selected page also contains network administration and monitoring tools: Align Antenna Site Survey Ping Traceroute Speed Test AirViewMainThe Main tab displays a summary of the link status information, current values of the basic configuration settings (depending on the operating mode), network settings and information, and traffic Name Displays the customizable name (ID) of the AirRouter .
8 The Device Name (Host Name) is displayed in registration screens and discovery Mode Displays the network mode that the AirRouter is operating in. There are three modes available: Bridge, Router, and SOHO router. SOHO router is the default setting. This setting is configured on the Network Mode Displays the radio interface operating mode. Access Point (or Access Point WDS) and Station (or Station WDS) operating modes can be set depending on the network topology Networks, 3: AirOS AirRouter user GuideSSID Displays the wireless network name (SSID). The wireless network name is dependent upon the wireless mode selected: While operating in Station mode, displays the SSID of the Access Point the AirRouter is associated with. While operating in Access Point mode, this displays the SSID configured on the AirRouter . The SSID is configured on the Wireless Displays the wireless security method being used on the AirRouter . If None is displayed, then wireless security has been disabled.
9 Version Displays the version of the AirOS This is the total time the AirRouter has been running since last power up (reboot) or software upgrade. The time is displayed in days, hours, minutes and Displays the current system date and time. The date and time are displayed in YEAR-MONTH-DAY HOURS:MINUTES:SECONDS format. The system date and time is retrieved from the Internet using NTP (Network Time Protocol). NTP Client is enabled by default on the Services tab. The AirRouter doesn t have an internal clock and the date and time may be inaccurate if NTP Client is disabled or the AirRouter isn t connected to the Displays the channel number and corresponding operating frequency. The AirRouter uses the channel/radio frequency specified to transmit and receive data. Valid channel/frequency range will vary depending on local country regulations. Channel Width This is the spectral width of the radio channel used by the AirRouter . 5, 10, 20 and 40 MHz channel spectrum widths are supported.
10 In Station (or Station WDS) 20/40 MHz is the value by Displays the current timeout value for ACK frames. ACK Timeout can be set manually or self-adjusted automatically. The ACK Timeout (Acknowledgement frame Timeout) specifies how long the AirRouter should wait for an acknowledgement from a partner device confirming packet reception before concluding there must have been an error and resending the packet. TX/RX Chains Displays the number of independent spatial data streams the AirRouter is transmitting/receiving simultaneously within one spectral channel of bandwidth. This ability is specific for devices which rely on multiple-input multiple-output (MIMO) technology. Multiple chains increase data transfer performance significantly. The number of chains Ubiquiti device uses is hardware specific. Every TX/RX chain requires a separate antenna. WLAN MAC Displays the MAC address of the AirRouter as seen on the wireless MAC Displays the MAC address of the AirRouter as seen on the LAN (Local Area Network).