Transcription of APPLICATIONS Lexus ES300 2002-2003 Lexus ES330 2004 …
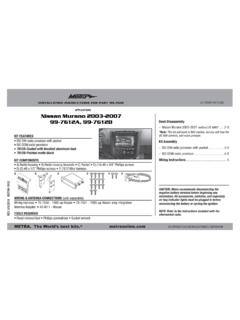
1 METRA. THE WORLD S BEST KITS. COPYRIGHT 2004-2011 METRA ELECTRONICS CORPORATION INSTRUCTIONS FOR PART 99-8158 GREV. 11/28/11 WIRING & ANTENNA CONNECTIONS (Sold Separately) Wiring Harness: TYTO-01-Toyota amp interface 2001-upAntenna Adapter: Not requiredPanel Removal Tool Phillips Screwdriver Socket WrenchTOOLS REQUIREDL exus ES300 2002-2003 Lexus ES330 2004-200699-8158 GBCDA A) Radio Housing Trim Panel B) Radio ISO Brackets C) Pocket D) (4) #8 x 3/8 Truss Head Phillips screws KIT FEATURESKIT COMPONENTS DDIN Head unit provisions ISO DIN Head unit provision with pocket Painted Grey to match factory finishTable of ContentsDash Disassembly Lexus ES300 2002-2003 Lexus ES330 2004-2006 3 Kit Assembly DDIN head unit provisions 4 ISO DIN head unit provision with pocket 5 KNOWLEDGE IS POWERE nhance your installation and fabrication skills by enrolling in the most recognized and respected mobile electronics school in our onto or call 800-354-6782 for more information and take steps toward a better recommends MECP certified technicians99-8158 GCautionMetra recommends disconnecting the negative battery terminal before beginning any installation.
2 All accessories, switches, and especially air bag indicator lights must be plugged in before reconnecting the battery or cycling the ignition. *NOTE: Refer also to the instructions included with the aftermarket Unclip and remove shifter trim panel. (Figure A)2. Unclip and remove climate control panel. (Figure B)3. Remove (4) 10mm screws holding the radio chassis. Remove radio/trim panel (Figure C)4. Remove (2) chrome trim pieces and (4) clips from radio panel and place aside for kit assembly. (Figure D)Continue to kit assembly3 Dash Disassembly99-8158G(Figure D)(Figure A)(Figure B)(Figure C)4 Kit Assembly 99-8158 GISO DIN head unit provisionsRadio Trim Panel Assembly(Figure A)(Figure A)1. Mount the radio to the brackets with screws included with unit. (Figure A)2. Mount the radio brackets to the pocket with the screws supplied. (Figure A)3. Locate the factory wiring harness and antenna plug in the dash.
3 Metra recommends using the proper mating adapters from Metra and/or AXXESS. 4. Mount assembly into the sub dash. 5. Reassemble dash in reverse order of disassembly using 99-8158G trim panel instead of factory Attach (2) chrome trim pieces and (4) clips removed in dash disassembly to kit panel. (Figure A)5 Kit Assembly 99-8158G(Figure A)1. Mount the radio to the DDIN brackets with screws included with unit. (Figure A)2. Locate the factory wiring harness and antenna plug in the dash. Metra recommends using the proper mating adapters from Metra and/or AXXESS. 3. Mount assembly into the sub Reassemble dash in reverse order of disassembly using 99-8158G trim panel instead of factory DIN head unit provisionsNotesNotesMETRA. THE WORLD S BEST KITS. COPYRIGHT 2004-2011 METRA ELECTRONICS CORPORATION INSTRUCTIONS FOR PART 99-8158 GREV. 11/28/11 METRA. THE WORLD S BEST KITS. COPYRIGHT 2004-2011 METRA ELECTRONICS CORPORATION DE INSTALACI N PARA LA PIEZA 99-8158 GREV.
4 11/28/11 CABLEADO Y CONEXIONES DE ANTENA Arn s de cableado: TYTO-01-Toyota amp interfaz 2001y masAdaptador de antena: No se requiereHerramienta de remoci n de panel Destornillador Phillips Llave para dadosHERRAMIENTAS REQUERIDASL exus ES300 2002-2003 Lexus ES330 2004-200699-8158 GBCDA A) Panel de moldura para carcasa de radio B) Soportes ISO para radio C) Bolsillo D) (4) Cuatro tornillos Phillips de cabeza segmentada #8 x 3/8 CARACTER STICAS DEL KITCOMPONENTES DEL KIT Provisi n de unidad central DDIN Provisi n de unidad central ISO DIN con bolsillo Pintada en gris para igualar el acabado de f brica(Se venden por separado)IndiceDesmontaje Del Tablero Lexus ES300 2002-2003 Lexus ES330 2004-2006 3 Montaje Del Kit Provisi n de unidad central DDIN 4 Provisi n de unidad central ISO DIN con bolsillo 5 KNOWLEDGE IS POWERE nhance your installation and fabrication skills by enrolling in the most recognized and respected mobile electronics school in our onto or call 800-354-6782 for more information and take steps toward a better NMetra recomienda desconectar el terminal negativo de la bater a antes de comenzar cualquier instalaci n.
5 Todos los accesorios, interruptores y, especialmente, las luces indicadoras de airbag deben estar enchufados antes de volver a conectar la bater a o comenzar el ciclo de ignici n.*NOTA: Refi rase tambi n a las instrucciones incluidas con la radio del mercado de recomienda t cnicos con certificaci n del Programa de Certificaci n en Electr nica M vil (Mobile Electronics Certification Program, MECP).EL CONOCIMIENTO ES PODERM ejore sus habilidades de instalaci n y fabricaci n inscribi ndose en la escuela de dispositivos electr nicos m viles m s reconocida y respetada de nuestra industria. Reg strese en o llame al 800-354-6782 para obtener m s informaci n y avance hacia un futuro Suelte y retire el panel de moldura de la palanca de velocidades. (Figura A)2. Suelte y retire el panel de moldura del panel de control. (Figura B)3. Retire los (4) tornillos de 10mm que sostienen el chas s del radio. Retire el radio/panel de moldura.
6 (Figura C)4. Retire las (2) piezas de moldura cromada y (4) clips del panel de radio y ap rtelos para el ensamble del kit. (Figura D)Continuar al ensamble del kit3 Desmontaje del tablero99-8158G(Figura D)(Figura A)(Figura B)(Figura C)4 Ensamble del kit 99-8158 GProvisiones de unidad central ISO DINR adio ensamblaje del panel de trim(Figura A)(Figura A)1. Monte el radio en los soportes con los tornillos incluidos con la unidad. (Figura A)2. Monte los soportes del radio en el bolsillo con los tornillos suministrados. (Figura A)3. Ubique el arn s de cableado de f brica y el conector de la antena en el tablero. Metra recomienda el uso de adaptadores adecuados de acoplamiento de Metra y/o de AXXESS. 4. Monte el ensamble en el sub tablero. 5. Vuelva a armar el tablero en orden inverso al desensamble, usando el panel de moldura decorativa 99-8185G en lugar del panel de f Coloque las (2) piezas de moldura cromada y (4) clips que retir durante el desmontaje del tablero en el panel del kit.
7 (Figura A)5 Ensamble del kit 99-8158G(Figura A)1. Monte el radio en los soportes DDIN con los tornillos incluidos con la unidad. (Figura A)2. Ubique el arn s de cableado de f brica y el conector de la antena en el tablero. Metra recomienda el uso de adaptadores adecuados de acoplamiento de Metra y/o de AXXESS. 3. Monte el ensamble en el sub Vuelva a armar el tablero en orden inverso al desensamble, usando el panel de moldura decorativa 99-8185G en lugar del panel de f de unidad central doble DINN otasNotasMETRA. THE WORLD S BEST KITS. COPYRIGHT 2004-2011 METRA ELECTRONICS CORPORATION DE INSTALACI N PARA LA PIEZA 99-8158 GREV. 11/28/11
