Transcription of www.metraonline.com
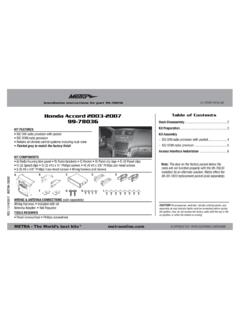
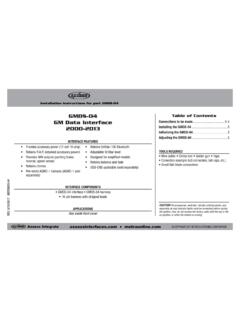
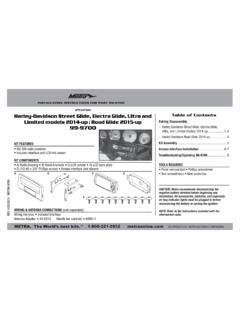
1 CAUTION! All accessories, switches, climate controls panels, and especially air bag indicator lights must be connected before cycling the ignition. Also, do not remove the factory radio with the key in the on position, or while the vehicle is running. Metra. The World s Best Kits. COPYRIGHT 2018 METRA ELECTRONICS CORPORATION REV. 5/15/18 INST95-7345 BINSTALLATION INSTRUCTIONS95-7345 BKIT FEATURES ISO DDIN radio provision Painted matte black match factory dashKIT COMPONENTS A) Radio trim panel B) Radio brackets C) (3) #8 x 3/8 Phillips screwsTOOLS REQUIRED Panel removal tool Phillips screwdriverTABLE OF CONTENTSDash Disassembly ..2 Kit Preparation ..3 Kit Assembly.
2 3 WIRING & ANTENNA CONNECTIONS (sold separately)Wiring Harness: 70-7304 AX-HYKIA1-SWC & AX-HYKIA-SPDIF (for amplified models)Antenna Adapter: Not requiredSteering wheel control interface: ASWC-1 ABCKia Optima | DISASSEMBLY1. Unsnap and remove trim from around top center to passenger side dash. (Figure A)2. Unsnap panel from outside edge of driver s side dash. (Figure B)3. Remove (2) screws from knee panel and pull top of panel back so it doesn t overlap the instrument cluster. (Figure C)4. Remove (2) screws from the driver s side vent trim and remove. (Figure D)(Figure B)(Figure F)(Figure C)(Figure G)(Figure D)(Figure A)(Figure H)(Figure E)5. Remove (5) screws from instrument cluster and remove.
3 (Figure E)6. Remove (4) screws from the climate controls and remove. (Figure F)7. Remove (6) screws securing the radio trim panel and remove. (Figure G)8. Remove (4) screws securing the factory radio chassis and remove it. (Figure H) Continue to Kit PreparationREV. 5/15/2018 INST95-7345B3 KIT PREPARATIONKIT ASSEMBLY(Figure A)(Figure B)(Figure C)1. Remove (3) screws and remove the vent from the factory radio panel. (Figure A)2. Using the supplied #8 x 3/8 Phillips screws, install the vent to the kits trim panel. (Figure B) Continue to Kit Assembly(Figure A)(Figure B)1. Secure the radio brackets to the radio using the screws supplied with the radio. (Figure A)2. Locate the factory wiring harness and antenna connector in the dash and complete all necessary connections to the radio.
4 Metra recommends using the proper mating adapter from Metra and/or Axxess. Test the radio for proper Secure the radio assembly to the dash using the factory screws. (Figure B)4. Snap the radio trim panel over the radio assembly, then reassemble the dash in reverse order of disassembly. (Figure C)KNOWLEDGE IS POWERE nhance your installation and fabrication skills by enrolling in the most recognized and respected mobile electronics school in our onto or call 800-354-6782 for more information and take steps toward a better tomorrow. Metra recommends MECP certified techniciansIMPORTANTIf you are having difficulties with the installation of this product, please call our Tech Support line at 1-800-253-TECH.
5 Before doing so, look over the instructions a second time, and make sure the installation was performed exactly as the instructions are stated. Please have the vehicle apart and ready to perform troubleshooting steps before The World s Best Kits. COPYRIGHT 2018 METRA ELECTRONICS CORPORATION REV. 5/15/18 INST95-7345 BINSTALLATION INSTRUCTIONS95-7345B PRECAUCI N! Todos los accesorios, interruptores, paneles de controles de clima y especialmente las luces del indicador de las bolsas de aire deben estar conectados antes ciclar la ignici n. Adem s, no quite el radio de f brica con la llave en la posici n o de encendido ni con el veh culo The World s Best Kits. COPYRIGHT 2018 METRA ELECTRONICS CORPORATION REV.
6 5/15/18 INST95-7345 BINSTRUCCIONES DE INSTALACI N95-7345 BCARACTER STICAS DEL KIT Provisi n de radio ISO DDIN Pintado en negro mate para igualar el acabado de f bricaCOMPONENTES DEL KIT A) Panel de moldura de radio B) Soportes de radio C) (4) Tornillos Phillips #8 x 3/8 HERRAMIENTAS REQUERIDAS Herramienta para quitar paneles Destornillador PhillipsINDICED esmontaje del tablero ..2 Preparaci n del Kit ..3 Ensamble del kit ..3 CABLEADO Y CONEXIONES DE ANTENA (se venden por separado)Arn s de cables: 70-7304 AX-HYKIA1-SWC y AX-HYKIA-SPDIF (para modelos amplificados)Adaptador de antena: No se requiereInterfaz de control en volante Axxess: ASWC-1 ABCKia Optima | DEL TABLERO1.
7 Desenganche y quite la moldura de alrededor de la parte de arriba del centro al tablero del lado del pasajero. (Figura A) 2. Desenganche el panel del borde de afuera del tablero del lado del conductor. (Figura B)3. Quite los (2) tornillos del panel que protege las rodillas y jale la parte de arriba del panel hacia atr s para que no se empalme con el conjunto de instrumentos. (Figura C)4. Quite los (2) tornillos de la moldura de la rejilla del lado del conductor y qu tela. (Figura D)(Figura B)(Figura F)(Figura C)(Figura G)(Figura D)(Figura A)(Figura H)(Figura E)5. Quite los (5) tornillos del conjunto de instrumentos y qu telo. (Figura E)6. Quite los (4) tornillos de los controles del clima y qu telos.
8 (Figura F)7. Quite los (6) tornillos que sostienen el panel de la moldura del radio y qu telo. (Figura G)8. Quite los (4) tornillos que sostienen el chas s del radio de f brica y qu telo. (Figura H) Contin e con la Preparaci n del KitREV. 5/15/2018 INST95-7345B3 PREPARACI N DEL KITENSAMBLE DEL KIT(Figura A)(Figura B)(Figura C)1. Quite los (3) tornillos y quite la rejilla del panel del radio de f brica. (Figura A)2. Con los tornillos Phillips # 8 x 3/8 provistos, instale la ventilaci n en el panel de acabado de los kits. (Figura B) Contin e con el Ensamble del Kit(Figura A)(Figura B)1. Asegure los soportes de radio a la radio usando los tornillos suministrados con el radio.
9 (Figura A)2. Localice el arn s de cableado de f brica y el conector de la antena en el tablero y haga todas las conexiones necesarias al radio. Metra recomienda que use adaptadores adecuados de acoplamiento de Metra y/o de AXXESS. Pruebe el radio para verificar que funcione Asegure el ensamble de la radio al tablero usando los tornillos de f Enganche el panel de la moldura del radio sobre el ensamble del radio, luego vuelva a ensamblar el tablero en orden inverso al del desmontaje. (Figura C)KNOWLEDGE IS POWERE nhance your installation and fabrication skills by enrolling in the most recognized and respected mobile electronics school in our onto or call 800-354-6782 for more information and take steps toward a better tomorrow.
10 Metra recomienda t cnicos con certificaci n del Programa de Certificaci n en Electr nica M vil (Mobile Electronics Certification Program, MECP).EL CONOCIMIENTO ES PODERM ejore sus habilidades de instalaci n y fabricaci n inscribi ndose en la escuela de dispositivos electr nicos m viles m s reconocida y respetada de nuestra industria. Reg strese en o llame al 800-354-6782 para obtener m s informaci n y avance hacia un futuro tiene dificultades con la instalaci n de este producto, llame a nuestra l nea de soporte t cnico al 1-800-253-TECH. Antes de hacerlo, revise las instrucciones por segunda vez y aseg rese de que la instalaci n se haya realizado exactamente como se indica en las instrucciones.