Example: tourism industry
Arlo Pro 4 Wire-Free Spotlight Camera
5. Attach the camera to the outdoor mount and swivel to adjust the camera angle. Install a Total Security Mount (sold separately) 1. Place the back plate against the wall, with the arrow pointing up, and secure it with screws. Note: If you are mounting your Total Security Mount on drywall, we recommend using the included wall anchors.
Tags:
Information
Domain:
Source:
Link to this page:
Documents from same domain
Arlo HD Security Camera System User Manual
www.arlo.comIf you are using a computer, enter arlo.netgear.com in the address bar of a browser. The Devices page displays. 2. Log in to the old Arlo account. 3. Tap or click Settings > My Devices. A list of devices including the base station and cameras displays. 4. Tap or click the camera. The settings for the camera display. 5.

Arlo Quick Start Guide
www.arlo.com• Mount your Arlo camera at least 7 feet (2.1 meters) above the floor or ground and angle it slightly downward. • Place your camera within 10-15 feet (3.0–4.6 meters) of where motion is expected. • Make sure that side-to-side traffic crosses the camera’s field of view. • The best area for motion detection is 5 to
Essential Series Wire-Free Camera - Arlo
www.arlo.comArlo Essential Series Wire-Free Camera User anual 3. Tilt and swivel to adjust the camera angle. Connect an optional Essential Solar Panel (sold separately) You can use the Essential Solar Panel (VM3600) to harvest power from the sun to keep your camera battery charged. camera..
Arlo Pro 4 Wire-Free Spotlight Camera User Manual
www.arlo.comPro 4 Spotlight Camera User Manual Pro 4 Spotlight Camera features • 2K video with HDR. Zoom in on objects and see clearer details and colors in 2K HDR. • Color night vision. See what’s lurking with color night vision or black and white. • Integrated spotlight. Light up the night and ward off unwelcome guests. • Fast and easy wire ...

Essential Video Doorbell Wired - Arlo
www.arlo.combut it can still be configured to trigger recordings on other cameras or vice versa. • Can I pair the wired Arlo Essential Video Doorbell with other Arlo cameras? ... The estimated voltage is commonly printed on transformers. This is typically accurate, but it isn’t as precise as using a multimeter. Get Started 11 Essential Video Doorbell ired
Arlo Pro 3 User Manual
www.arlo.com• 160 degree view. See a full panoramic view with auto image correction that reduces the fisheye effect. The camera has an 160-degree diagonal field of view with a matching wide range for motion detection. • Auto Zoom and Tracking. Auto-focus on moving objects with clarity and detail • Magnetic charging. Quickly charge your camera and ...
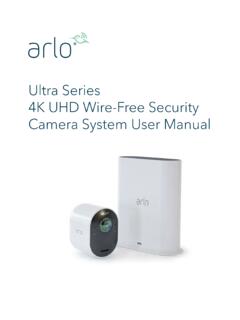
Arlo Ultra User Manual
www.arlo.comSee a full panoramic view with auto image correction that reduces the fisheye effect. The camera has an 180-degree diagonal field of view with a matching wide range for motion detection. • Noise canceling technology. Listen and speak to visitors with crystal clear, full 2-way audio that reduces wind and noise. • Auto Zoom and Tracking. Auto ...
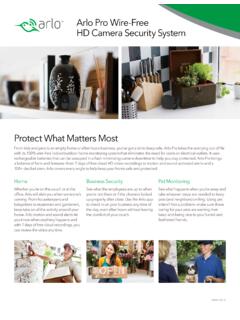
Protect What Matters Most - ARLO
www.arlo.comFeatures 100% Wire-Free Free of power cords and wiring hassles Weather-resistant Put Arlo anywhere—indoors or out Rechargeable Battery 2 …
Arlo Audio Doorbell and Arlo Chime User Manual
www.arlo.comchime The Arlo Audio Doorbell is compatible with AC-powered mechanical and digital chimes operating between 8-24 volts. The Arlo Audio Doorbell isn’t compatible with wireless door chimes or any chime or intercom system using a DC transformer. Set the chime switch The chime switch is located inside the Arlo Audio Doorbell. This switch is only used
Arlo Q and Arlo Q Plus User Manual
www.arlo.com2. Connect your own Ethernet cable to the PoE adapter. 3. Connect the other end of the Ethernet cable to an Ethernet switch or a router. 4. Connect the included micro USB cable to the side of the PoE adapter. 5. Connect the other end of the micro USB cable to the USB power adapter. 6. Plug the USB adapter into a wall socket. 7.
Related documents

Nest Cam IQ outdoor security camera Installation Guide
nest.comoutdoor security camera Installation Guide. 3 Contents In the box 4 What you’ll need 5 Do this first 6 Choose a good spot 8 ...

Nest Cam Outdoor Installation Guide
nest.comwhere you’d like the camera to be and move on to the next step. Tip: If the camera wall plate sticks to the mounting magnet, you can use a screwdriver to help pry them apart. Tip: Some outdoor outlets have covers you can lock in place. Use a zip tie or padlock to keep the cover shut. 8. Secure the cable Fasten the cable to the wall using as many
Quick Start Guide - Zmodo
www.zmodo.combracket. Position the camera for an optimal viewing angle, and tighten the bracket. 3 Connect the supplied power adapter to the power port on the camera, and plug the adapter into a nearby power outlet. Repeat steps 1-4 for all cameras in your camera kit. 4 (image may vary for your specific camera model) 8 (image may vary for your specific ...
NanoStation AC Datasheet - Ubiquiti
dl.ubnt.comand outdoor installations • Improved Surge Protection The NanoStation AC and NanoStation AC loco utilize the latest ESD Protection to help protect against power surges. • Efficient FootprintThe radio and antenna are combined into a single body that takes up minimal space. • Quick Installation No fasteners are required for