Transcription of Compact 802.11ac Wave 2 Enterprise Access Point
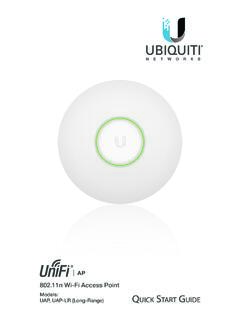
1 Compact Wave 2 Enterprise Access PointModel: UAP-nanoHDIntroductionThank you for purchasing the Ubiquiti Networks UniFi Wave 2 Enterprise Access Point . This Quick Start Guide is designed to guide you through installation and includes warranty : The UAP-nanoHD requires the UniFi Controller or higher, available at: ContentsUniFi nanoHD APMounting BracketCeiling Backing PlateScrews (Qty. 4)Flat Head Screws (Qty. 4)Keps Nuts (Qty. 4)Screw Anchors (Qty. 4)Gigabit PoE* (48V, ) with Mount BracketPower Cord** Included only in the single-pack of the UAP-nanoHDTERMS OF USE: All Ethernet cabling runs must use CAT5 (or above).
2 It is the professional installer s responsibility to follow local country regulations, including operation within legal frequency channels, output power, indoor cabling requirements, and Dynamic Frequency Selection (DFS) Requirements CAT5 cable Phillips screwdriver Drill and drill bit (6 mm for wall-mounting or 3 mm for ceiling-mounting) Optional: Drywall or keyhole saw (to cut 18 mm hole for Ethernet cable feed)System Requirements Microsoft Windows 7/8/10, Mac OS X, or Linux Java Runtime Environment (or above) Web Browser: Google Chrome (Other browsers may have limited functionality.) UniFi Controller software or higher (available at: )Network Topology Requirements A DHCP-enabled network (for the AP to obtain an IP address as well as for the wireless clients after deployment) A UniFi Cloud Key or management station running the UniFi Controller software, located either on-site and connected to the same Layer-2 network, or off-site in the cloud or a NOCUS-16-150 WUSG-PRO-4(DHCP Server)InternetUAP-nanoHDUAP-AC-M-PROUAP -AC-HDLANWANUniFi Cloud Key(UniFi Controller)Remote Access toUniFi ControllerGoodFa irPoorGreatNetwork.
3 Switches12 GatewayUtilization18%InternetCapacity43% Clients412 Guests113 IoT45 Everything isgreatMy DashboardEdit Widgets-24hrs-24hrsMax980 Min0 NowNowThroughputLatencyISP Load:Great-24hrsMax0 NowAirtime-24hrsHighLowNowRetry RateGreatWi-Fi Mbps1Wi-Fi Traffic Distribution3661140444852566064100104108 1121161201241281321361401491531571611655 GHzAccess Points20 Last 24 HrsMost Active APsOfficeBack RoomStorageRoofHallway We ..91 GB86 GB53 GB48 GB45 GBTop 5 ApplicationsYo uTu b e35 ClientsInstagram19 ClientsSquarespace17 ClientsGoogle1 ClientsFacebook20 ClientsTop InterferenceHallway We ..RoofStorage51%45%44%To p C P U U s a g eOfficeBack RoomHome51%45%43%Most Active ClientsWi-Fi Key Metrics91 ClientsiPhone87 ClientsAndroid ClientsMacBook35 ClientsPC Laptop1 ClientsiPadTop Memory UsageClient Frequency DistributionDevice DistributionHD-Kitchen Con=euen1eStorageRoofHallway We.
4 Client UptimeWi-Fi SummaryRouting UtilizationSwitch SummaryiPad-1 APs OnlineGateway - USG MainController - Office CKController - Office 2 CK25% CPU Utilization50% CPU Utilization33% CPU UtilizationOnlineMBP-2 ClientsiPad-2 UtilizationClientsPort Utilization8d 4h 0m32242d 8h 30m1,3242d 5h 15m64%1,32432%Port UsageVPN NameStatusUsersGuestsPurposeAverage DataPort 1- GBVPN-LA-PDX212 Corporate320 GBPort 2- GB POE+VPN-LA-PDX260 VLAN Only11 GBPort 3- 10 GBRemote-Office-1430 VLAN Only12 GB1208032 Con=euen1e42%Office - Art Dept42%MBP-1 TrafficDevicesTraffic2d 3h 10m248 GB5361,248 GBPort 4- GB POET ransfer-1712 VLAN Only0 GB135 GHz50%13 LAN03 WLAN01 WAN0%0%0%100%100%100%Average Capacity500 MbpsAverage Airtime Utilization8%Average Spectral (b/s) Hz64% 11ac W228% 11ac08% 11n1300 Mbps0 Mbps100%0%(b/s) (b/s) HzInternet Connection:30 Mbps40 Mbps50 Mbps20 Mbps10 Mbps0 Mbps-24 hrs-12 hrsNow o m o-7 Theoretical CapacityThroughputPortlan os; Acti=' >i;c,'sSample Network DiagramAll UniFi devices support off-site management controllers.
5 For setup details, see the User Guide on the website: OverviewLEDLED ColorStatusWhiteFactory default, waiting to be WhiteInitializing. Alternating White/BlueDevice is busy; do not touch or unplug it. This usually indicates that a process such as a firmware upgrade is taking the device has been successfully adopted by a network and is working properly. Quickly Flashing BlueThis is used to locate an AP. When you click Locate in the UniFi Controller software, the LED on the AP will flash. It will also display the location of the AP on the Blue with Occasional FlashingIndicates the device is in an isolated state (all WLANs are brought down until an uplink is found).
6 PortsEthernet Port Reset ButtonLocking NotchCable Feed PlugLocking Notch The Locking Notch will be used with the Mounting Bracket to help secure the UniFi AP. ( This is described further in the Mounting Bracket section.)Ethernet This Gigabit Ethernet port is used to connect the power and should be connected to the LAN and DHCP server. Reset The Reset button serves two functions for the UniFi AP: Restart Press and release the Reset button quickly. Restore to Factory Default Settings Press and hold the Reset button for more than five Feed Plug If your Ethernet cable feeds along the mounting surface, remove the Cable Feed BracketMounting BracketLocking TabLocking Tab During installation, the Locking Tab on the Mounting Bracket moves from the Initial Position to the Final Position, where the Locking Tab fits securely into the Locking Notch on the UniFi AP to help prevent PositionSlotInitial PositionNote.
7 If you need to remove the UniFi AP from the Mounting Bracket, insert a paper clip in the Slot to release the Locking Tab and turn the UniFi AP InstallationThe UniFi AP can be mounted on the wall or ceiling. Perform the steps for the appropriate installation:Wall Mount1. Position the Mounting Bracket at the desired location on the wall with the arrow pointing Use a pencil to mark the four mounting holes. Use a 6 mm drill bit to drill the mounting If your Ethernet cable feeds through the wall, then cut or drill a circle approximately 18 mm in diameter. Then feed the CAT5 cable through the mmNote: 25 mm is the distance from the center of the bottom mounting hole to the center of the cable Insert the Screw Anchors into the 6 mm holes.
8 Secure the Mounting Bracket to the wall by inserting the Screws into the If the Ethernet cable runs along the mounting surface, remove the Cable Feed Connect the Ethernet cable to the Ethernet port. 7. Align the arrow on the UniFi AP with the arrow on the Locking Tab of the Mounting Tab8. Ensure that the UniFi AP is firmly seated on the Mounting Bracket. Turn the UniFi AP clockwise until it locks into place and the Locking Tab fits securely into the Locking Mount1. Remove the ceiling Place the Ceiling Backing Plate in the center of the ceiling tile. Mark the four mounting screw Mark a hole approximately 18 mm in diameter for the Ethernet cable mmNote: 25 mm is the distance from the center of the bottom mounting hole to the center of the cable Use a 3 mm drill bit to drill the screw holes, and cut or drill the hole for the Ethernet cable Insert the Flat Head Screws through the Mounting Bracket, ceiling tile, and Ceiling Backing Plate.
9 Fasten the screws using the Keps Nuts. Then feed the Ethernet cable through the 18 mm Connect the Ethernet cable to the Ethernet Align the arrow on the UniFi AP with the arrow on the Locking Tab of the Mounting TabArrow8. Ensure that the UniFi AP is firmly seated on the Mounting Bracket. Turn the UniFi AP clockwise until it locks into place and the Locking Tab fits securely into the Locking Set the ceiling tile back into the UniFi APThe UAP-nanoHD features auto-sensing PoE support and can be powered by any of the following: Ubiquiti Networks UniFi Switch with PoE PoE compliant switch Ubiquiti Networks Gigabit PoE Adapter (48V, )The single-pack of the UAP-nanoHD includes one Gigabit PoE adapter.
10 For multi-pack units, PoE adapters or a UniFi Switch with PoE may be purchased separately. Connecting to a PoE SwitchConnect the Ethernet cable from the UniFi AP directly to an port on the Power over Ethernet1. Connect the Ethernet cable from the device to the adapter s POE Connect an Ethernet cable from your LAN to the adapter s LAN port. 3. Connect the Power Cord to the adapter s power port. Connect the other end of the Power Cord to a power the PoE Adapter (Optional)1. Remove the PoE Mounting Bracket from the adapter, place the bracket at the desired location, and mark the two holes. 2. Pre-drill the holes if necessary, and secure the bracket using two fasteners (not included).