Transcription of Constant Speed Control - Eaton
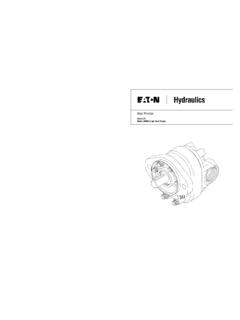
1 Eaton Heavy Duty HydrostaticsInstallation &Operating InstructionsJune, 1995 Constant Speed Control2 Operating Instructions for Constant Speed Control (The valve package, Speed sensor and electronic Control box are installed by following the instructions and diagrams ona 12 VDC system.)1. The motor will remained stopped if: A) The manual controlvalve is in the center position; B) The switch on the elec-tronic controller is in the OFF The direction of the motor rotation is controlled by themanual Control handle.
2 The electronic controller does notaffect the direction of motor The Speed of the motor is determined by the position ofmanual Control handle when the electronic controller is in the NORMAL position. With the switch in the "normal" position,the manual Control handle has the same (normal) effect onmotor rotation as it does when there is no electroniccontroller on the With engine at minimum rpm and the manual Control handledisplaced from center enough to cause the drum to rotate atleast two revolutions per minute (rpm), placing the controllerswitch in the AUTOMATIC position will cause the drumspeed to be controlled automatically.
3 (The manual controlhandle may be placed all the way forward or reverse withoutaffecting the Speed at which the motor is automaticallycontrolled). Drum Speed will be limited to approximately oneand 11/2 Drum rotation can be stopped or started with an electricalswitch wired across the "remote" terminals (in place of theelectrical jumper strap which may have been across theterminals when the controller was received). The switch canact as a remote switch by attaching it to an electrical cableextending from the controller to the back of the truck orother location within 100 feet of the :The controller switch must be in the NORMAL positionto enable the remote switch to Control the motor.
4 Alsonote that the remote switch must be in the ON positionto empower motor electronic transit mixer Control requires the use of an Eatonmotor with the digital Speed sensor option to monitor the speedof the hydraulic motor. The digital Speed sensor (PN 106768)has a three pin connector that mates with the wiring harnessconnector shown on page the digital Speed sensor into the motors s end cover until ittouches the shaft. Unscrew the sensor until the flats are parallelwith the motor shaft (see figure 3).
5 To provide running clearance between the motor shaft andspeed sensor, unscrew the Speed sensor an additional 1/2 total amount the Speed sensor is unscrewed must notexceed 270 .Tighten the sealing hex nut against the end cover and torque itto 14Nm [10 lb-ft ]*. Make sure that the sensor flats are stillparallel with the motor shaft.*Caution: More torque than the specified amount maypermanently damage the the Digital Speed SensorCBAM otor End CoverSealingHex Nut3 Pin ConnectorSpeed SensorFlatsMotor ShaftCenterline 5 Motor Shaft3 Electrical CableUse an oil resistant, weather resistant cable such asindustrial type SJOW, 2 wire, AWG size 18 or molded assembly with the connector molded on thecable will have superior resistance to weather andwashing.
6 Route the wires in a protected area andsecure them frequently to prevent pump connectors must meet DIN 43650 specificationsuch as Hirschmann GDM 209, IMEX # MPM-182-09-N orequivalent. The cable to connector joint must be weathertight. The connector lug cavity should be filled with anelectrical corrosion resistant grease. NOCO Company,NCP 2 battery corrosion preventative works well. Thespeed pick-up has a weather pack connector, # polarity of the solenoid and Speed sensor wiring isinterchangeable on the pump and motor Speed Control Installation Requirements The solenoid with the external tube fitting must have onewire going to the Control box lower terminal strip marked solenoid (see wiring diagram).
7 MountingReplace the S1 orifice under the controller following theinstructions below. The solenoid valves must be orientedon the pump as shown. Failure to do so will result inbending the tube assembly unnecessarily, causing erraticoperation of the Control . Remove the two plugs on themanual Control and mount the valve package with thefittings provided. The plug on the pump housing isreplaced with the fitting provided and the tube is connectedto it. Tighten all fittings to 22 Nm[16 lb-ft].FailuresSee attached troubleshooting.
8 In the event of an electricalor solenoid failure, the particular solenoid can be overrid-den by turning the screw on the end in about 11/2 : The orifice size is stamped on the orifice in thousandths of an inch, example: 21 = .021 Removal and Installation1. Place the .021 inch orifice in the S1 Orifice pocket sothe size is Stake the orifice in three places with a center Insure that the orifice is properly seated after Reinstall the manual Control valve with a new gasket and thecontrol line attached.
9 Torque the controller mounting boltsto 122 Nm[16 lb-ft].Orifice PocketsS2S1 PGasket Surface of Control Valve4 Trouble Shooting GuideProblemCauseCorrective ActionMotor will not run with theControl lever manual Control lever one-inchswitch in NORMAL or(or more) from the center or corroded wireTighten and/or clean theattached to POWER (+12)connection and secure the GROUND (-12)terminal on the valveRemove valve and clean outstuck or replace solenoid and/or secondaryRemove and clean holes in blown in and replace fuse.
10 Check wiring forshort from solenoid to ground. Exchangecontroller with known good unit. Checksolenoid coils on valves for : To override Control system and restoremotor rotation, turn the screw in until thevalve is the jumper or remote switch is attachedto the correct the 2 solenoid connections arenot will not rotate whenNo electrical power to theChange position of remote switch to controller switch is inmodulation / controlthe NORMAL because theremote switch is Shooting GuideProblemCauseCorrective ActionMotor Speed changes veryBypass Solenoid ValveRemove and clean Solenoid Valve (that is.)